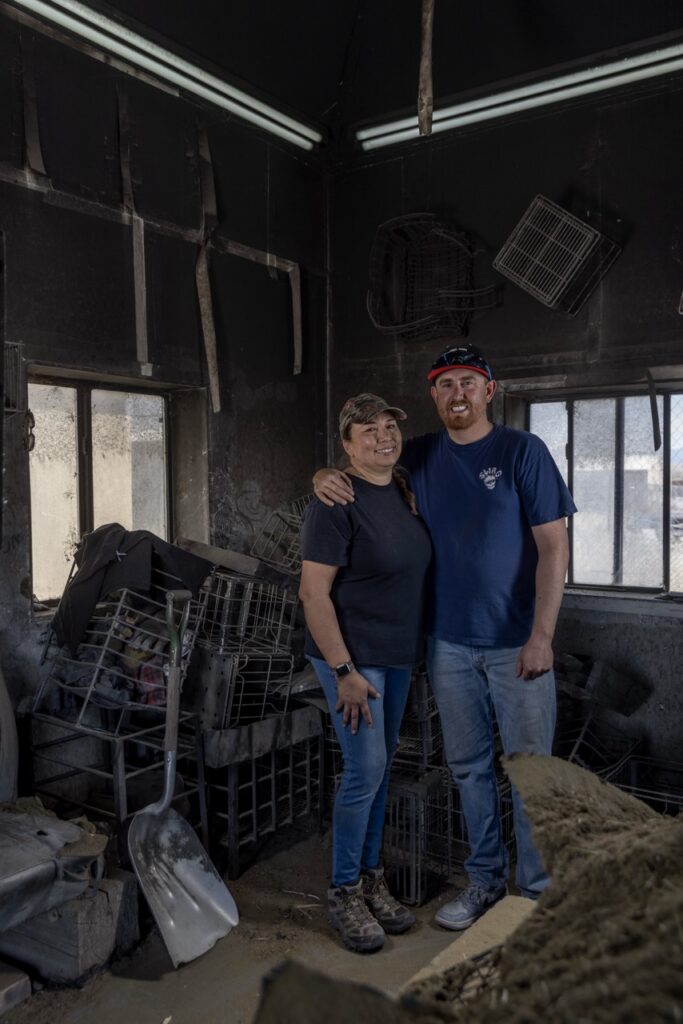
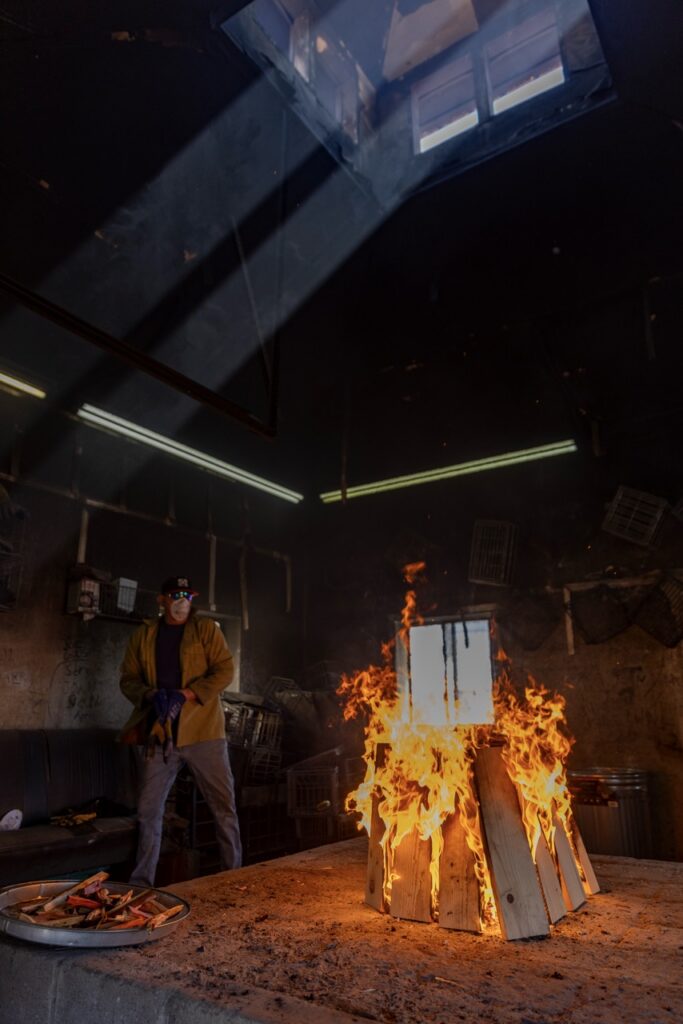
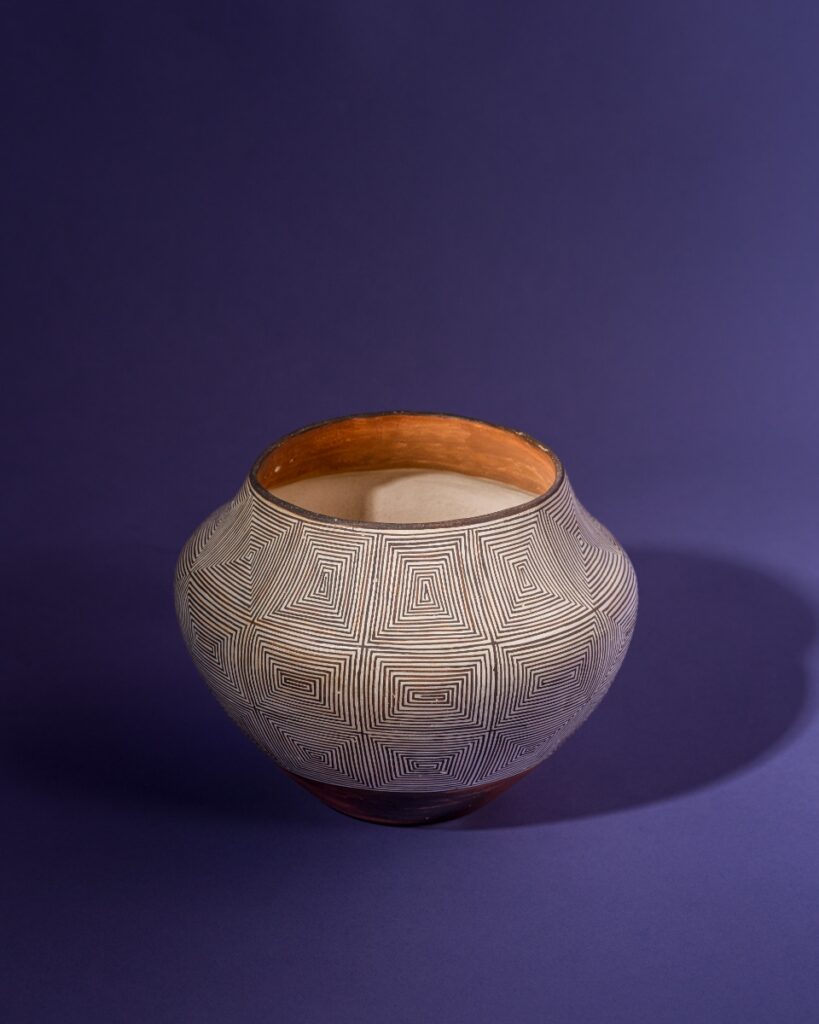
At Santa Clara Pueblo, husband and wife artists Chris Youngblood and Jennifer Tafoya create ceramics that celebrate a pottery tradition handed down through generations of potters which they bring to the Santa Fe Indian Market. They dig for their own clay, sift it, and form it into pots, vases, and jugs before placing them into a pit fire sparked by kindling. “We cultivate all our own materials,” Chris Youngblood says. “It’s a big thing for us to continue the traditional way of firing. Every color you see on our pieces is a natural pigment. We focus on maintaining the tradition, and trying to carry that on.”
Chris Youngblood and Jennifer Tafoya Bring Their Traditional Ceramics to Indian Market Yet Again
Youngblood’s family has taken part in the Indian Market since the market’s beginning in 1922. “It’s like the Super Bowl of our world,” he says, recalling going to market with his mother, Nancy, since he was three years old. He says she would bring six or eight pieces to sell, and they would all be gone within the first five minutes of market. Today he and Tafoya make and sell their own individual work, as well as pieces they create together.
Youngblood takes hours to shape the clay into water jugs, vases, and oblong shapes before the two fire them. Afterwards, Jen spends more precious hours etching and painting each piece. “She’s able to add this ultra-realism into the work,” Youngblood says. She adorns the works in elements from nature, like longhorn sheep, billowing clouds, or the tendrils of a climbing plant. The pair have been collaborating for around 12 years, something they now do more often than working separately. With the time and dedication it takes to complete one vessel, they make only around 25 a year.
With an art like pit firing, there’s never a guarantee the clay forms will make it out of the fire whole. And the bigger the piece, the more chance things can go wrong. “When you fire traditionally, you’re taking a risk. The larger you get, the more susceptible you are to the elements,” Youngblood explains. “There’s a certain level of emotional detachment you have to have for your work until it’s finished.” He says getting too invested in a piece too early can end in heartbreak. These pieces take hundreds of hours to complete from start to finish, and once they hit the fire, the work is just beginning. It’s part of what makes their pieces such treasures.
Indian Market remains a highlight in the couple’s year. It’s a time to meet and speak with collectors, to explain the processes behind the traditions he they keep, older than time immemorial. “You’re surrounded by people who love art, and who want to collect,” he says. “It’s like being a Marvel hero at a comic con.”
Head to this year’s Indian Market August 14-15.
Story by Maria Manuela Photography by Gabriella Marks
Chef Marc Quiñones has been named a TasteTwenty Chef by the James Beard Foundation. It’s the foundation’s annual roster of “ones to watch” in the industry. It’s not the first time Quiñones has caught the eye of the foundation: in 2025 he garnered a James Beard Award semi-finalist nomination for Best Chef in the Southwest.
James Beard Foundation Welcomes Chef Marc Quiñones to TasteTwenty Class
Quiñones – a highly decorated and respected chef with more than 15 years in the business – now makes his culinary home at La Fonda. He’s the Executive Outlet Chef for the historic property, with responsibilities for La Plazuela, The Bar at La Fonda, and the Bell Tower Rooftop Bar.
Quiñones along with the rest of the TasteTwenty class of 2026-27 will kick off with a tasting event in New Orleans on September 16. Expect Quiñones’ contribution to reflect both the strong culinary history of La Fonda as well as New Mexico’s own deep food culture.
Closer to home, Quiñones will host a Taste America dinner at La Fonda in November.
Story by Julia Platt Leonard Photo Courtesy of Chef Marc Quiñones
Whenever summer days heat up and the kitchen feels like the last place you want to be, you need summer lunch ideas that come together with ease but taste amazing too. Don’t settle for store-bought sub sandwiches or warm salads, these recipes prove that summer lunches are worth yearning for.
10 Refreshing Summer Lunch Ideas for Any Day of the Week
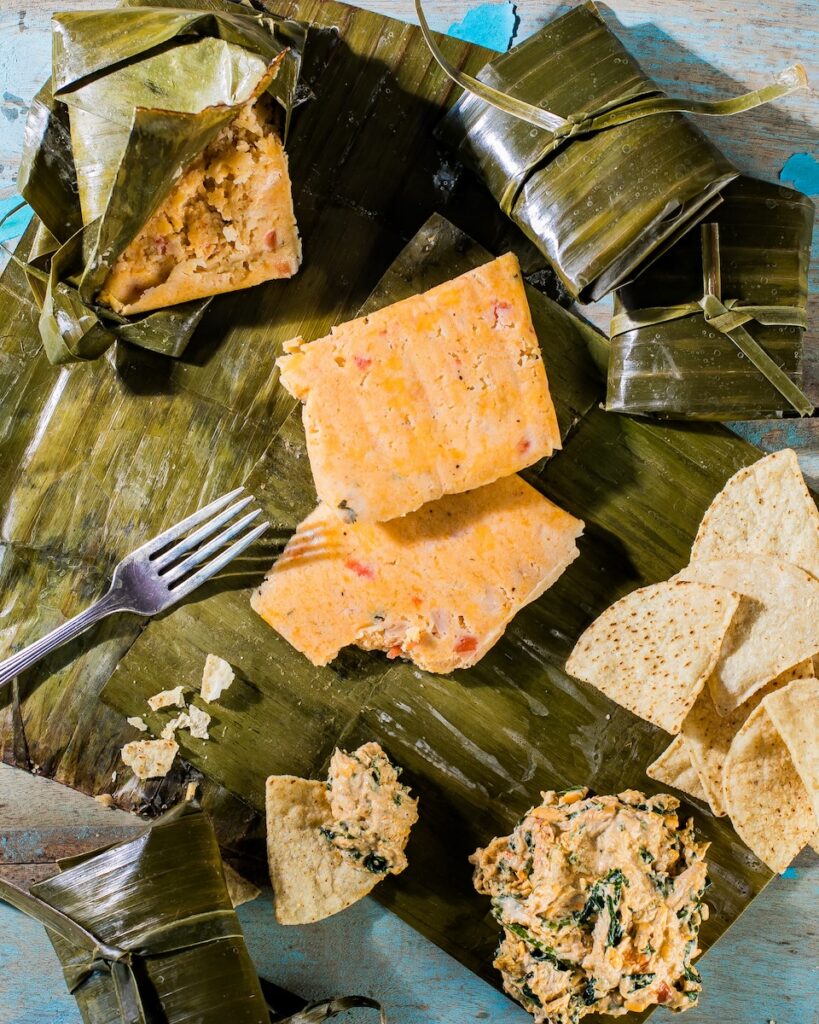
If you’re looking for something a bit more adventurous than your usual salad, these Lunchtime Tamales may be your answer. Banana leaves wrap up bundles of masa dough with a savory chicken and chipotle pepper filling. Serve with chips and your lunch dreams are answered!
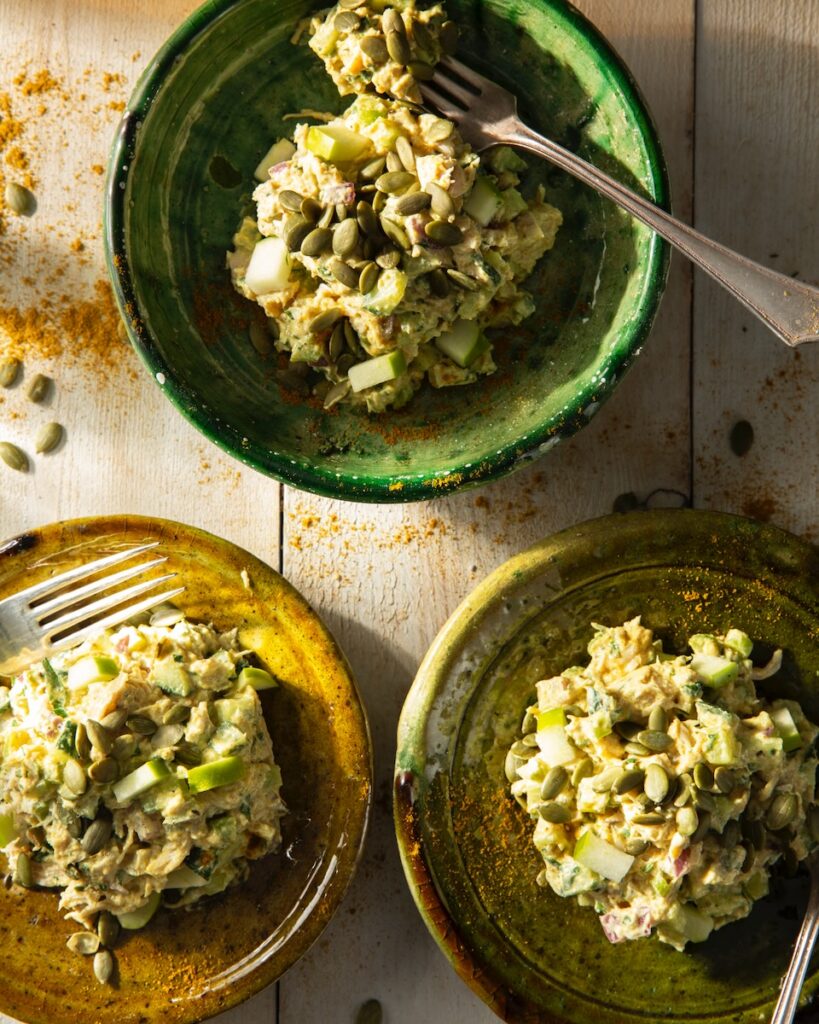
If you’re going to make a chicken salad sandwich, you might as well make it high protein with the addition of greek yogurt. This recipe mixes a greek yogurt and curry powder dressing with chunks of chicken, red onion, celery, cucumber, green apples, golden raisins, and pepitas.
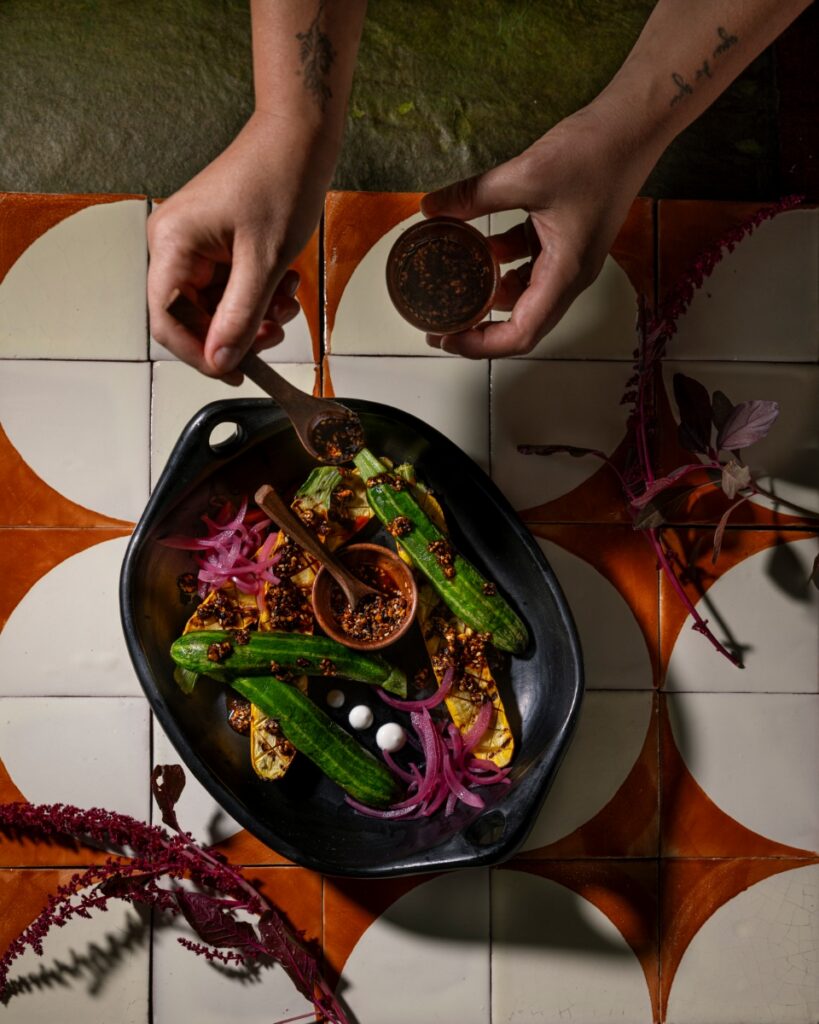
Summer squash is one of the ingredient’s of the season with their earthy flavor and tender texture after cooking. After grilling and adding a bit of char, you’ll make a Lime Crema that’s cooling and refreshing to match the bit of spice in the homemade Salsa Macha.
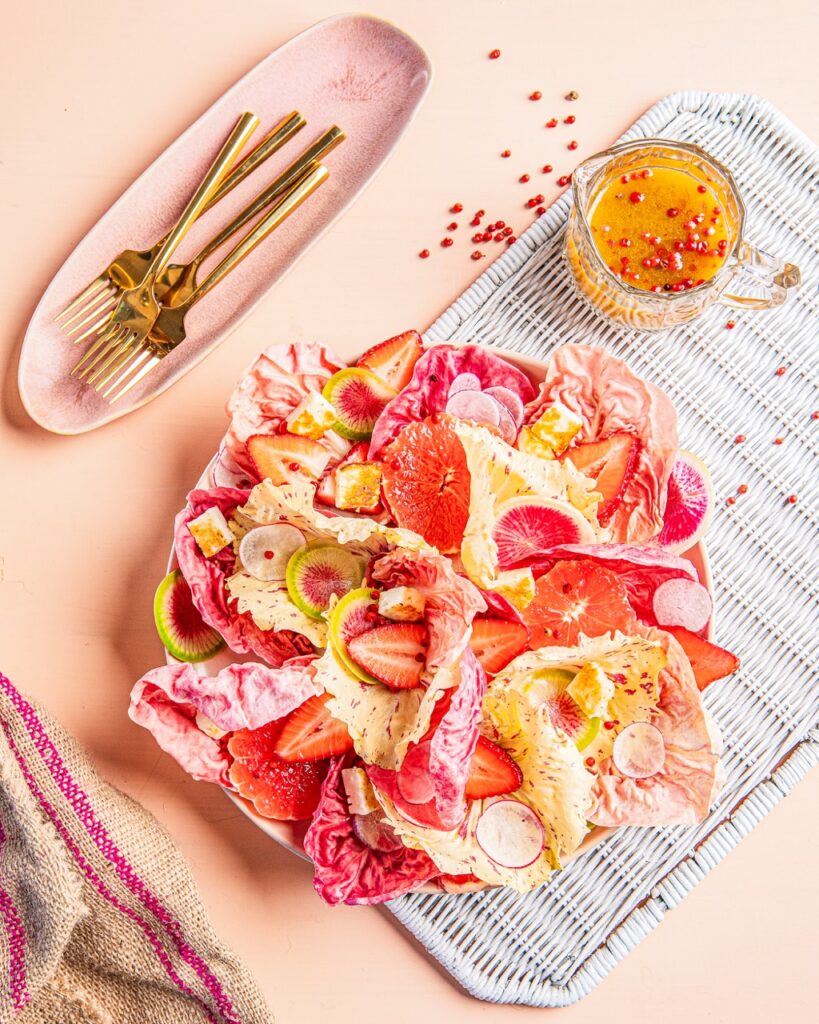
For those craving a salad, why not dress up your plate to match the bright palette of summer? This salad uses pink radicchio as its base that’s a bit bitter but perfectly matches the sweetness of strawberries and the forward-flavor of a Pink Peppercorn Vinaigrette.
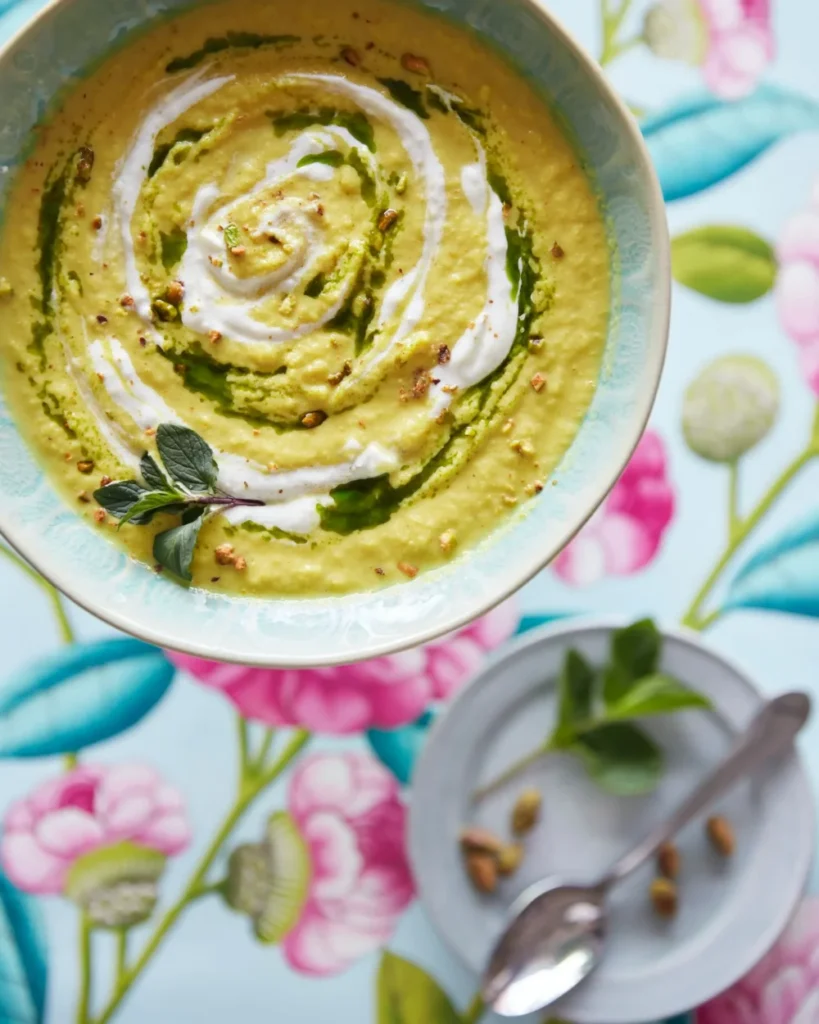
You may be thinking that soup isn’t for summer but this Chilled Cauliflower Soup is here to prove you wrong. Cool down with a bowl full of slow-cooked cauliflower featuring a lemon yogurt drizzle and cilantro mint oil. To complete this dish, we add crushed pistachios on top for a nutty finish.
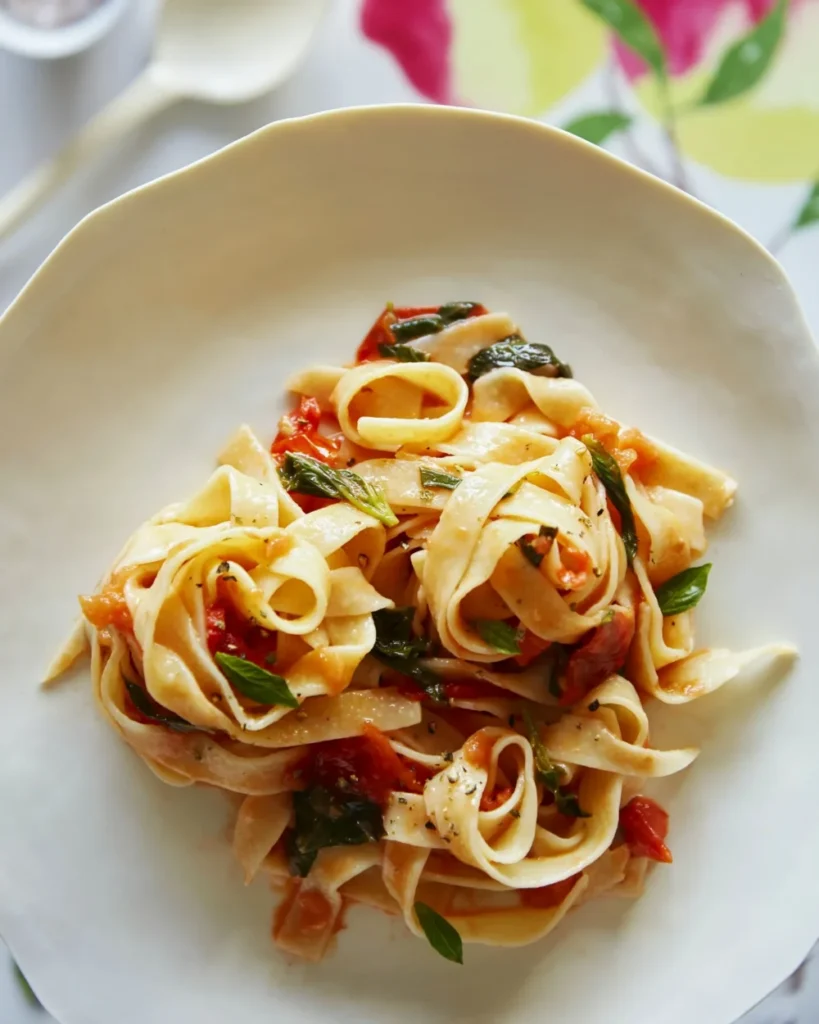
Heirloom tomatoes are the key to creating a pasta that tastes as fresh as it would be in Italy. All you need for this recipe is your favorite type of pasta (though we recommend tripoline for its long strips), butter, basil, and tomatoes from your local farmers market. Serve with crusty bread for a lunch that’s easy to put together and delicious to taste.
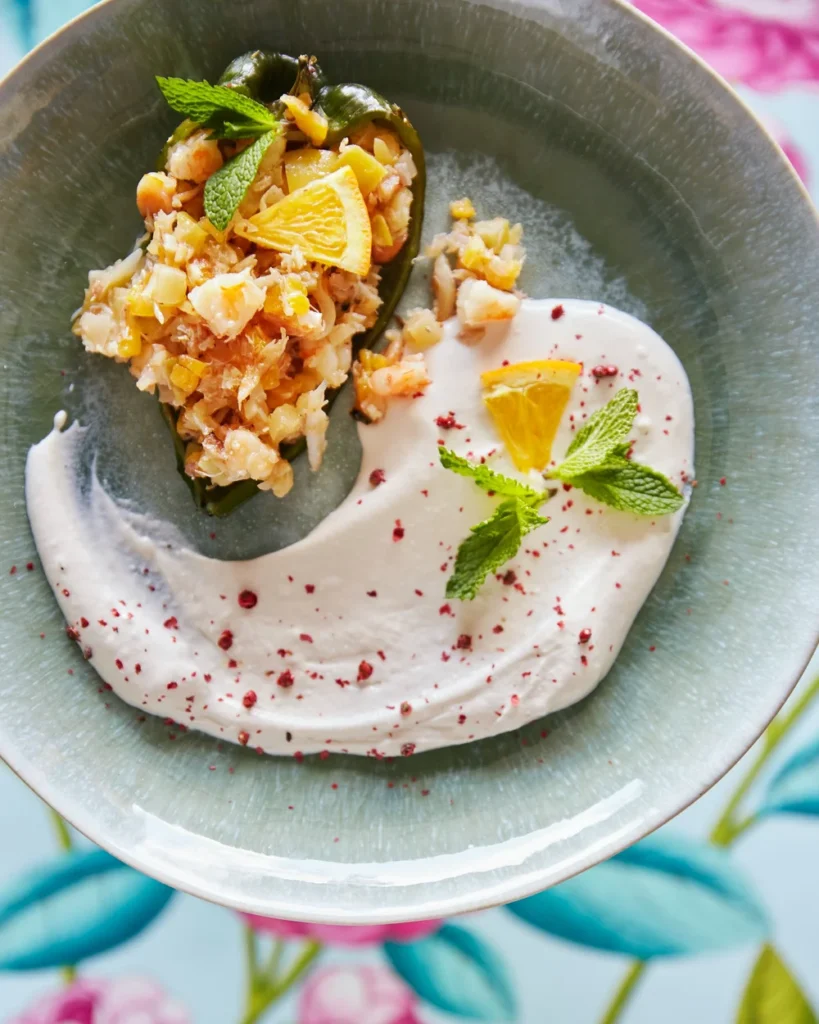
Seafood dishes take us to our happy place: on the beach, lounging in the sun. Our Seafood Stuffed Poblano Peppers use a filling that mixes together crab meat, octopus, and chopped shrimp along with dried apricots, shallots, and Granny Smith apples. Serve with a cashew sauce, orange slices, and mint for a flight to the coast.
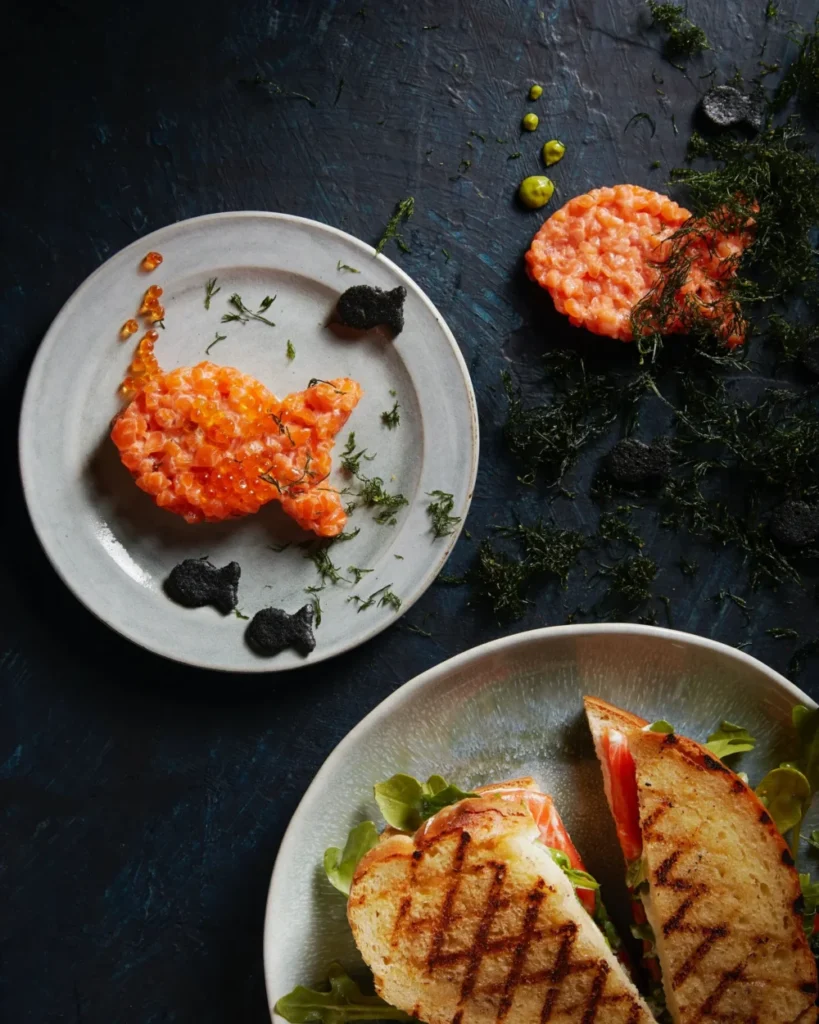
You deserve to indulge this summer. Whether you choose to make a Salmon Tartare or use your salmon in a grilled cheese instead, you deserve luxury on a plate. One pairs with avocado puree, white soy dressing, and goldfish crackers. The other cushions cold-smoked salmon, pickled onions, horseradish vinaigrette, and your choice of cheese between two homemade slices of sourdough.
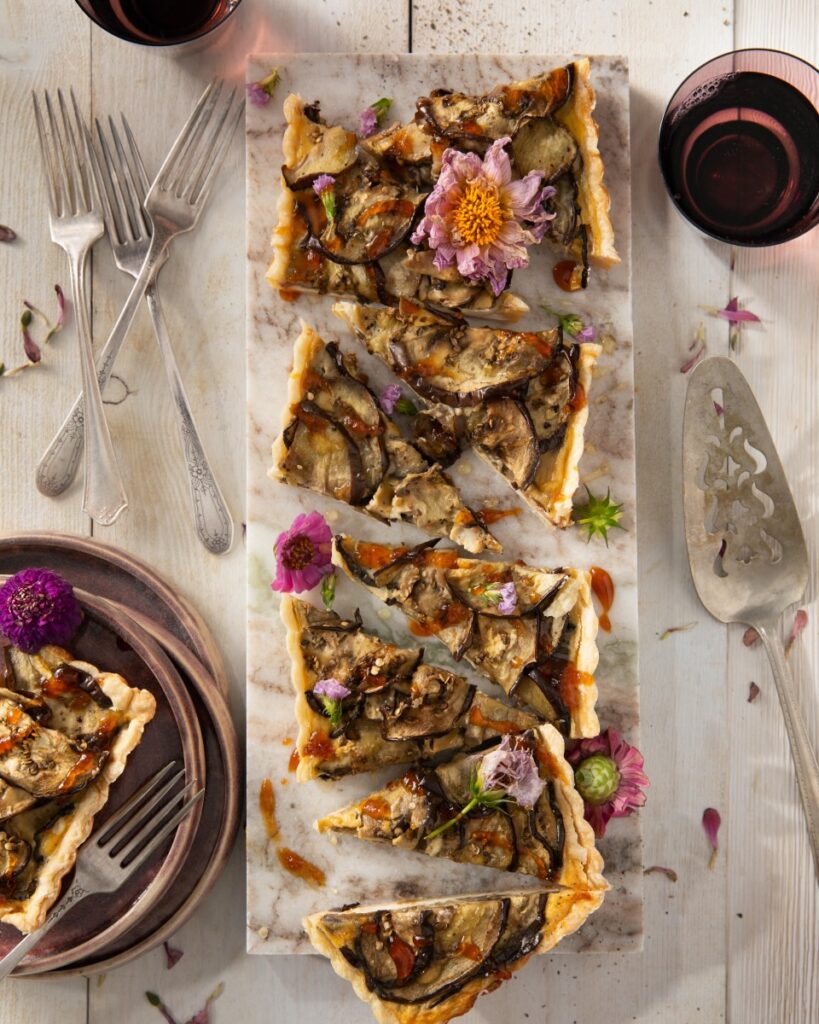
You’ll find eggplant throughout July and at their peak in August so let the summer season guide you to their deliciousness. Use store-bought pie crusts for your tart base before dressing with eggplant slices, goat cheese, smoked fresh mozzarella, honey, and herbs like chives or basil as your garnish.
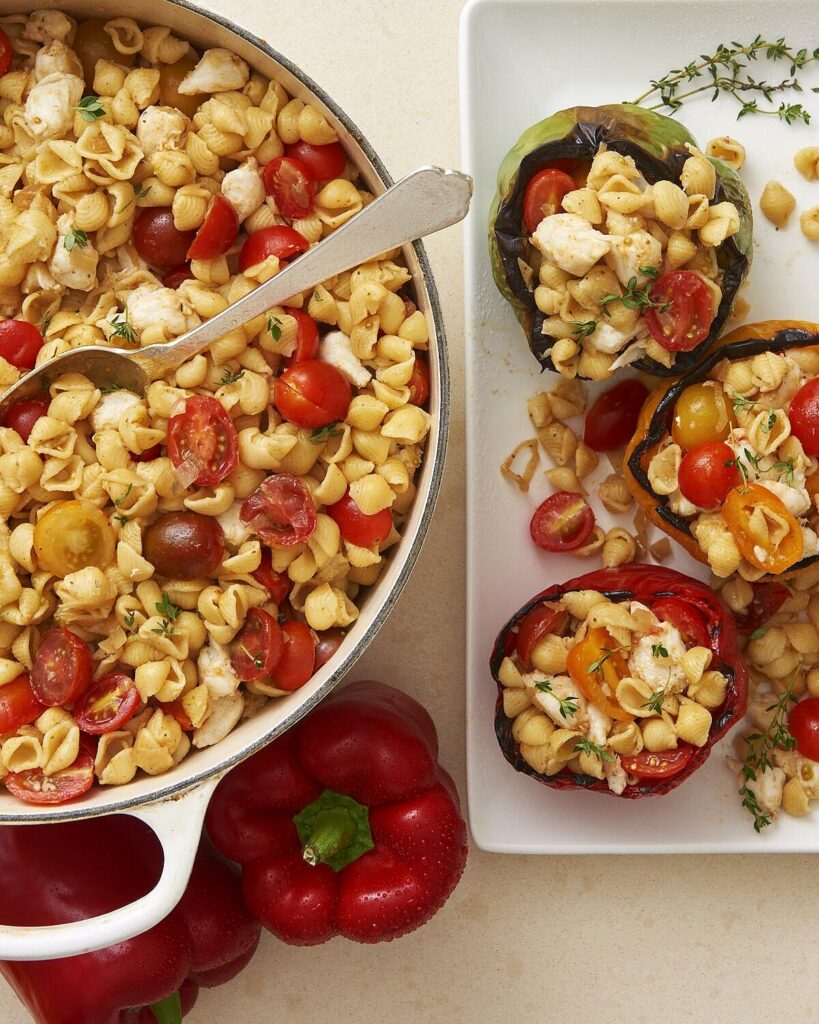
You can’t have summer without a pasta salad. This dishes presence at cookouts and picnics is a crowd favorite and adding crab in just makes it so much better. We recommend you scoop the Crab Pasta Salad into lightly grilled garden peppers and then garnish with parsley.
Here, smooth panna cotta, sweet peach sorbet, and crunchy honeycomb topping create a fun mix of textures in every bite.
How Our Sage Panna Cotta Comes Together
I am an unapologetic panna cotta devotee, and I’m always dreaming up new flavor combinations for it. I also believe that savory flavors belong in desserts. Sage and cream work really well together and I love using my backyard sage for this dessert. Peach and sage are equal soulmates, so a scoop of fresh peach sorbet alongside a crumble of sweet honeycomb felt like a natural next step. Light, floral, and a little indulgent.
1 tbsp light corn syrup (or increase amount of honey)
1 1/2 tsp baking soda
Instructions
For the sage panna cotta:
Line a quarter sheet pan with parchment paper (or lightly oil 8 ramekins if using).
In a small bowl, sprinkle the gelatin over the cold water and let sit for 5 minutes.
Add heavy cream, milk, sugar, salt, and sage leaves to a saucepan. Warm over mediumlow heat, stirring occasionally, until steaming and the sugar dissolves, 5-7 minutes. Do not boil.
Remove from the heat, cover, and let the sage steep for 15 minutes.
Strain out the sage leaves and return the infused cream mixture to the saucepan.
Warm gently over low heat. Add the bloomed gelatin and whisk until fully dissolved, 1-2 minutes.
Whisk in the vanilla extract.
Pour into the prepared sheet pan (or ramekins). Refrigerate until fully set, at least 4 hours or overnight.
For the peach sorbet:
Combine sugar and water in a small saucepan and bring to a simmer over medium heat, stirring until the sugar dissolves, 2-3 minutes. Remove from the heat and chill completely.
Purée the peaches with the chilled syrup, lemon juice, and salt in a blender until very smooth.
Strain through a fine-mesh sieve.
Chill the base until very cold, at least 2 hours.
Churn in an ice cream maker according to the manufacturer’s instructions.
Transfer to a container and freeze until scoopable, at least 2 hours.
For the honeycomb crumble:
Line a baking sheet with parchment paper.
Combine granulated sugar, honey, water, and corn syrup in a saucepan over medium heat. Cook without stirring until the mixture reaches 300 degrees, 8-12 minutes.
Remove from the heat. Quickly whisk in the baking soda. The mixture will foam up.
Immediately pour onto the parchment-lined baking sheet and let cool completely, about 30 minutes. Once cool, break into shards.
To serve:
If using ramekins, serve panna cotta directly. If using a sheet pan, cut circles and transfer to plates.
Add a scoop of peach sorbet alongside.
Finish with honeycomb shards over the panna cotta.
Recipe by Marijke Uleman Photography by Tira Howard
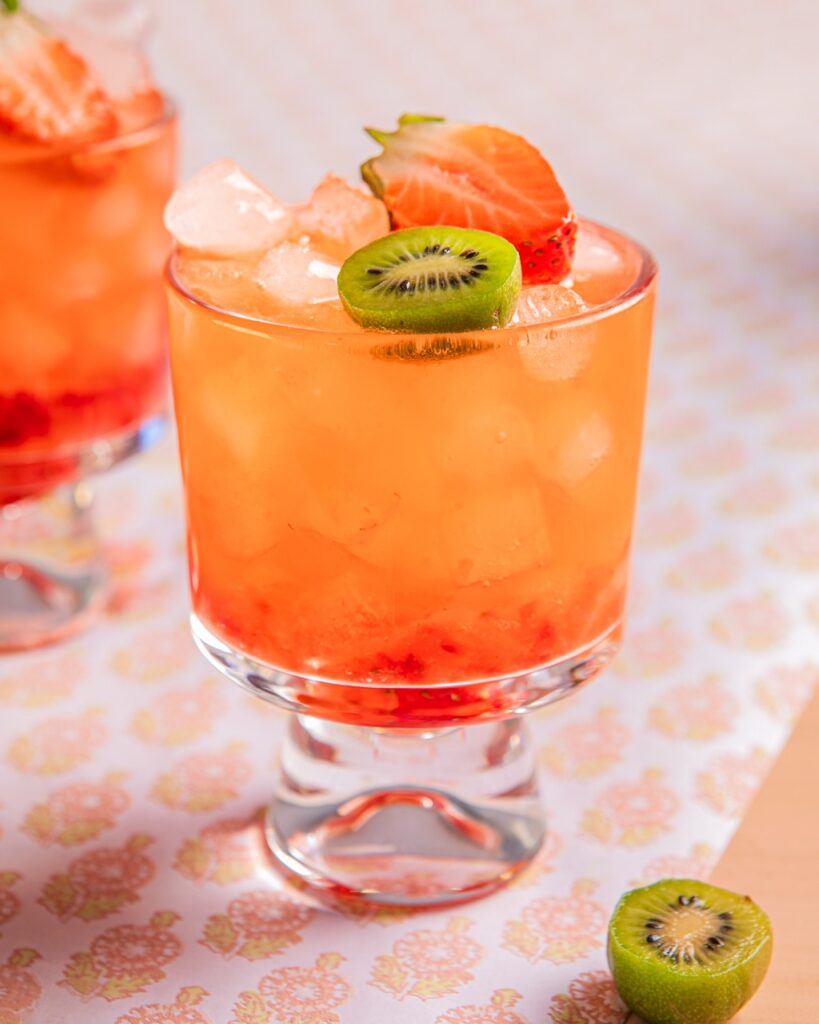
This oh-so-sippable Strawberry Kiwi Bramble strikes a summer-y balance of sweet, tart, and boozy. Fresh lemon, strawberry, and kiwi bring the tartness. Strawberry simple syrup brings the sweet. Your choice of gin completes the picture. Since summer is a veritable theater of ripeness, rework the recipe with cherries, raspberries, and blueberries as the season unfolds. The drink is perfect for hot evenings across June, July, August, and beyond.
How to Add Other Fruits to This Bramble
Are strawberries out of season or you’d simply rather shake things up a bit? Try subbing in other fruits like summer berries, cherries, even peaches, and pears can be a scrumptious surprise. The best part is it’s easy to tweak your bramble’s flavor, all you have to do is replace the strawberries in this recipe for your choice of fruit. After making a simply syrup and muddling with other ingredients, you’ll have a bramble for every season.
Muddle 1 strawberry and 1/2 kiwi at the bottom of a cocktail glass. Muddle until most of the juice has been released and the strawberry pieces don’t clump together.
Top the muddled fruit with about 1/2 cup of crushed ice.
Add the gin, freshly squeezed lemon juice, and strawberry simple syrup to a cocktail shaker with cubed ice. Shake well and strain into the glass.
Garnish with strawberries and sliced kiwi.
For the strawberry simple syrup:
Add all ingredients to a pot and simmer until the sugar is dissolved and the strawberries are soft. Remove from heat and let the mixture sit until it reaches room temperature.
Strain off the strawberry chunks and reserve the liquid. This can be stored in the refrigerator for up to 1 week.
Recipe and Styling by Anna Franklin Photography by Laura Petrilla
The Fifth Avenue Hotel is a special place in New York where history meets modern comfort. From its colorful rooms to the cozy restaurant and bar, it feels like stepping into a storybook while still enjoying all the modern touches.
Whether you want to explore the city or just relax inside, The Fifth Avenue Hotel makes your stay feel both exciting and relaxing.
The Fifth Avenue Hotel in New York City
Craving a getaway and a bit of the big apple? Then some Bohemian Romanticism may be just what the doctor ordered.
New York is all about reinvention. Neighborhoods rise and fall in popularity, only to be reborn as something else. Historic buildings are often repurposed. Many become condos or hotels in the process.
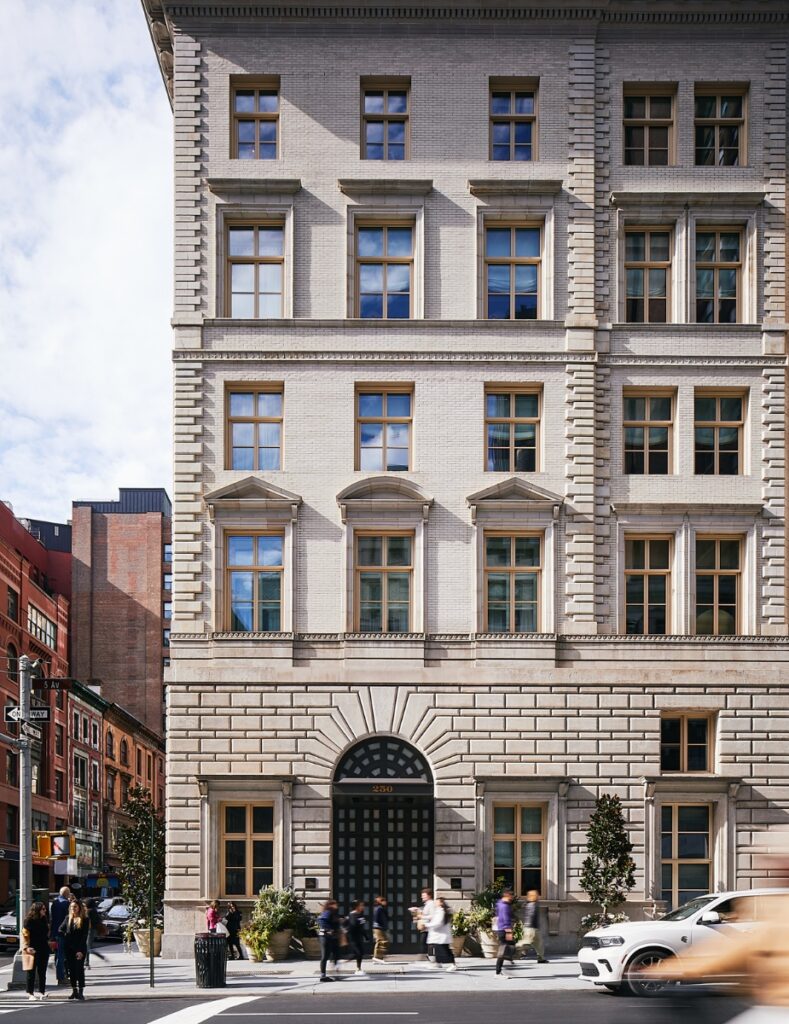
So it is with NoMad, the area to the north of Madison Square Park. In what was originally the Second National Bank, a five-story Renaissance-style palazzo built in 1907 and designed by McKim, Mead, & White, the glitzy new
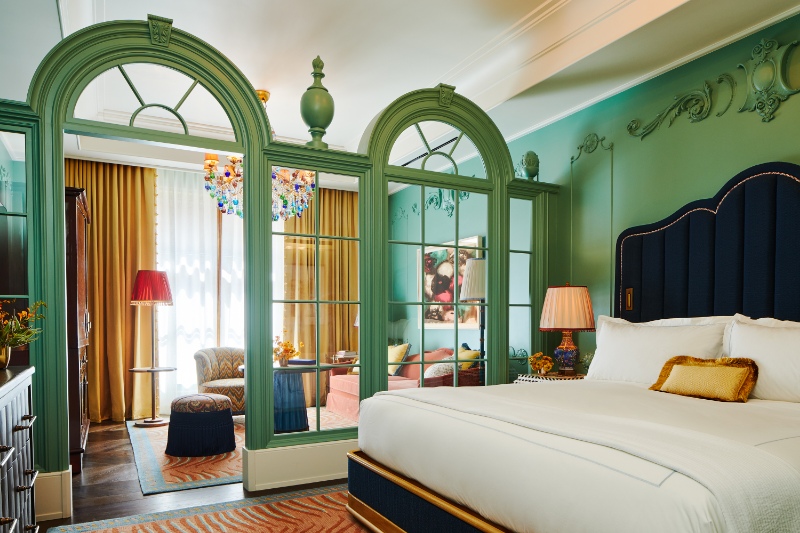
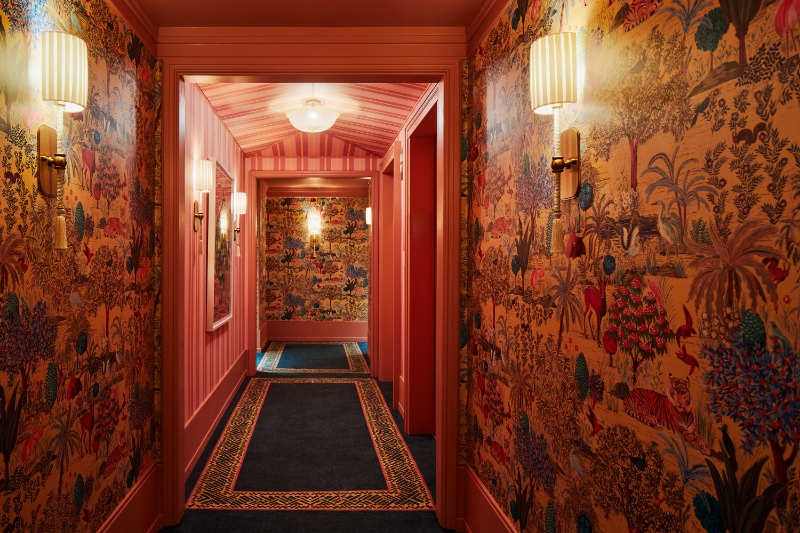
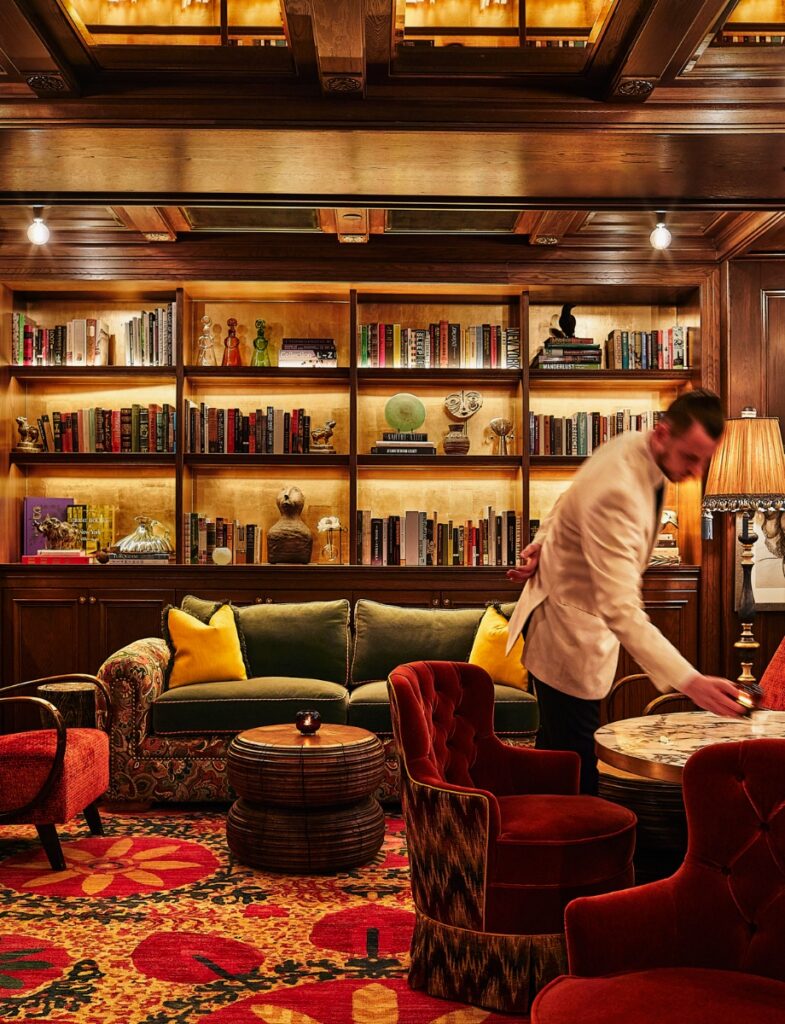
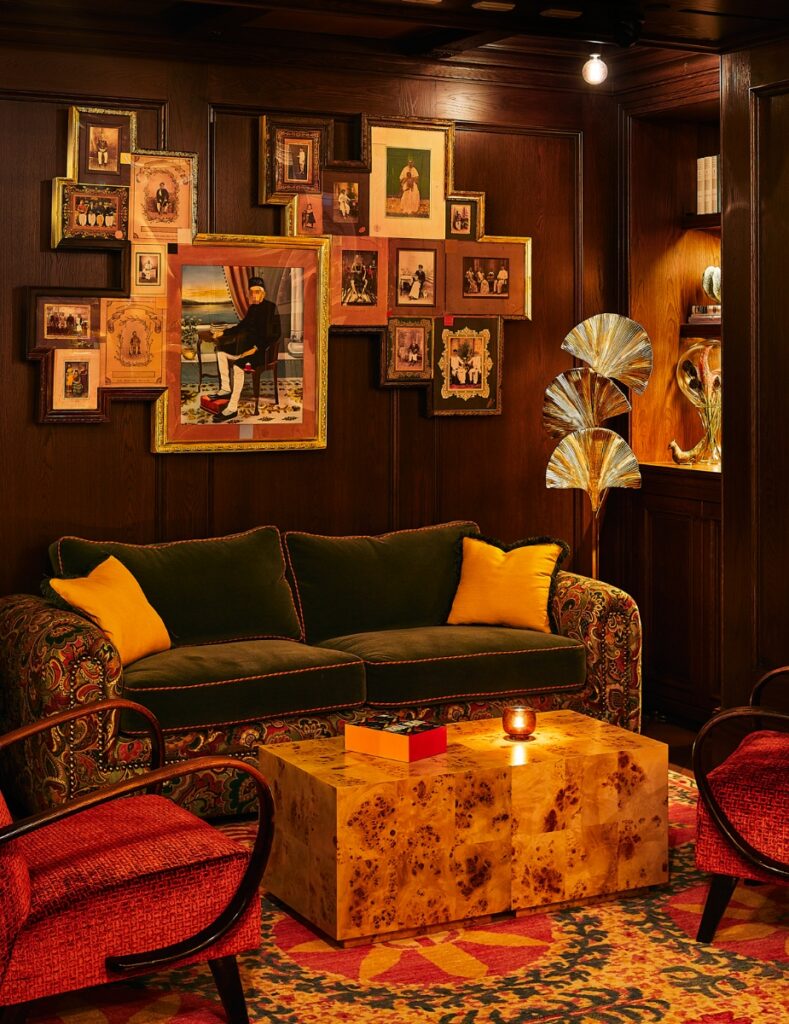
Fifth Avenue Hotel bucks the trend of bland, blond, and ivory luxury hotels. Interior designer Martin Brudnizki’s spaces are luscious and lavish, filled with a confident meeting of texture, hue, and pattern. Rarely is a surface left plain. Most are painted in rich colors, inlaid, or gilded. Many are covered with exotic-patterned wallpaper or decorated with elaborately hand-knotted rugs.
The 153 rooms manage that difficult balance between resembling something out of a Henry James novel and being modern. They are also comfortable. Meanwhile, the public areas have that vibe that makes you feel as if you’ve arrived. This is true although your destination is nothing like what you imagined.
The Story of NoMad Neighborhood Hotels
The area has a history of attracting high society and creative types, as it does today. Located on what was formerly swampy hunting ground, Madison Square Park opened in 1847.
Although dark and narrow row houses originally filled the area, mansions soon surrounded it. These included the residences of Teddy Roosevelt and Edith Wharton. A luxury property, also called the Fifth Avenue Hotel, existed on the west side of the park. It operated from 1859 to 1908. (It was the first hotel in the US with elevators!)
Mark Twain and numerous presidents, including Abraham Lincoln, visited the hotel. Eventually, the hotel closed and people demolished it, but a number of other hotels sprang up nearby. The site of the current Fifth Avenue Hotel, a couple of blocks north, was originally the home of Charlotte Goodridge, a prominent society figure during the Gilded Age, when the area was a hub for the literate — including Oscar Wilde and Charles Dickens.
The current former bank building required a 10-year restoration, including the addition of modern amenities. A 24-story glass tower designed by Perkins Eastman and PBDW Architects was also added.
A Luxury Stay at Fifth Avenue Hotel
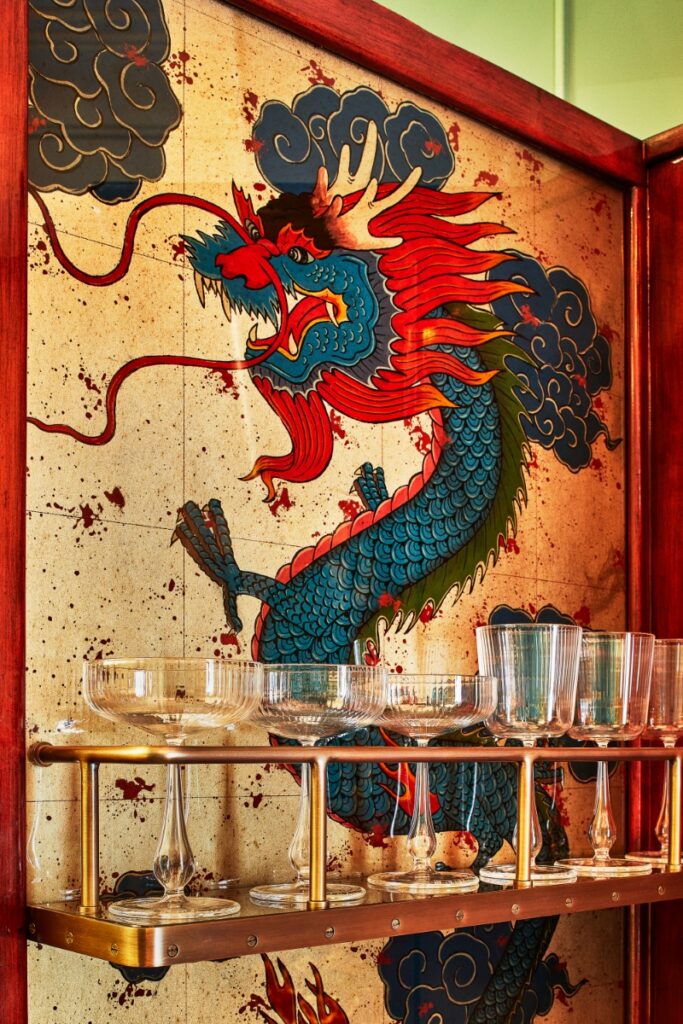
As you enter the hotel, a dazzling mix of faceted mirrors, burled wood panels, and a huge tapestry by artist Pae White await — it takes your eyes a moment to adjust to it all.
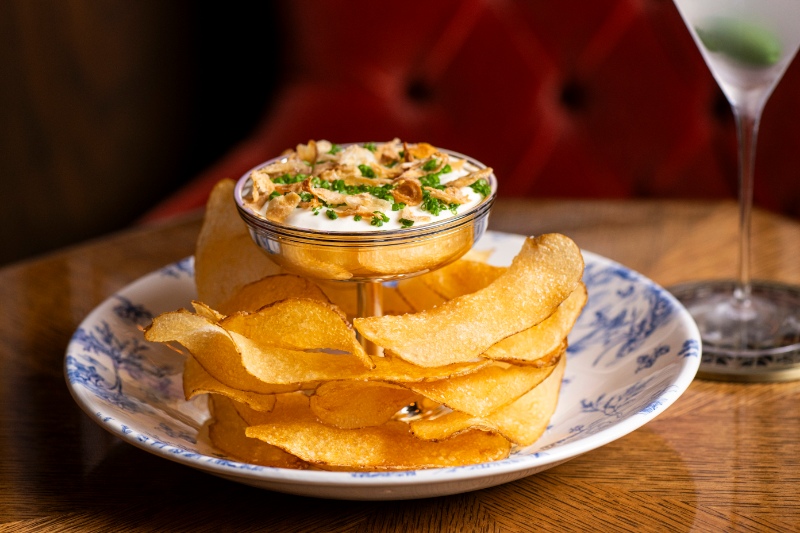
The restaurant, Café Carmellini, is a cozy yet opulent mix of dark wood, mustard-colored leather, and blue velvet, while its seemingly infinite lightbulbs in chandeliers, sconces, and table lamps fill the space with an inviting atmosphere that’s convivial yet intimate and sexy.
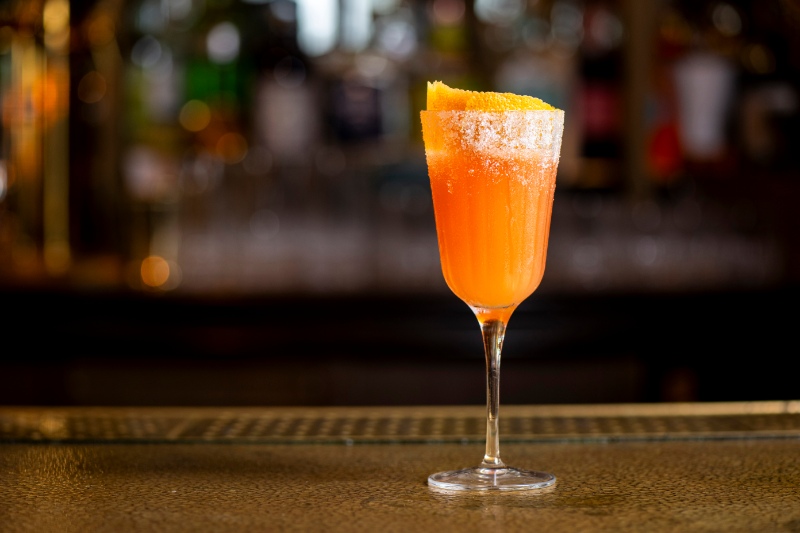
Afterwards, head to the dark and moody Portrait Bar for a destination-named cocktail, such as the Oaxaca, which contains Oaxacan gin, Empirical Ayuuk, Contratto aperitif, lime sherbet, hibiscus, and chocolate.
If you can still walk, the journey to your room will take you through dimly lit, rosy-colored corridors clad in a mix of striped and tropical papers with bordered blue carpets underfoot.
Things to Do Near The Fifth Avenue Hotel
If you’re in the mood to actually leave the hotel, there are several exquisite restaurants nearby, including Eleven Madison Park (Michelin 3-star, plant-based), Scarpetta (refined Italian in a beautiful space), and Junoon (upscale, modern Indian).
Its always worth checking out if there is an art installation in Madison Square Park. (The original Shake Shack location is in the corner of the park in case you have a sudden craving for fries.)
Although it isn’t nearby, the newly reopened (as of April 17) Frick Collection, among the best museums in New York, is a must-see for anyone coming to visit.
If you’re looking for the best restaurants in New Mexico, the historic Taos Plaza has a bundle of new, exciting spots to try just down the street.
You can find four new-wave eateries within a two-minute stroll of the historic plaza, off Paseo del Pueblo Sur as you roll northward into town on Highway 68.
From wood-fired sourdough pizzas to creative fine dining and natural wine bars, each place offers something special.
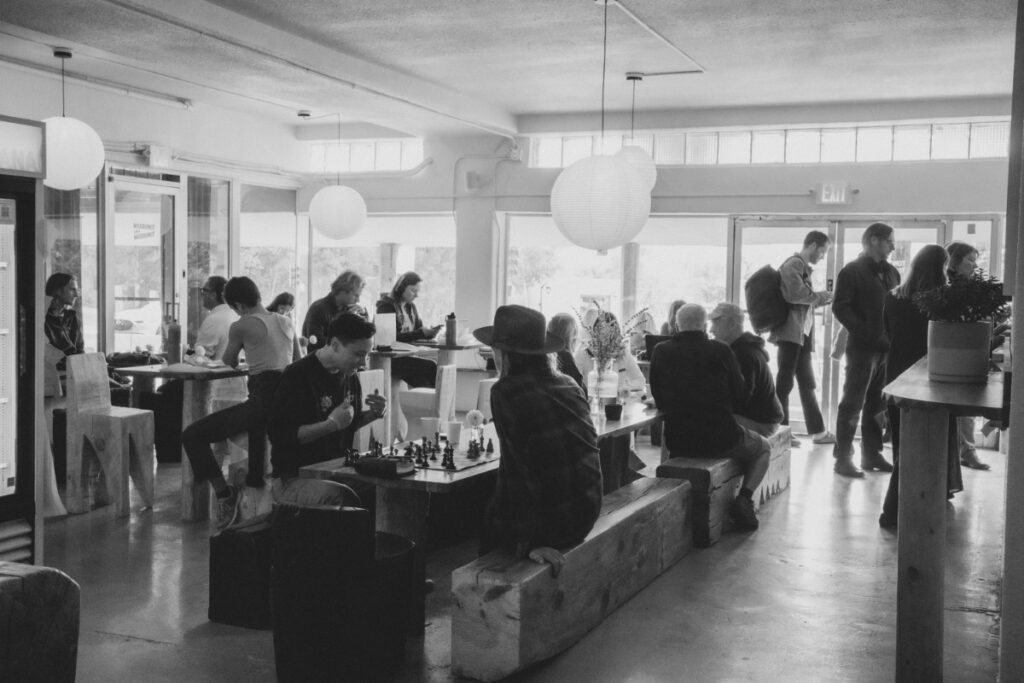
Tomorrow and Tomorrow bakery and cafe, TNT to locals, therefore, sits nearby. Moreover, born in Paris, Matt Burns’ sourdough starter is over a decade old and has, in addition, logged miles in Mexico, Canada, Argentina, and more. Furthermore, “Making bread is the world’s best icebreaker,” says Burns.
Chef & owner Matt Burns
That same well-traveled starter, therefore, powers the morning’s baguettes, boules, and bialy-style bagels, all baked in a wood-fired oven. Then, in the morning, order the lox (wildcaught Atlantic smoked salmon), which is flown in fresh daily. By contrast, by evening, the menu pivots to 12-inch sourdough pizzas. Additionally, they have arty names like Agnes Martin Abstract, with arugula, serrano, and lemon. Another is Hopper’s LSD, featuring local green chili sausage, local honey, and red chile.
A game of chess, great food, and relaxed vibe at TNT
With its open kitchen, killer cappuccinos, and a staff passionate about creating beauty, TNT is a special place. It’s a place where you find yourself planning to return.
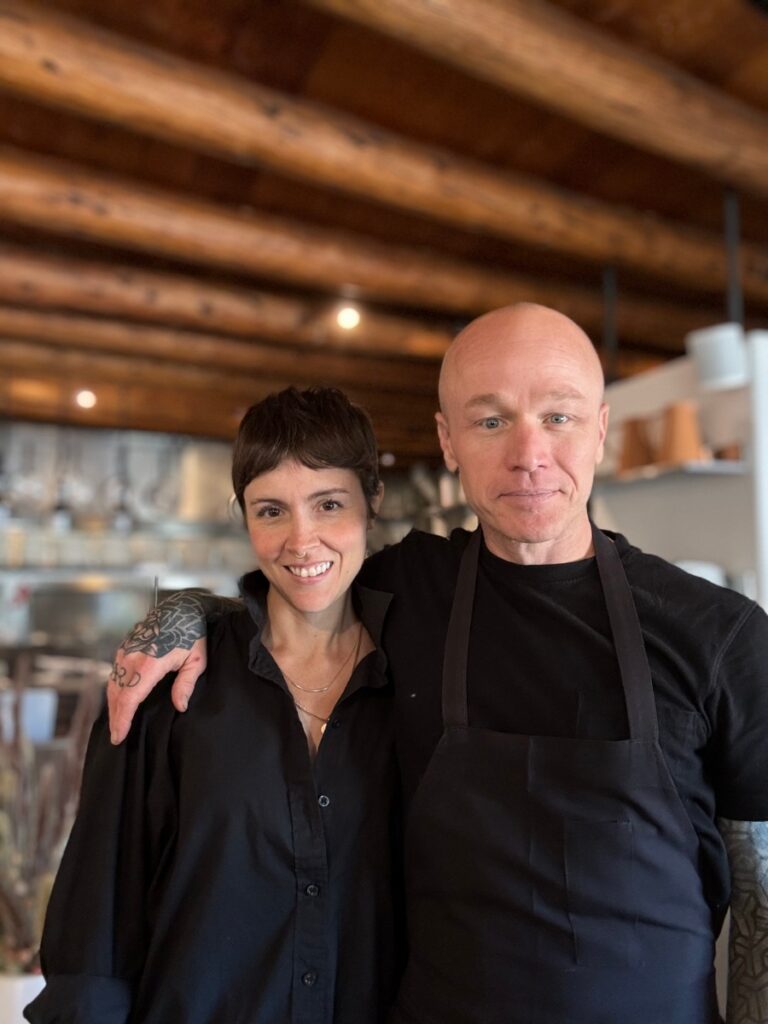
Opened in June 2024, Suchness is the love child of Pittsburgh transplants Kevin and Meg Sousa. With clean lines and simple furnishings beneath the requisite vintage vigas, the room is anchored by a bright blue canvas that catches your eye between bites. Behind the open pass, Kevin works alone. Meg, meanwhile, runs everything else: front of house, the bar, the room’s temperature.
A meal at Suchness is like falling down a rabbit hole. Each twist of the fork reveals a hidden layer. You discover a different texture, an unexpected flavor, or a quiet revelation that makes you set your utensils down. Then you just sit and think. Take the rigatoni, a smoked carrot bolognese with vegan ricotta. It’s a dish so rich and complex it would fool the most committed carnivore.
Meg and Kevin Sousa
“If people walk away from a dinner here and say, ‘Oh, I could have made that at home,’ I f*cked up,” Kevin says.
In late 2022, Zak Pelaccio and Jori Jayne Emde—the duo behind award-winning Fish + Game—opened Corner Office. It is the town’s only natural wine bar. The 12-page wine list is mostly a love letter to Loire Valley and Jura wines. It also features funky skin contact wines and a sprinkle of Italian wines, thanks to new partner, chef Ian Wolff. “The menu is basically Zac and Jori’s cellar that we get to drink,” says Wolff, former cofounder of legendary Blue Plate.
The vibe is chic Cheers: everybody knows your name, and everybody knows their Gamay from their Grüner. The food matches the quality of the wine selection. Dishes include wild Burgundian escargot broiled in fermented garlic-thyme butter and a broiled hamachi collar with local grape gastrique. There are also the legendary Corner Tots—confit potatoes shaped and stacked like Jenga blocks, served with chile aioli.
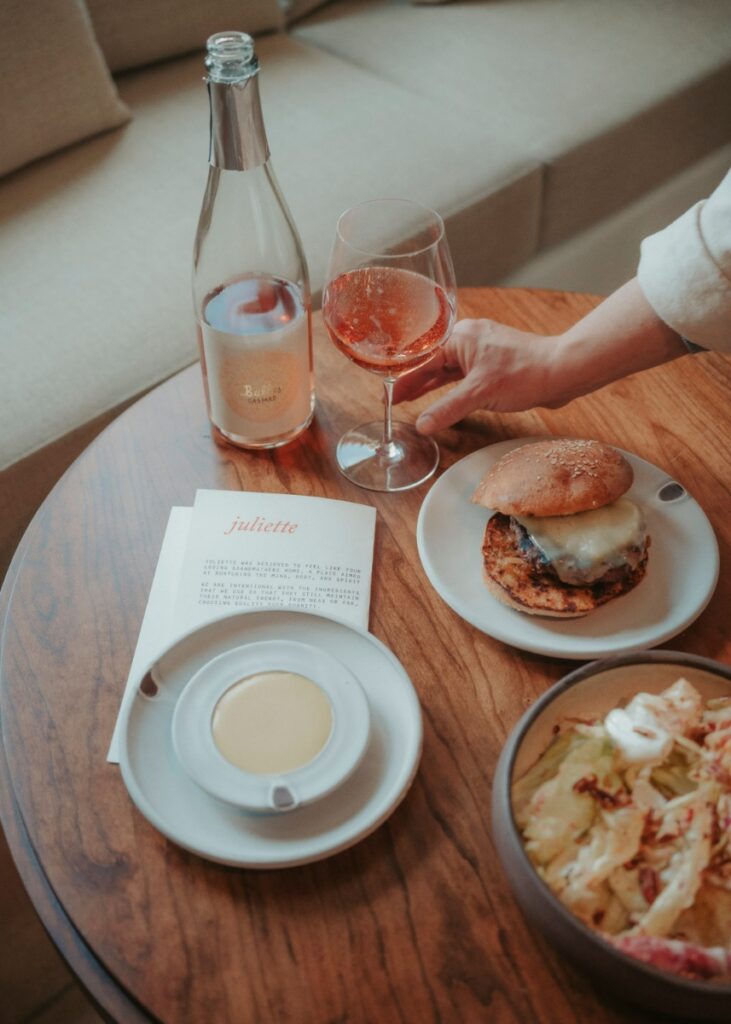
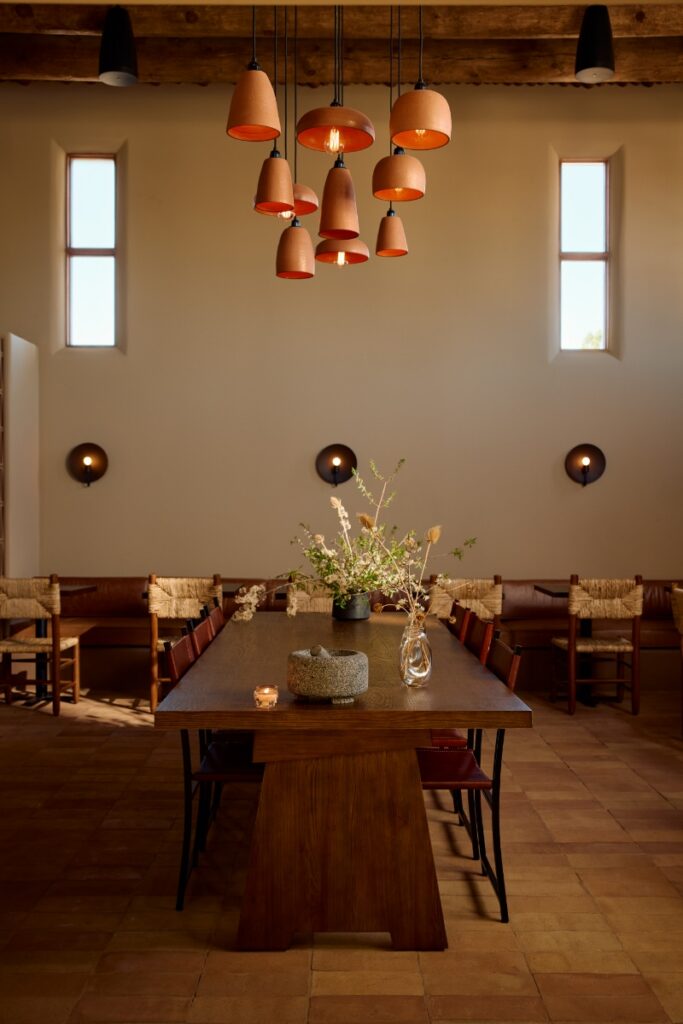
Completing the triangle is Juliette, opened in May 2025 as the signature restaurant of Hotel Willa, the new 51-room, art-centric hotel. Created by chef and Taos Pueblo member Johnny Ortiz-Concha of Siempre Design, Juliette’s menu reflects both creature comforts, like the green chile smashburger, and boundary-pushing dishes, such as the cold milk custard dessert with local bee pollen, piñon honey, and vinegar.
“We let the bounty dictate the menu,” explains executive chef Noah Petrus. Petrus carries out the vision with a spin of his own, like the smoked trout over cultured cream and thinly sliced, spicy black radishes.
Chef Johnny Ortiz-Concha
Juliette is certainly the “wild child” of the triangle, staying open till midnight on weekends with chill DJs or live music. Yet the cocktails, like mezcal margaritas, are reason enough to visit. Weekend brunch is a new addition as well, anchored by the Dutch pancake that arrives puffed and golden and absurdly giant in the best way.
Summer is the perfect time to enjoy fresh and tasty food, and the award winning restaurants in Santa Fe know how to make every dish special. From seafood dinners under the stars to sweet desserts full of summer flavor, these restaurants bring the best local ingredients to every plate.
Try These Summer Menus at Santa Fe Restaurants
New Mexico’s Farms and Ranches deliver ripe summer foods that make their way into innovative dished serves in award-winning restaurants.
Summer ushers in the fresh flavors of just-plucked greens, juicy sweet corn, heirloom tomatoes, and luscious peaches. Following a winter of warming root vegetables and braised meats, we now eagerly welcome the light, bright flavors of summer. Notably, this includes two iconic dishes from two landmark Santa Fe restaurants, each of which features a patio ideal for dining beneath the stars.
Executive chef Weston Ludeke, who recently moved on to Single Thread Farm in Healdsburg, California, dreamed up The Compound’s Maine Lobster & Bay Scallop with Avocado & Squid Ink Brioche as an entree. This ode to summer begins with bay scallop mousse studded with poached Maine lobster morsels. The mousse is warmed and then topped with squid ink brioche that’s as black as night. Avocado slices are the next layer, followed with a colorful tangle of radicchio, parsley, and chives lightly tossed in a red wine vinaigrette. This tower of flavors is finished with a classic beurre blanc enhanced with Dijon and chives. Savor it on The Compound’s elegant patio and raise a glass to the year’s sweetest season.
The Famous Key Lime Tart Santa Fe Dessert
Executive pastry chef Rebecca Freeman divinely crafts the Key Lime Tart at Santacafé. It is a symphony of sun-kissed yellows and whites. The tart sits atop a buttery homemade graham cracker crust. The chef decorates its filling with custard-like passionfruit crémeux, coconut sorbet, and crispy coconut meringues. Squares of fresh mango add bright, tropical notes. Freeman also crafts desserts for Santacafé’s sister restaurant, Coyote Cafe, where she skillfully captures the essence of summer in both flavor and presentation. Her ingenuity earned the Freemason Pastry Chef of the Year honor from the American Culinary Federation in 2023. I can’t wait to see what she concocts next.
Story by Lynn Cline Photography by Gabriella Marks
IAF.1272
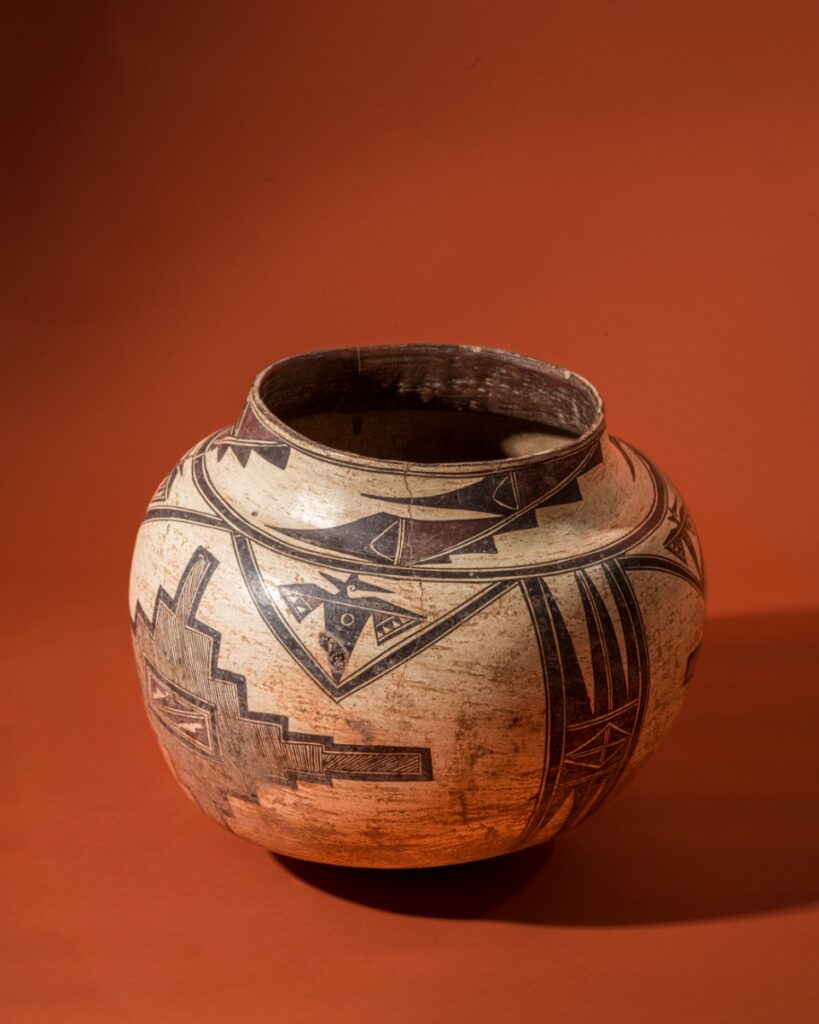
Artist once known (Pueblo of Zuni), K'yabokya de'ele (Water jar), c. 1850, clay and paints, 12 x 14 in. Indian Arts Fund purchase for the permanent collection, 1929. Collection of the School for Advanced Research, Santa Fe, NM, catalog number IAF.1272.
The Native Artist Fellowships give artists a special chance to focus on their work while exploring amazing collections of pottery, jewelry, and textiles. At the School for Advanced Research, artists get to learn from history and let it inspire their own creativity. The Native Artist Fellowship is all about helping artists grow and connect with their culture in a meaningful way.
The School for Advanced Research’s Native Artist Fellowships Help Kickstart Creativity
Each year, three artists come to SAR — the School for Advanced Research — to take part in the SAR Native Artist Fellowship. For the artists, it’s a chance to immerse themselves in their art. It’s also an opportunity to access the Indian Arts Research Center (IARC), home to more than 12,000 pieces of pottery, jewelry, textiles, painting, basketry, and drums. We asked seven past fellows two questions — what is the piece from the IARC collection that’s influenced you the most and why?
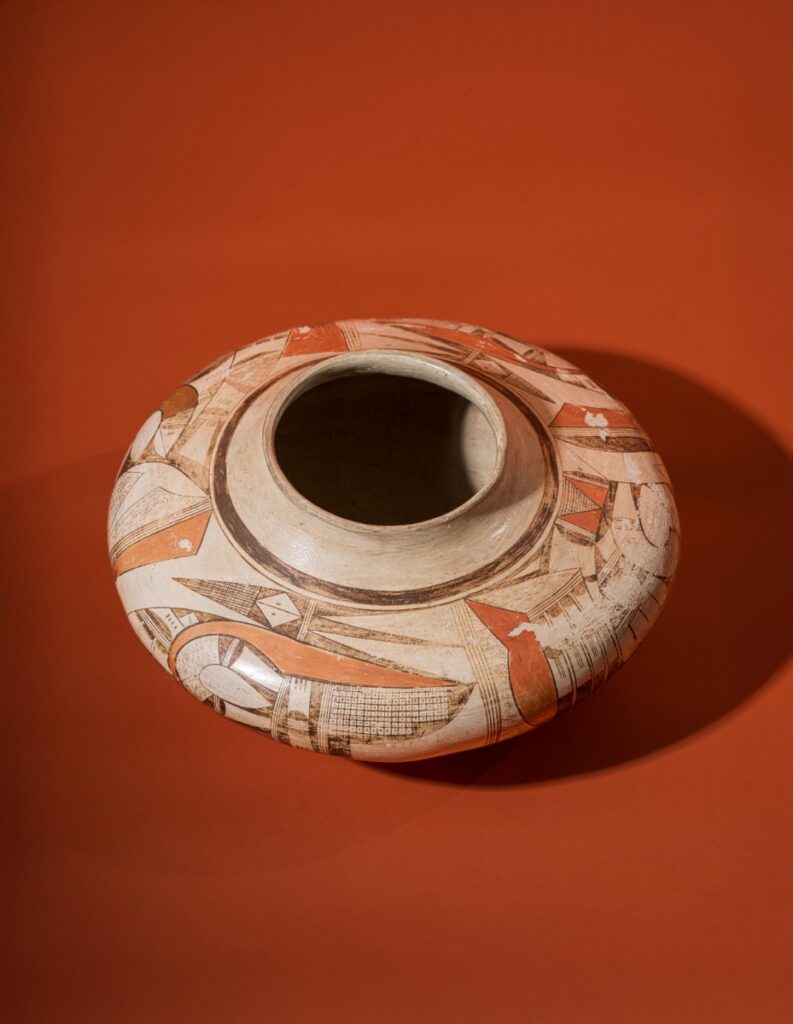
Nampeyo (Hopi-Tewa), Jar, c. 1915, clay and paints, 6 1/4 x 13 in. Gift of Mrs. H. P. Mera for the Harry P. Mera Memorial Collection, 1951. Collection of the School for Advanced Research, Santa Fe, NM, catalog number IAF.2413.
Michael chose three pieces of Nampeyo pottery, including this piece circa 1915. In addition, I think what I was really looking at was the time period in which these were created. Specifically, this was the late 1800s and, furthermore, the early 1900s. At the same time, I was also looking at the abstract quality of the line of the images. However, it is important to note that each one of these represents something.
And in that same time frame, artists like Wassily Kandinsky were creating works on another continent that were of very similar line and form, whereas they were exploring shape and composition. I think Nampeyo was doing the same thing, but also creating something that was very spiritual and talking about our culture within these vessels.
I come from a long line of Hopi pottery makers, beginning with Nampeyo. In addition, my photography practice is related a lot to climate change, and, moreover, to where our culture is rooted in a sense of place, as well as to what is happening to that environmentally.
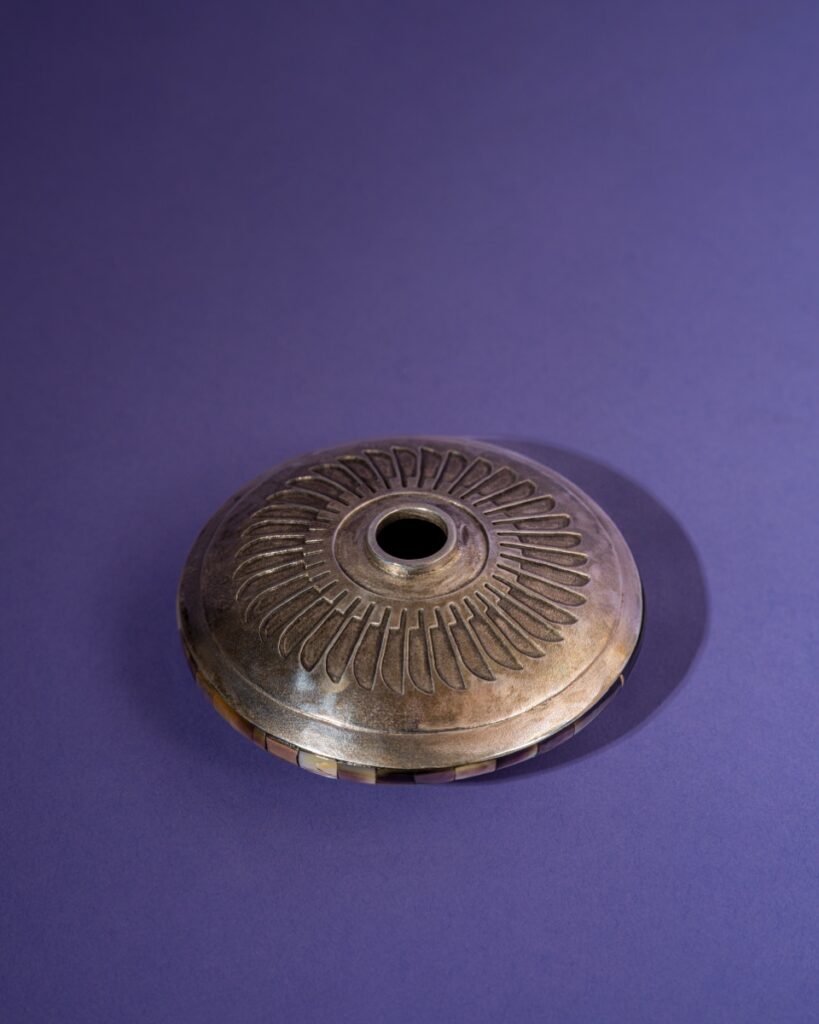
Connie Tsosie Gaussoin (Picuris Pueblo and Diné [Navajo]), Seed bowl, 2006, sterling silver, mother of pearl, and gold, 1 9/16 x 4 5/16 in. Gift of the artist, 2007. Collection of the School for Advanced Research, Santa Fe, NM, catalog number SAR.2007-2-1.
Connie was the first person next to my father who really gave me that sense of what artistry can be and what it is. She came into her own creativity in such an organic way that I would just lean into the way she spoke, the way she engaged with people, the way she welcomed me hanging around her and her family when I was just a kid.
It was from her that I got this sense of how you get to define how you want to be seen. It doesn’t always have to be defined in the terms of how your tribe designates you to be, because there are so many ways our creativity can bloom and grow. And she’s consistently been doing that in a way that also solidifies her within her tribe. I just love listening to her. I love talking with her, and I still do. She’s like my Santa Fe mom.
Artist once known (Pueblo of Zuni), K’yabokya de’ele (Water jar), c. 1850, clay and paints, 12 x 14 in. Indian Arts Fund purchase for the permanent collection, 1929. Collection of the School for Advanced Research, Santa Fe, NM, catalog number IAF.1272.
I really like art. So just from hanging out working in the museums, it turned me into an artist almost. The reason why I picked the Zuni piece is because it has a long history.
I can sort of see the line work and the detail and the overlap of how Zuni pieces from this period evolve into kind of those geometric pieces that you get out of Acoma, that I’ve seen out of Zia. It looks like stuff that you know, it’s almost universal. I think everybody somehow used that design on their own. It’s kind of like it moved around all the pueblos.
And I really like the whole part about the universal connections of how designs are used by other people. I like seeing how they are influenced by pottery made in other villages. When I really look at their designs, I also consider how my piece will work with that design.
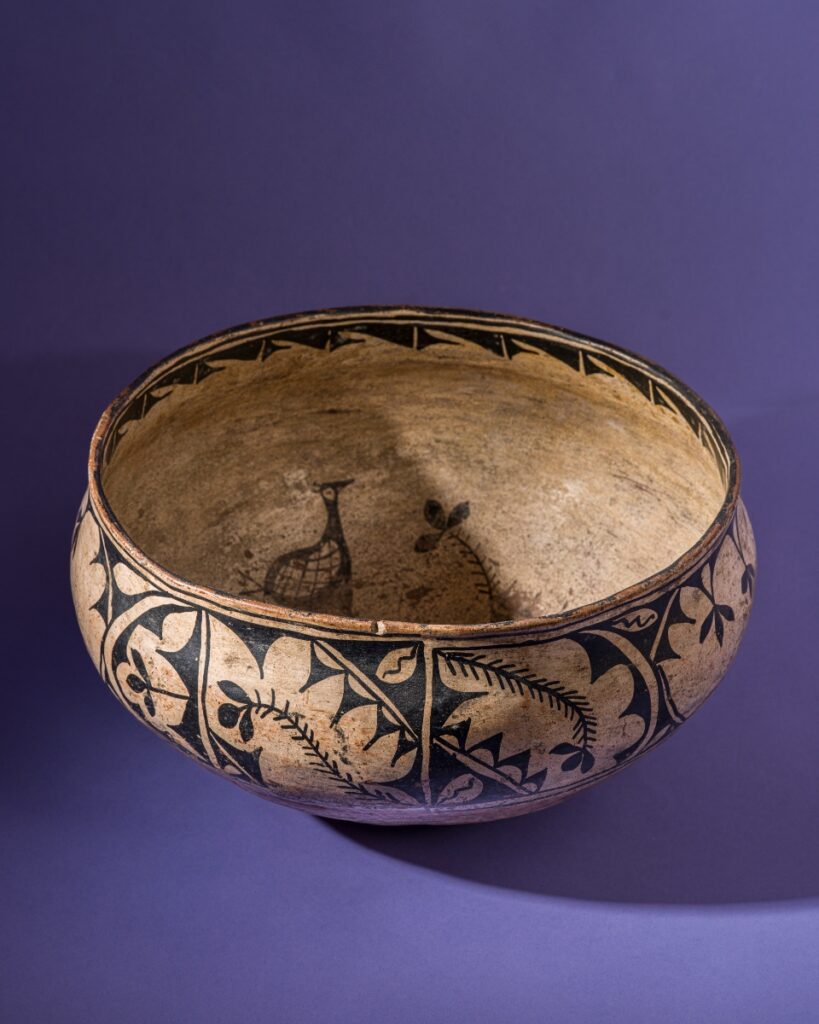
Artist once known (Pueblo de Cochiti), Bowl, c. 1890, clay and paints, 9 x 16 1/2 in. Gift of Mr. Henry Glover Stevens, 1923. Collection of the School for Advanced Research, Santa Fe, NM, catalog number IAF.19.
When you look inside you can see the wear that these were actually used – this vessel was actually storage for the food. Things that were happening at the time, you know, like what were they eating, what were the ingredients that they were using?
And it’s always something dear to my heart because I do love to cook. It kind of takes me back to when I grew up, going with my mom, aunties, or family. We would go pick wild spinach or onions. It brings you back to those memories, you know. We would just wait to see what your mom was going to cook with them. How she would use those ingredients in whatever she decided to make.
Also what I like about these pieces is they’re all fired outdoors and that’s what I do with my work as I keep it traditional as much as possible.
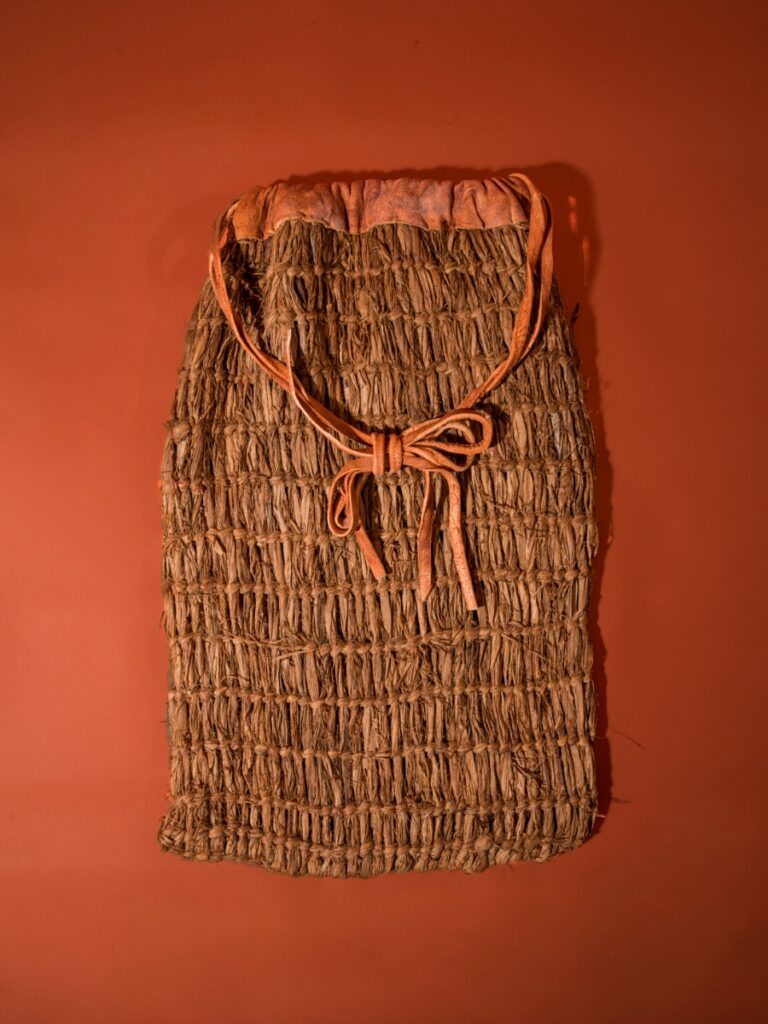
Everett Pikyavit (Moapa Band of Paiutes), Bag, 2005, cliffrose bark, brain tanned leather, and natural dye, 22 x 14 1/4 x 2 in. Gift of Nancy C. Leonard, 2011. Collection of the School for Advanced Research, Santa Fe, NM, catalog number SAR.2011-11-1.
It was my first show and it was in Berkeley, California. And I was really nervous because I never had worked outside a community before and I wasn’t even sure like, how do you sell this stuff? How do you commodify it?
And so that was something I was struggling with. The maker of this particular basket was selling there. I was just amazed at their work and how well they navigated using more place-based or high craft work, and watched collectors come up, get excited, and line up to purchase works. I was thinking, “Wow, that’s so cool.”
And so, consequently, it really opened my eyes. Moreover, it really paved the way, at least for me, to think about how to move from just working within community spaces and, in addition, sharing my work within community, to, ultimately, moving it outside of community and, furthermore, moving it into art markets and gallery spaces.
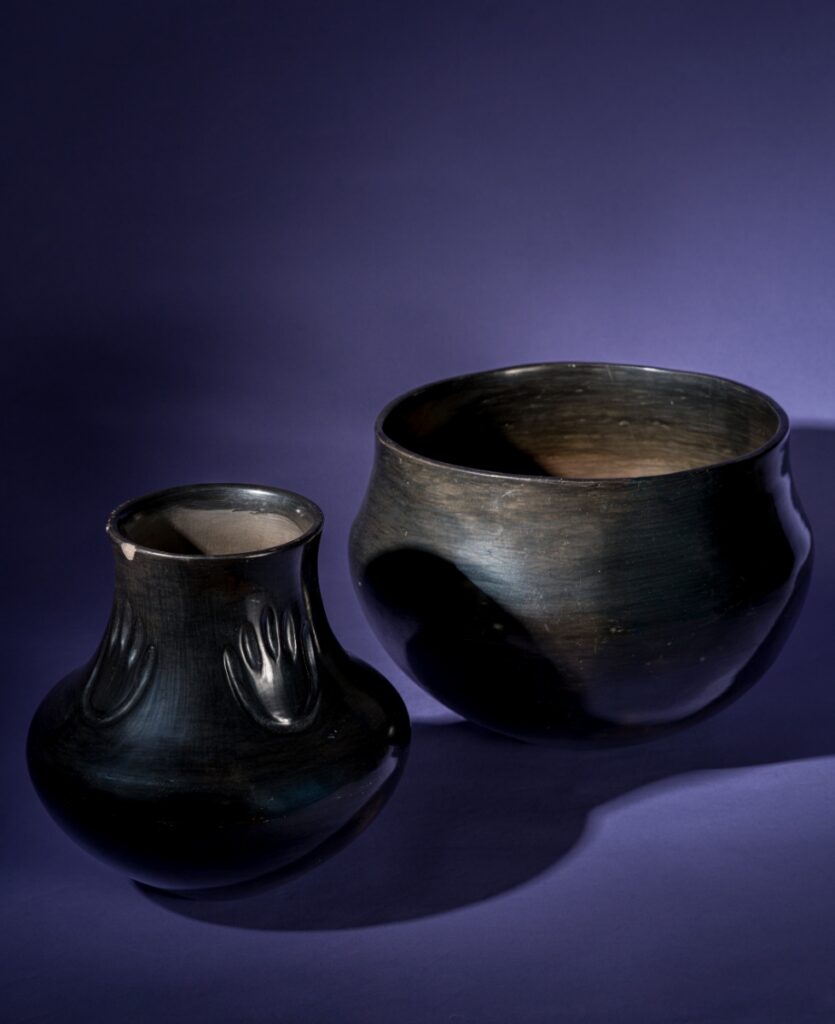
Severa Tafoya (Santa Clara Pueblo), Bowl, c. 1940, clay, 12 x 16 15/16 in. Gift of Margretta S. Dietrich, 1955. Collection of the School for Advanced Research, Santa Fe, NM, catalog number IAF.2527.
Severa Tafoya (Santa Clara Pueblo), water jar, before 1973, clay, 13 x 12 5/8 in. Gift of Judge and Mrs. Oliver (Jean) Seth, 1980. Collection of the School for Advanced Research, Santa Fe, NM, catalog number SAR.1980-15-1.
It’s always amazing to look at these pieces and how the indentation is there. Usually when I see pots like this and others made by my paternal great-grandmother (Severa Tafoya), we’ll feel that indentation of where her finger made that impression of the bear paw.
It’s pretty smooth on the inside. But sometimes you’ll feel, on some of the pots, that indentation of a fingerprint. Then you know that you’re touching that person, in a sense. And sometimes, with pots like this, it’s amazing to see them. You pick them up, and the weight of them—it’s almost like holding a baby.
It’s always nice to see her work in the collection and kind of come in and revisit it and look at it, touch it, feel it, smell it, and just having that connection to her.
Lucy Martin Lewis (Pueblo of Acoma), Water jar, 1947, clay and paints, 63/4 x 9 in. Gift of Sallie Wagner, 1994. Collection of the School for Advanced Research, Santa Fe, NM, catalog number SAR.1994-5-65.
Lucy Lewis was born in 1889 in Acoma Pueblo and lived her life on what Acoma Pueblo residents call The Rock: a 365-foot-tall mesa that juts out of the ground in an otherwise flat landscape. Lewis most likely lived in the traditional village atop the mesa.
No electricity or running water — by today’s standards, a challenging lifestyle. However, Lucy’s creativity thrived. Her obvious drive and intentionality regarding her art motivate and inspire my own creativity. Lucy came from a long, rich history of pottery making, inherited from her mother and grandmother. I understand that familial connection to clay, I am also a part of that history.
Drawing inspiration from Mimbres and Anasazi pottery shards, she developed a strong sense of design. This design reflected ancestral creativity and the world she inhabited. Whenever I see Lucy’s work, I see a woman with vision. She has incredible skill—a pioneer who used her vessel’s surfaces like a canvas.
Story by TABLE Magazine Staff Photography by Tira Howard
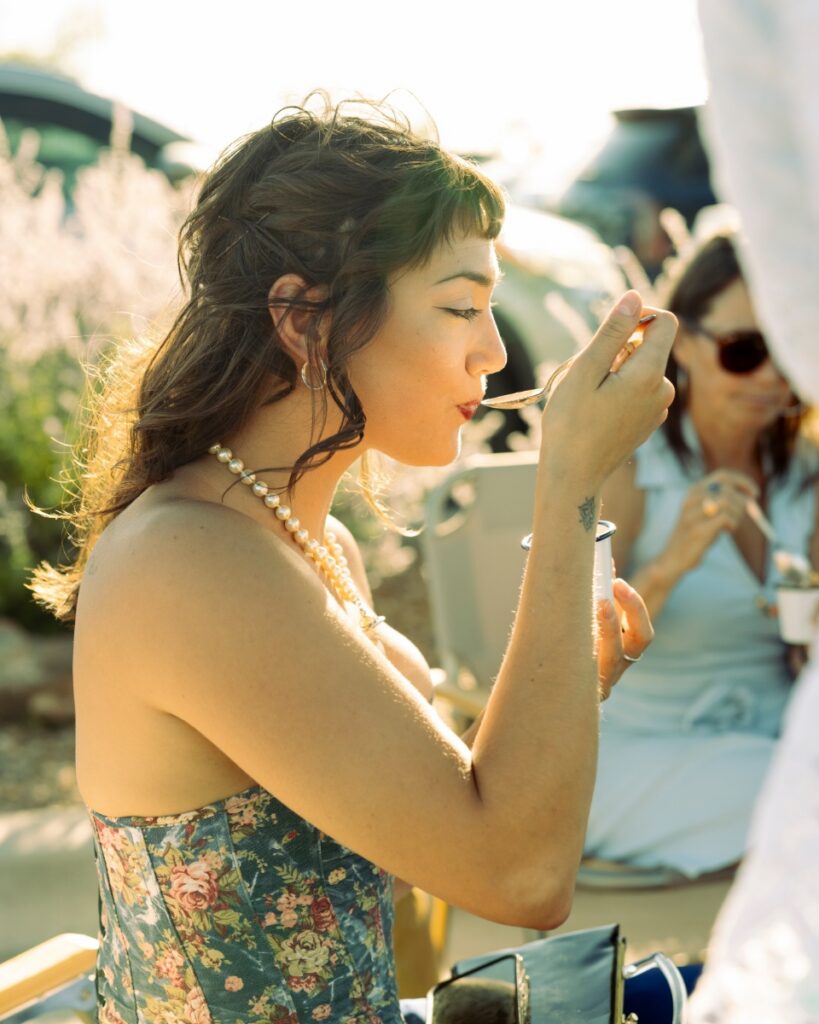
Not all of the drama occurs on stage at the Santa Fe Opera. There is the see-and-be-seen. The outfits, fine China, and crystal. It’s all part of the pre-performance delights of a tailgate party. We gathered TABLE Magazine contributors to experience it for ourselves.
A Santa Fe Opera Tradition: A Tailgate Party for Everyone
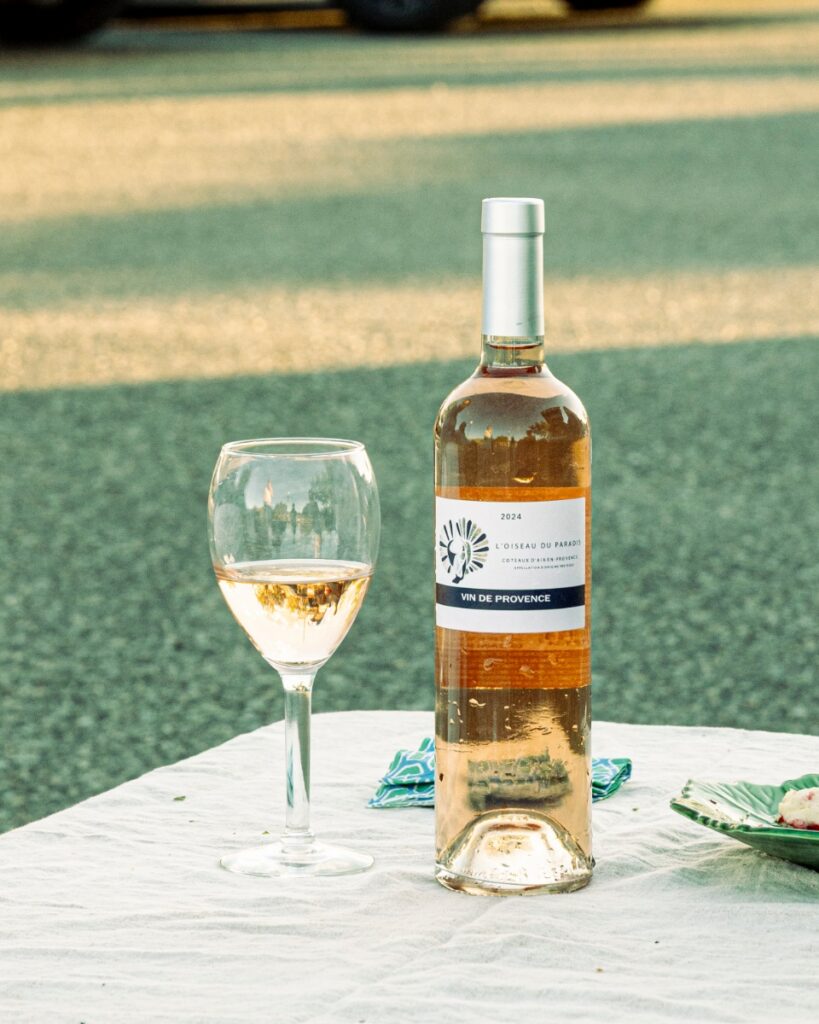
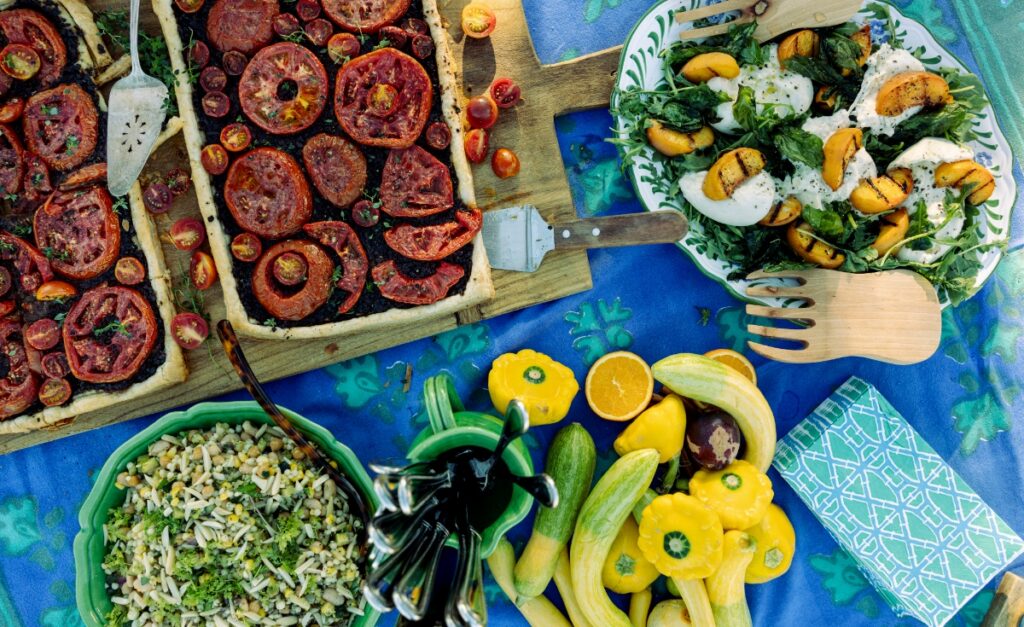
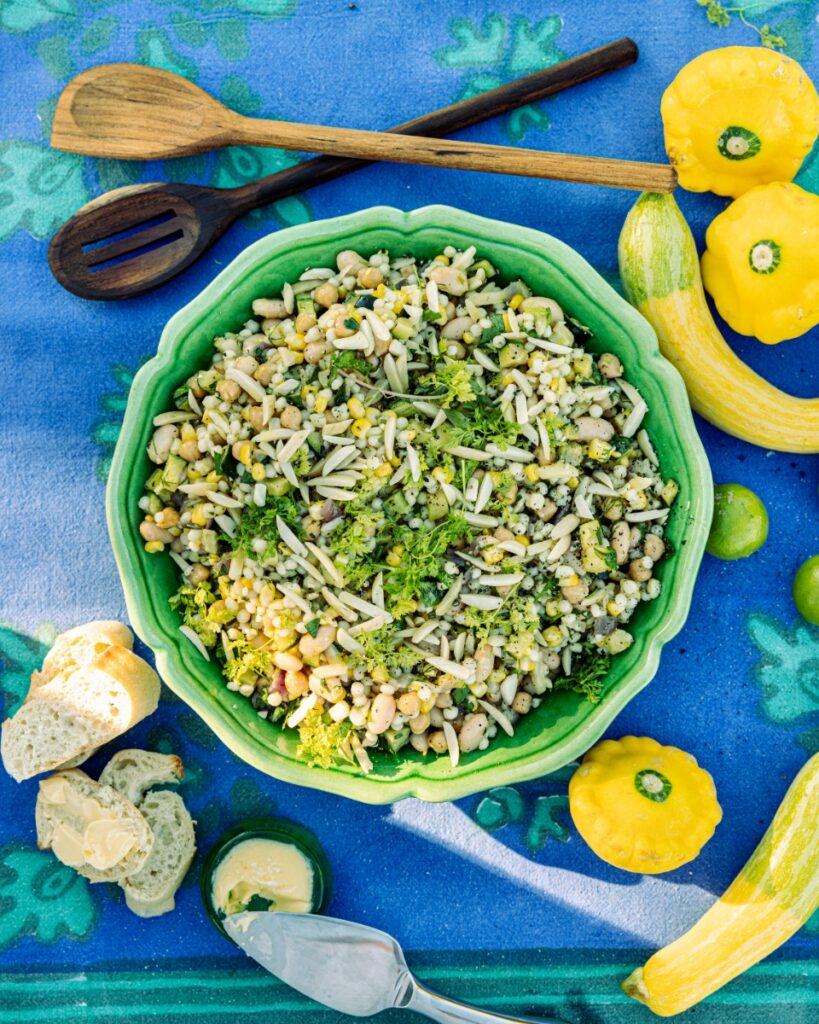
Chilled rosé? Check. Tomato and tapenade tart? Check. Ice, ice buckets, side dishes, napkins, tablecloth, plates, and cutlery safely stowed in the back of our Mini Cooper and we were off. The occasion was my maiden voyage hosting a tailgate at the Santa Fe Opera along with some of our beloved writers and contributors.
Summer Nights with Wine and Good Company
The only rule was no work talk (or not much). Wine and spirits writer Bill Smith kindly brought his favorite wines for tailgate imbibing – a sparkling and a still rosé that were just the thing for an early evening that was reluctant to dip below 90 degrees. Photographer Tira Howard magically managed to fit a table and six chairs in her car, already full to overflowing with camera equipment.
The opera kindly opens its parking lot early to welcome tailgaters like us to enjoy the show before the show. There’s everything from candelabras to costumes, so you can count on people-watching opportunities. “I just love the fact that we can say tailgate and opera in the same sentence,” says Jenna Scanlan, who’s an opera tailgate veteran of 25 years.
And even when a tailgate goes awry – that is, the heavens open up – it’s still memorable. Jenna remembers friends hosting a tailgate one year complete with china and crystal when summer monsoons decided to join the festivities. “Luckily, they had an SUV, so they put the seats down, and we piled in the back, enjoyed it anyway, and then made our way to the opera. We were soaked, but happy,” she says.
How to Join the Santa Fe Opera Tailgates
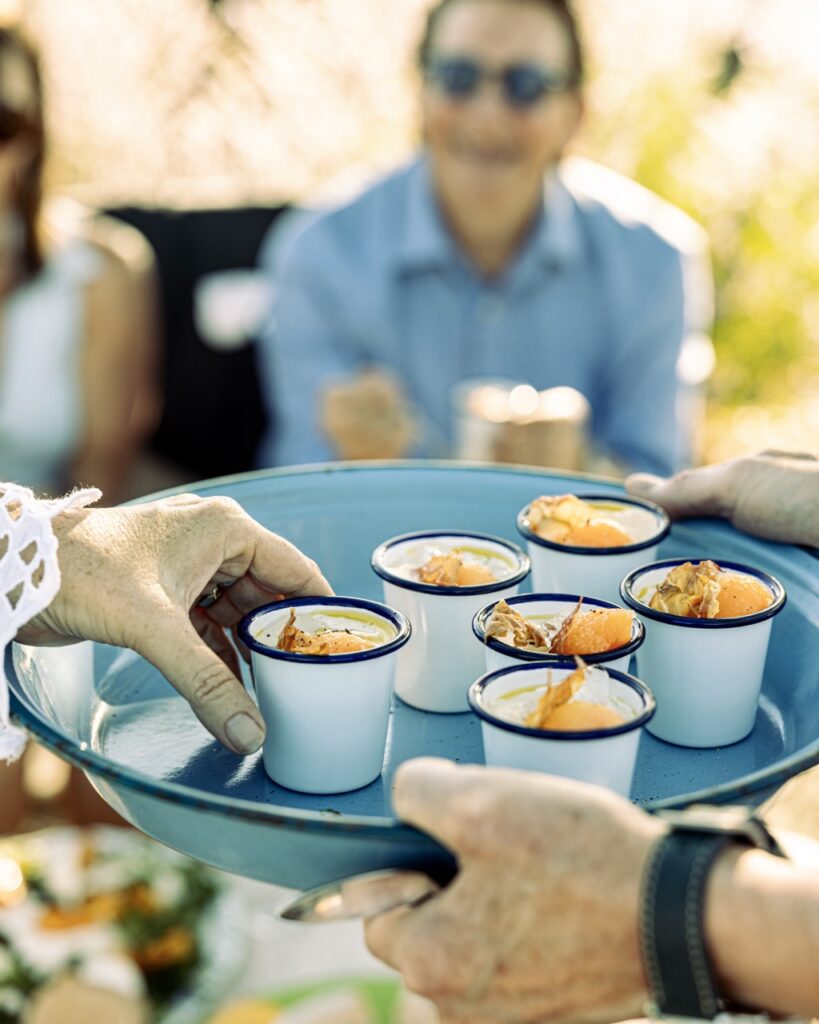
JB Peña has been an avid opera-goer since she was a child but is relatively new to the joys of tailgating. “One suggestion is to get a good parking space if you like the views. Now, if you want to be in the thick of it, then you can just park right in the middle and have everybody walk by and ooh and aah and say, ‘Can I have a bite of that?’”
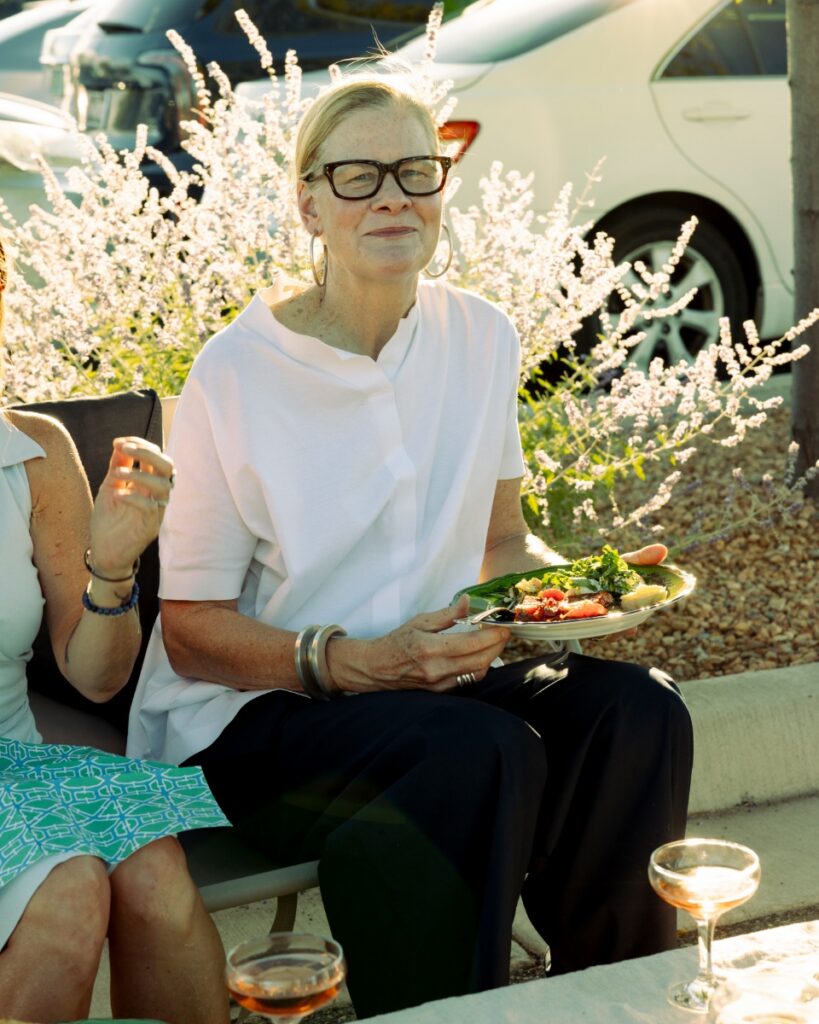
And it’s that conviviality that makes tailgating such a joy. Amy Owens got her first taste as an apprentice singer in 2014 (she now directs the Santa Fe Opera’s Young Voices program), but it was post-pandemic when she fell in love. And while she likes to don a ballgown and go OTT-elegant, she’s just as happy tucking into a takeaway salad and meeting fellow opera buffs at the picnic tables the opera kindly provides. “I feel like I’ve done all versions of tailgating and every one is a fun experience. There’s no one way to do it,” she says.
Connecting the Experience to the Show
This year, JB is toying with the idea of wearing one of her vintage kimonos for Madama Butterfly, while Jenna has her eyes set on Lili Elbe. “I’m so proud of our opera for hosting the American premiere,” she says. Amy is looking forward to Rodelinda by George Frideric Handel. “I always find that early music really does well here at Santa Fe Opera. It has this feeling of freshness, even though it’s quite old,” she says.
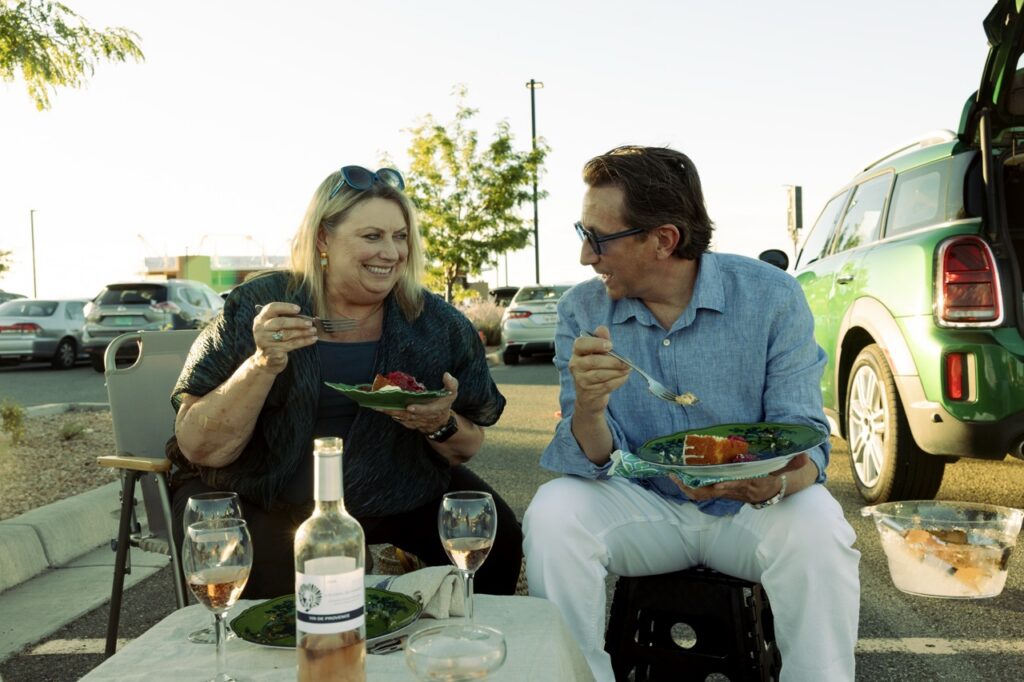
As we finished off a slice of cake with poached plums and orange mascarpone and took a last sip of L’Oiseau du Paradis Côteaux d’Aix-en-Provence Rosé 2024, the lure of the tailgate was clear. The temperature had dropped, there was laughter in the air, and the sun was doing its own performance for us as it slowly started to set. It was a wonderful reminder that a ticket to the opera is always a joy, and a tailgate makes it even better.
A special thanks to the Santa Fe Opera for so generously hosting us for a magical night!
Tailgating Tips from the Santa Fe Opera
We asked out good friends at the Santa Fe Opera for their dos and don’ts for a happy, stress-free tailgate. The dos list is much longer than the don’ts.
Arrive early. The parking lots open three hours before showtime.
Lean into the theme. Show-inspired foods, drinks, and table settings set the mood for the evening. Perhaps sushi and chilled sake for Madama Butterfly, or smoked salmon blini and a vodka cocktail for Eugene Onegin.
Make use of the scenic grounds. Picnic tables are scattered throughout the scenic grounds.
Bring the sparkle (safely). If you have a candelabra begging for its moment, opt for flameless candles.
Catch a Prelude Talk. These talks are free to ticket holders and offered two hours and one hour before most performances. No reservations required.
Plan for the elements. Santa Fe evenings can bring sun, wind, or sudden showers. Sunblock, sunglasses, and a light layer or poncho are wise companions.