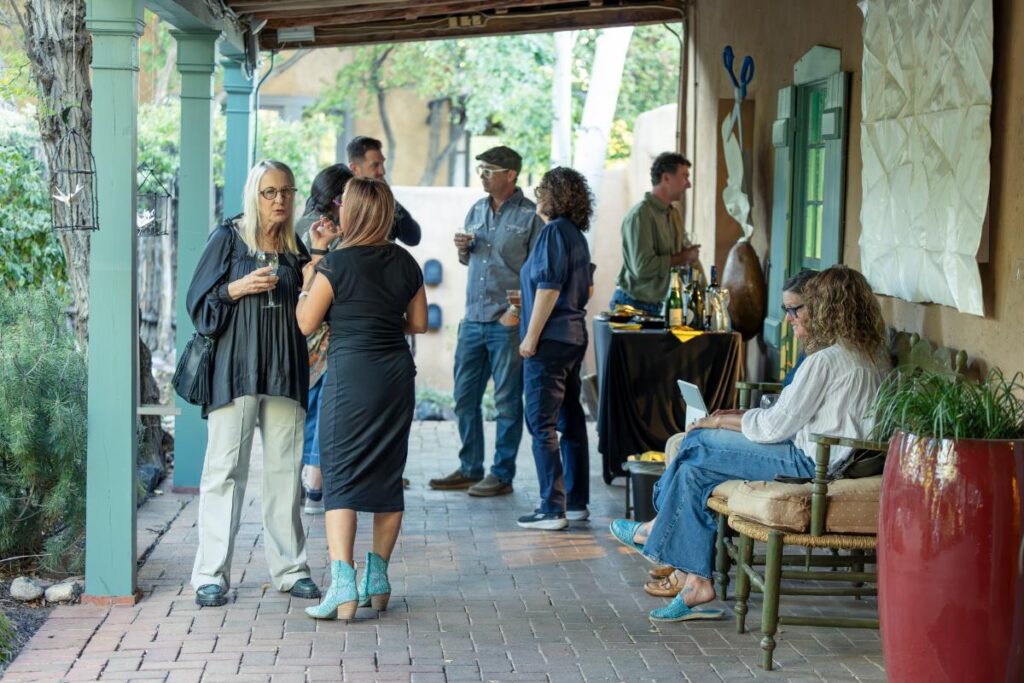
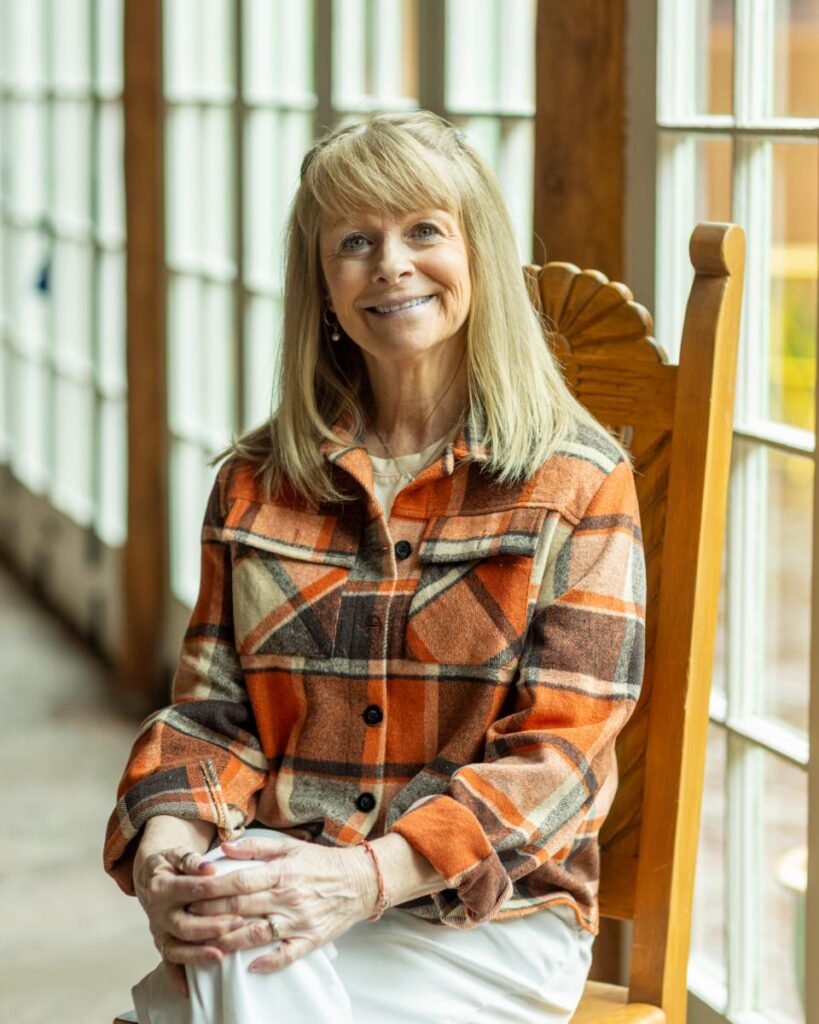
A warm, early autumn evening beckoned a well-curated group of artists, gallerists, and art lovers to a fifth anniversary celebration at Kay Contemporary Gallery, nestled off Canyon Road. Heather Hunter takes us into the gallery’s secret garden for the festivities.
Kay Contemporary Art Celebrates Fifth Anniversary in Their Secret Garden
The juxtaposition of a 300-year-old adobe house with contemporary art was not lost on me. It is the contrast of old and new that inspired gallery owner, Karla Winterowd, to open Kay Contemporary Art Gallery five years ago. Working with a bevy of nationally known, local contemporary artists including Rick Stevens, Kate Rivers, Kevin and Jennifer Box, and Kelly Cozart, Winterowd knew this distinctive space would allow artists’ work to shine in a whole new light.
“These artists all have a deep desire to share with others the human connection to nature and our desire to be connected to nature, which is one of the most important things Santa Feans have in common,” says Winterowd. “In a world with all this visual information, we find that nature is the antidote to that cacophony. It also helps us get back to our core of our own being.”
More Surprises!
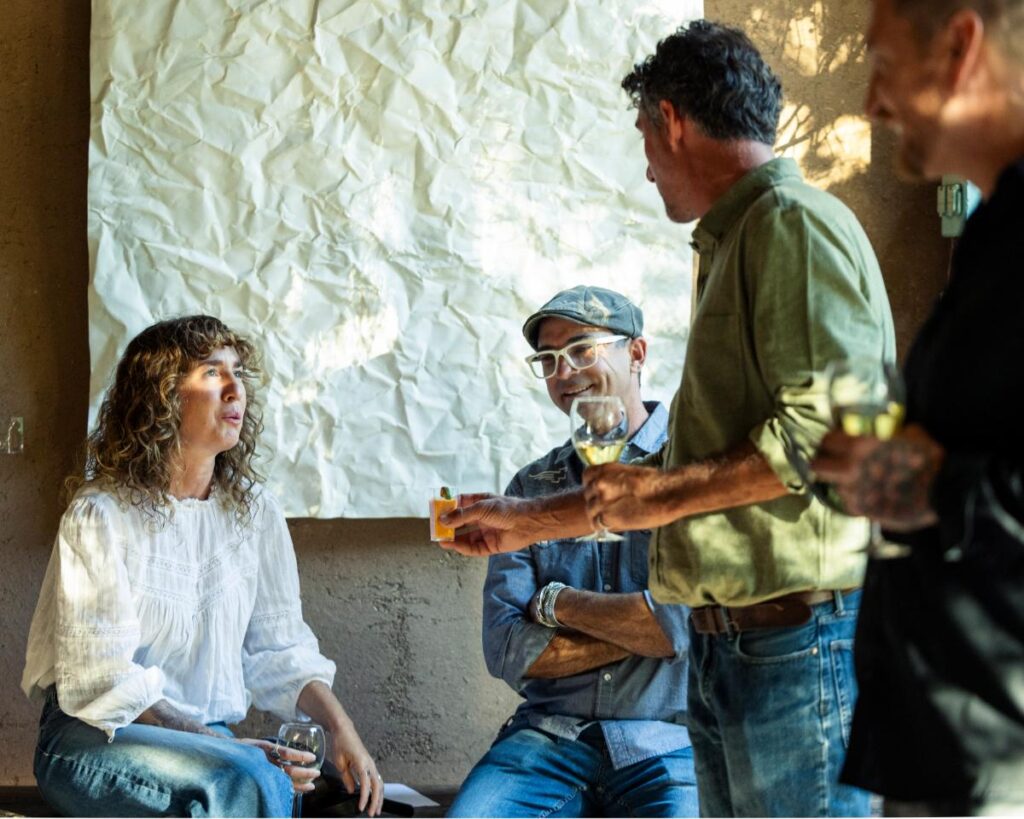
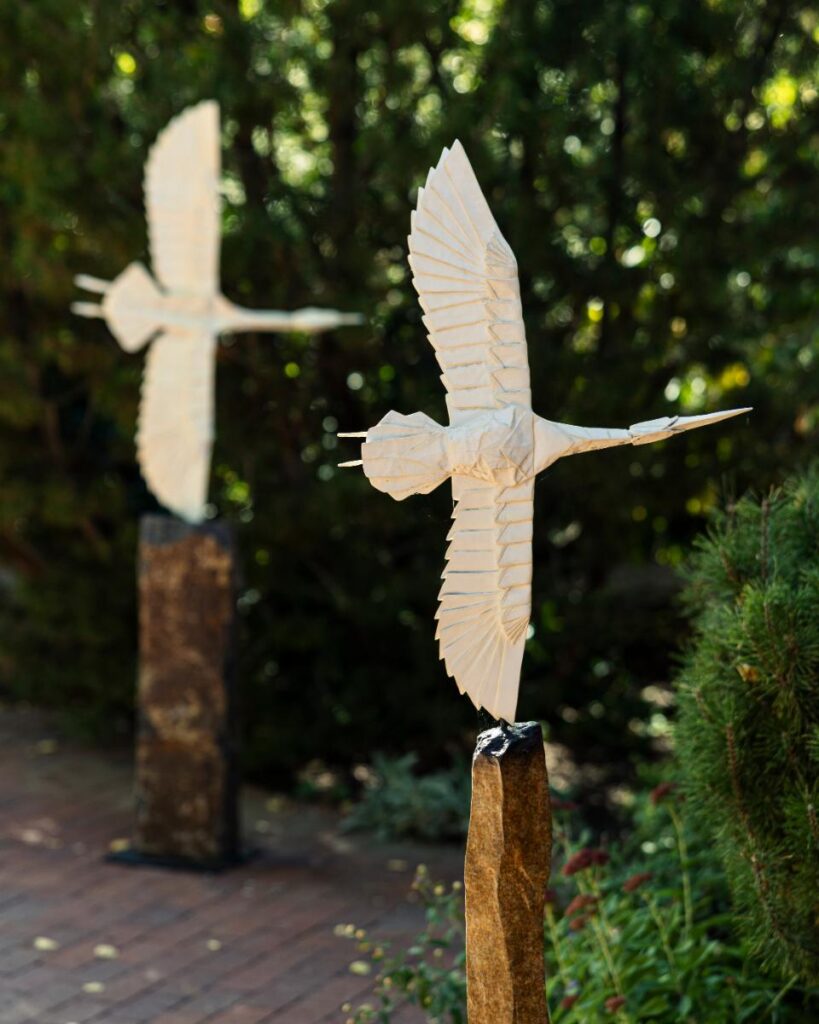
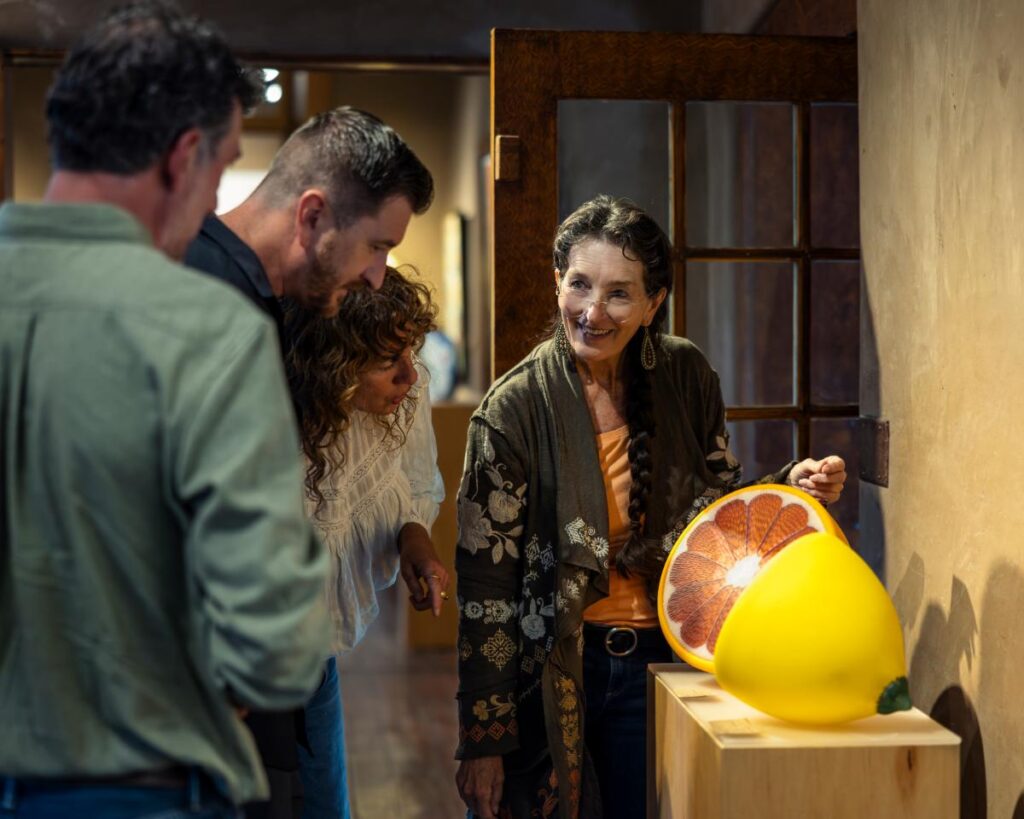
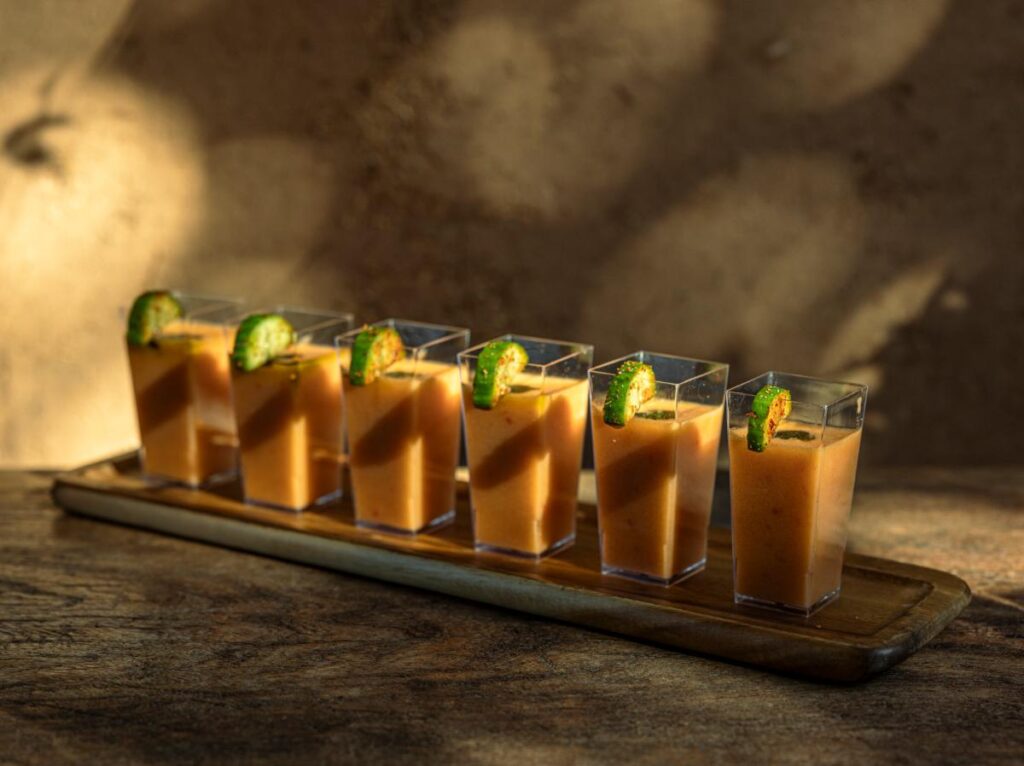
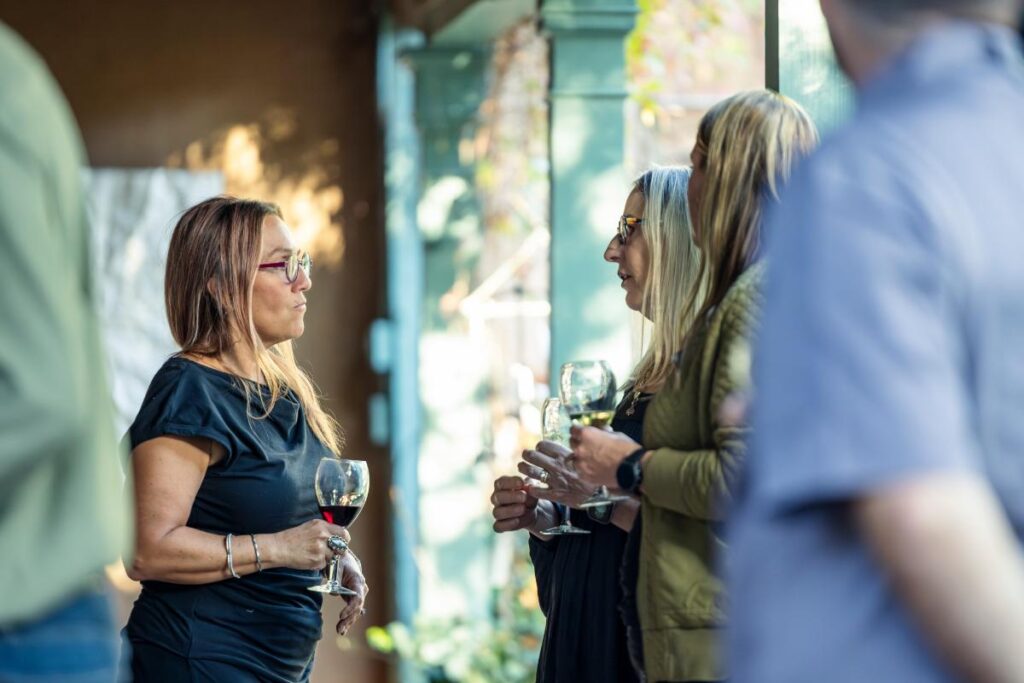
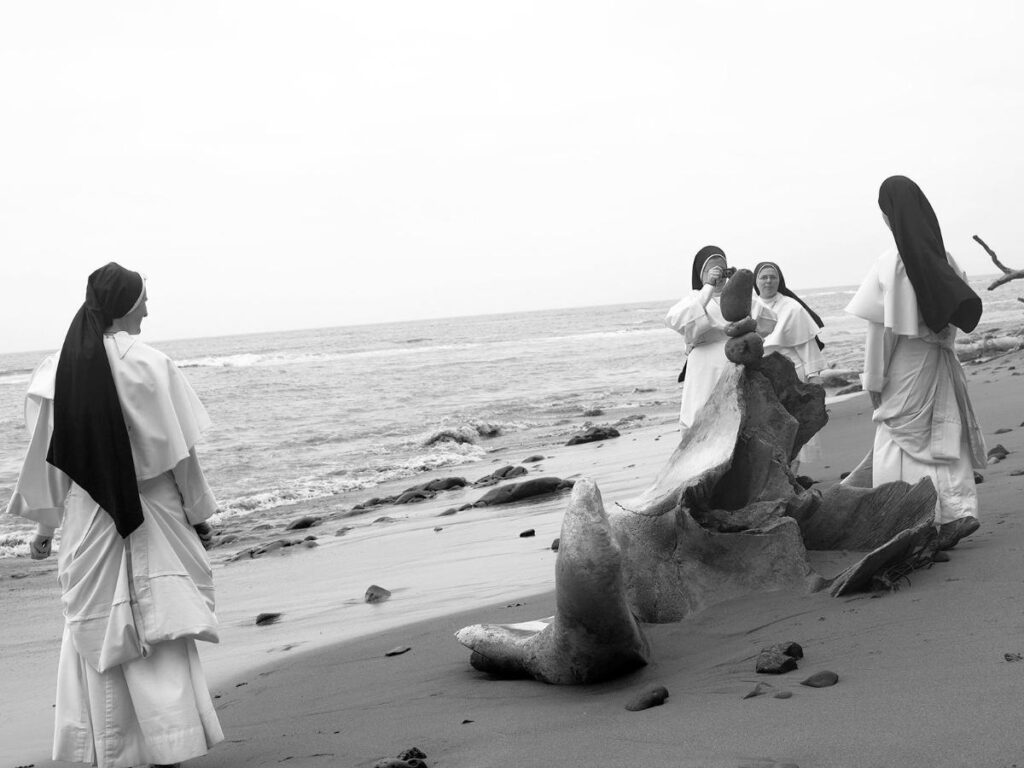
Slipping through the back door, there was another surprise. The metal origami sculptures created by Kevin Box of Box Studio punctuate the serene backyard. It was also the welcoming scene for the gallery’s five-year anniversary celebration. A glorious apricot tree provided generous shade. Under it, we sipped wine and nibbled on canapes by Jackson Ault, aka Santa Fe Chef.
While mingling with the artists and guests, I marveled! Among my favorites: the origami art by Box and his wife and business partner, Jennifer Box. In 2014, they launched a wildly successful outdoor traveling exhibit, “Origami in the Garden.” It began at the Santa Fe Botanical Garden and for the past decade has travelled all over the country.
It’s Not All About Origami
“While my art is origami, it’s not about origami,” Kevin revealed. “It’s a roundabout way to guide people to the blank slate concept: Anything is possible. When we unfold it, every single choice is remembered by the paper and it truthfully describes every choice that was made.”
Of Kevin’s art, Winterowd said, “Kevin’s work explores the outside objects of what we look like but also what we are on the inside. His work unfolds — every origami shape when unfolded tells a story of the journey of the life of that shape. Most origami, when unfolded, is a star and this connects us to the universe.”
Kate Rivers – another artist represented by the gallery – was also on hand for the party. Rivers’s work is in corporate and public collections, including The University of Texas at Austin and University of Virginia Hospital. Winterowd succinctly captured Rivers’s unique approach to creating art: “She uses mixed media ephemera. It’s subtle, but it’s rich in content and context.” Rivers cuts words and phrases from books and sews them together to create a tapestry of story
“With Kate, the books help us engage in what is important to us. The work references back to man’s connection to nature. And we were in the garden and the food came from the earth … it’s all part of this interconnected web of life,” said Winterowd of Rivers’s mesmerizing visual creations.
Don’t Follow Trends
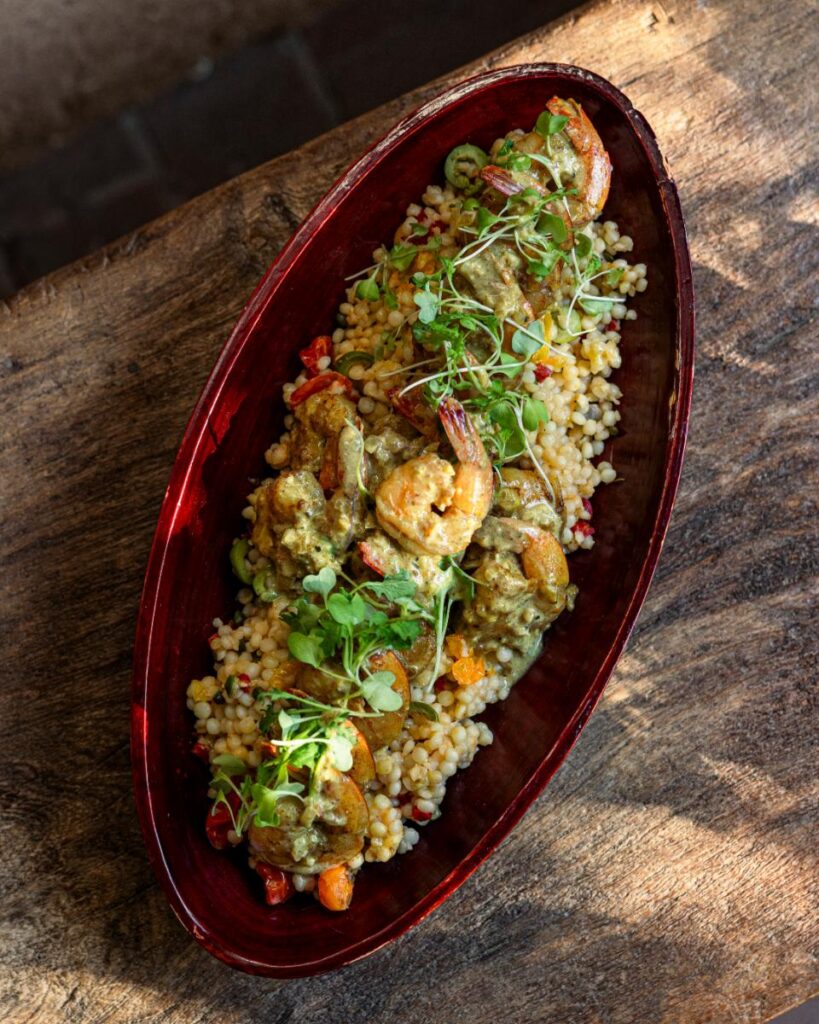
As the sun was setting, I savored another canape of Sicilian curried shrimp with Israeli couscous and kaffir lime and spoke with Jamie Garrison-Withrow, the gallery’s director, who helps customers and art collectors identify pieces that speak to them. Her advice? When it comes to collecting art, she said, “Don’t follow trends. Purchase what you love and what brings you joy.”
Another featured artist was Kelly Cozart, who has been creating art for 40 years and serves as the gallerist at Kay Contemporary Art. She said, “Today, as a gallerist and an artist, I guide art patrons to find incredible artwork that inspires them, while my artistry allows my creativity to flow.” Cozart feels this combination is invaluable for collectors seeking artistic insight and inspiration.
Attendees:
Karla Kay Winterowd, Owner, Kay Contemporary Art Gallery Kate Rivers, Mixed media artist Kelly Cozart, Gallerist and artist Kevin and Jennifer Box, artists Jamie Garrison-Withrow, Director, Kay Contemporary Art Gallery Hunter Chomer, Fine art delivery service and installation expert Rachel Zell, Doña Luz
Story by Heather Hunter Photography by Tira Howard Food by Santa Fe Chef
In a world in which beige and neutral seem to rule – whether in interiors or fashion – is there a place for a bright pop of color? The answer is a resounding yes. We talk to top designers to find out the pros and perils of using color and for tips for getting the most out of color in southwestern homes.
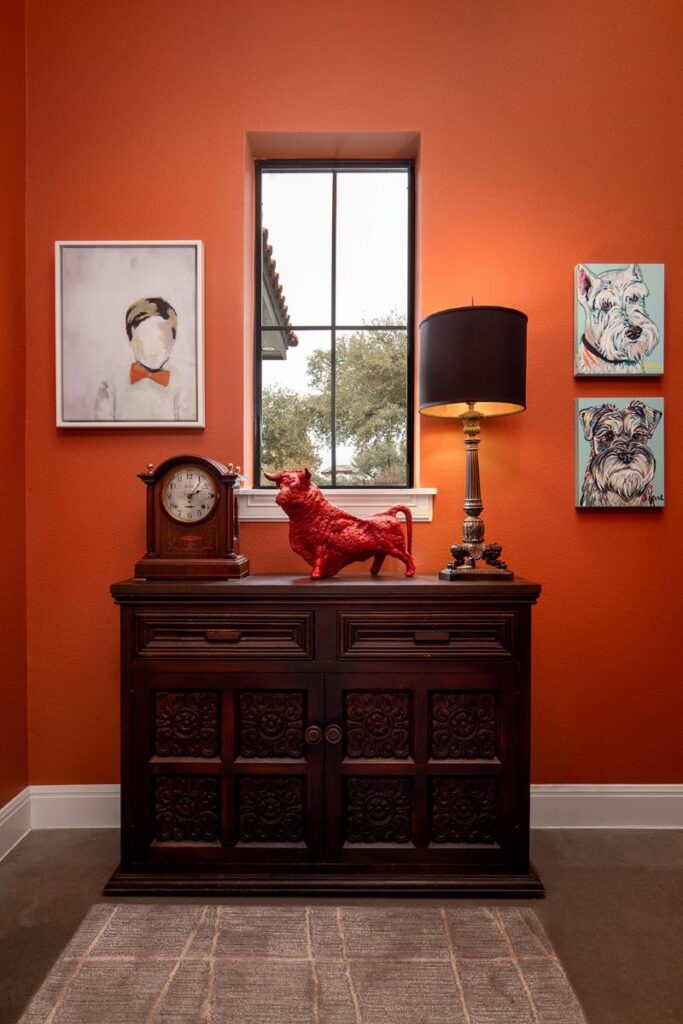
John Hare, co-owner of V&R, describes this mudroom in a modern Spanish revival home as a jewel box. “Since these types of rooms are likely the most well-traveled of spaces in a home,” he says, “I wanted to treat the passerby with a pleasing and energetic color as they arrived and departed.” Color is picked up and repeated to beautiful effect, like the match between the bow tie in the painting with the wall color. “Using vibrant colors can bring energy and life to a room, making it feel dynamic and engaging. For example, a bright wall color can serve as a focal point, drawing attention and creating a sense of excitement.”
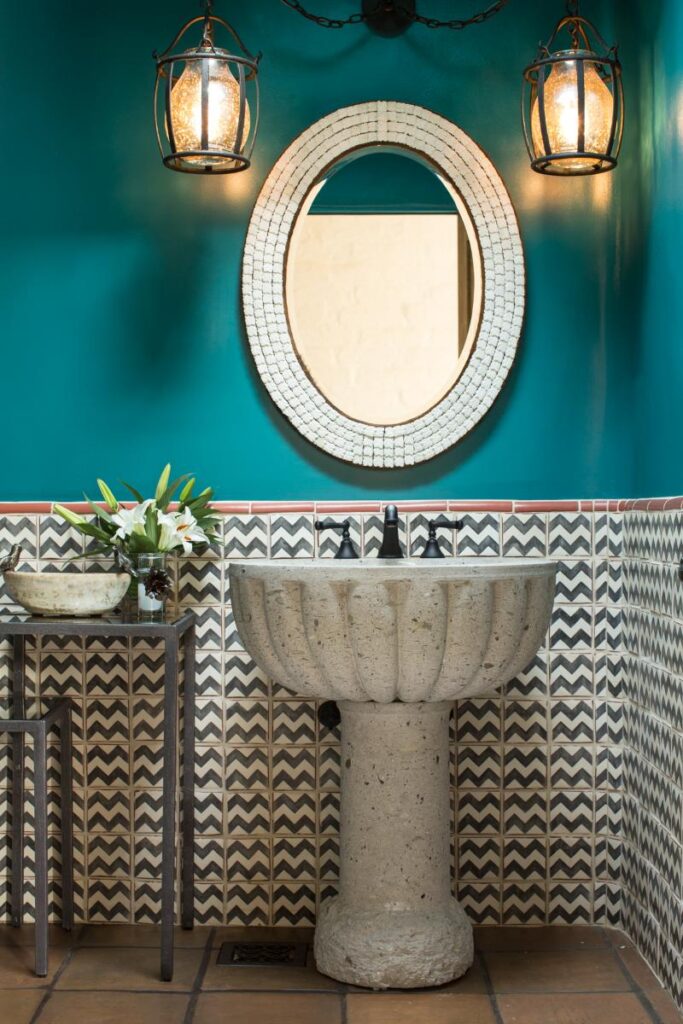
“Our client wanted a fun and unexpected powder room in their traditional pueblo style home,” says designer Chandler Prewitt. “I used saturated turquoise on the upper walls to create a bold, immersive backdrop that contrasts beautifully with the earthy saltillo tiles, hand-painted tile wainscoting, and carved stone pedestal sink.” The challenge was to balance vibrancy with serenity. “The teal offered a strong emotional punch — fresh, confident, and slightly unexpected — while the natural textures and graphic tile provided rhythm and structure,” he says.
“I access color accidentally,” says designer David Naylor. “Lots of designers like to start with a color conversation with their clients. I start to accrue pieces that I think are perfect for a job and then the color story comes from that,” he says. “I like neutrals on big pieces of furniture, like sofas, because I want the art pieces to speak about color.” For this hallway – what Naylor calls a spine of the house – antique bronze pots that had a verdigris pattern from oxidation that comes with age inspired him. “It has to be kind of mystical and accidental like that. If it’s too forced, it shows.”
An existing rug that was a lush, dark gold color was the starting point for this room by designer Steven Whitehouse of Three Roots Design. He picked up on that color with a curved headboard in “Tulum Gold” velvet. “The client enjoys nature, which is reflected in the scenic green-patterned wallpaper,” he says. Whitehouse feels the southwest welcomes the use of color. “Editing the tones and finding the right balance is the key,” he says.
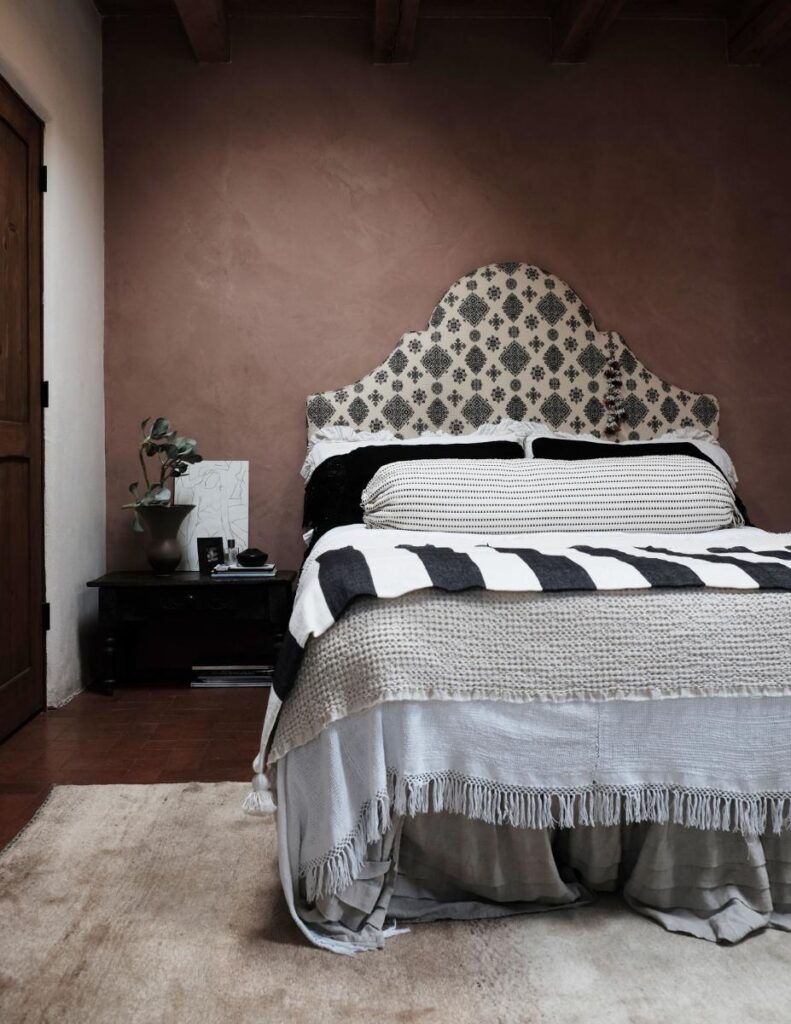
“I wanted to bring the stunning earth tones of the rocky hills around Santa Fe into this interior. To do so, I chose a colored plaster from American Clay and let the terra cotta brick floor blend with the rose, as it does in the hills. I kept the bedding in creams and black for contrasting neutrals.” The interplay between color and neutrals comes from her fine art background, she says. “Often I will throw in strong colors against a more neutral palette for distinction and to draw the eye around the room,” she says. For Stella, the natural light of a region, always plays into color choices. “New Mexico has a very particular, warm light to me. Working with the colors of the stone and dirt of the surrounding hills invites nature inside and gave this room a very grounded and organic feeling.”
“Aesthetically, our primary goal in designing this home was to infuse it with color, joy, and warmth. This transforms an outdated space that was stuck in a 1990s haze of pale pink-washed wood,” says Heather French of French & French. “In the bathroom, we chose a bold, sunny yellow to contrast beautifully with deep espresso-stained cabinetry. The combination adds both vibrancy and depth, making the space feel both energizing and grounded.” It’s an approach to color that is a cornerstone of their work. “We approach color with boldness and intention, embracing it where others might shy away. That said, we’re thoughtful about the palettes we introduce.”
When designer Jane Smith purchased her 1930s adobe home in the historic Eastside of Santa Fe, she bought a large Navajo weaving for her new living room. “The weaving is coral with natural browns and grays, so I decided I would use the coral color for the start of my home and garden,” she says. That one piece helped her focus and move forward. “The challenges were to keep the feeling without pieces or colors becoming too overpowering,” she adds. “My walls and vigas are painted white, the floors are a pale grey, both are a blank canvas for adding decor. I love to add color but not take away the overall feel and comfort of a home.”
Story by Julia Platt Leonard Photography Courtesy of the Designers
The beginning to our Genovese Classico sounds cliché: it was indeed a dark and stormy night. Our soggy start notwithstanding, the ending was nonetheless fantastic…because we had our first plate of Genovese Classico, a deeply traditional Neapolitan dish.
Genovese Classico Recipe
We may think of pizzas and nonna-made ragus when we think of Naples, but Genovese Classico pre-dates the 16th-century arrival of the tomato in Italy. Its primary ingredients are ancient: beef, pancetta, onion, wine, carrots and herbs. The secret to a successful Genovese rests with the cook…it’s patience. The best recipes often involve slow and steady braising, and Genovese Classico is no exception.
Try your hand at this oh-so-satisfying recipe. You will love it as much as we did on that dark and stormy night in Naples.
Add olive oil to a large pot. When hot, add cubed pancetta, Saute until the edges are slightly golden. Add onions, carrots, and celery. Lower the heat and let the mixture cook until the onions are translucent. Stir occasionally.
Add half the wine, bay leaves, thyme, and lemon zest—season with salt and pepper. Stir to combine. Nestle the chuck roast into the mixture so that it is submerged.
Cover and let simmer over very low flame for about 3 hours. Stir occasionally. Add wine if the liquid evaporates and the mixture looks too dry. When the meat is fork-tender, remove it from the pot and set it aside. Let the onion mixture continue to cook until it has jam consistency. Add lemon juice. Turn up the flame. Stirring frequently, caramelize the mix to a deeper golden brown. Lower the flame.
Pull the beef into bite-size chunks with a fork. Add to mixture and let warm again slowly. Taste the sauce: you can add salt, pepper, or a little extra lemon juice to taste.
Toss with al dente ziti or rigatoni cooked in well-salted water. Sprinkle with freshly grated pecorino cheese.
Notes
Hint: If you prepare the sauce the day before your meal. and let it sit overnight in the refrigerator, it is even better.
Recipe and Styling by Keith Recker Photography by Dave Bryce
Your 411 to the doughy, the decadent, and the downright delicious at
Albuquerque’s 8 essential bakeries.
“How can a nation be great if its bread tastes like Kleenex?” Julia Child had a point. Luckily, Albuquerque isn’t the problem. This city is baking with soul! Its rising class of bakers are putting flavor, texture, and local flair front and center. From chewy, pull-apart bagels to crackling sourdough and croissants so meticulously crafted they deserve their own art exhibit, Albuquerque is making one thing clear: world-class bread and pastries are thriving in the high desert.
Nab a crusty French baguette at the Los Poblanos Farm Shop. Or take home a loaf of green chile sourdough, a buttery croissant, or a dark, gooey chocolate chip cookie. Everything is small-batch and made daily, just next door at the Campo restaurant bakery. While you’re at it, pick up a jar of green chile jam. It’s the perfect partner for a toasted slice of their Sonora wheat bread.
Sunday Bagels is quietly redefining weekend breakfasts — one hand-rolled, perfectly boiled bagel at a time. Step inside. You’re greeted with the warm, yeasty smell of doughy perfection and a case full of golden, glossy beauties. The bagels strike that rare balance: soft and airy inside, with just the right amount of chew and a crisp shell. It’s a bite that’s deeply satisfying and dangerously addictive. Local love shows up for the green chile and cheese bagel — spicy, toasty, and totally New Mexico. Try it slathered in the scallion cream cheese. Hours/days at the storefront can change on the whim, so check their instagram for the latest.
Must Try: Don’t sleep on the biscochito bagel — a sweet, cinnamon and anise-coated nod to the Land of Enchantment tradition that melts in your mouth.
Red Barn Bakery blends mom’s homemade goodies with old-fashioned neighborly trust. In a rural South Valley neighborhood, this self-serve bakery stand, helmed with repurposed red metal sheets salvaged from an old barn, features a rotating roster of items, like fresh tortillas, Dr. Pepper brownies, bear claws, homemade jams — and even root beer floats in the summer from the next-to freezer.
“A lot of my family told me that I have too much faith in people,” says Red Barn Bakery founder and baker Lisa Dudasik, “but I have just enough faith that people will do the right thing.” She’s only been stolen from once since opening last August — Dudasik’s faith in humanity is clearly paying off. In an age of 10-minute pour-over coffees and lines at trendy bakeries that feel more like concert queues, Red Barn Bakery is a breath of fresh, flour-dusted air — just grab, pay (cash in a lock box or digitally), and go.
Must Try: The legendary Gold Bar — a rich, peanut butter-chocolate square that’s pure Albuquerque Public School nostalgia in every bite.
Relocated next to El Mesquite Market last November, Coda Bakery lives up to the buzz — and its 2025 James Beard nod for “Outstanding Baker.” Lines form early for Vietnamese specialties like green pandan cake, sesame balls, and pâté chaud — flaky pastries filled with slow-cooked pork. The all-day star is the bánh mì: savory pork, pickled veggies, fresh herbs, and just the right heat on crackly, house-baked bread that’s light and crisp. Pair it with a soursop or durian smoothie for a cultural culinary win.
Must Try: The Bánh Nho or cinnamon coconut raisin roll.
Dealing with celiac disease or a gluten sensitivity? No worries — The Bakehouse Off The Wheaten Path has you (deliciously) covered. This 100% celiac-safe gem, founded by Heidi Moir, proves indulgence doesn’t have to mean discomfort. “I started experimenting with making gluten-free comfort foods for my son over 20 years ago,” says Moir. “I now specialize in staples, like cinnamon rolls, that most people with wheat allergies haven’t had in a long time.” The bakery serves up over 20 rotating treats weekly, including vegan options — key lime tarts, strawberry rose donuts and raspberry white chocolate brownies. They also specialize in gluten-free celebrations, offering Instagram-worthy custom cakes made without nut flours or soy products — perfect for allergy-friendly birthdays and beyond. The vibe is warm, the flavors playful, and the baked goods? So good, even gluten-gourmands won’t miss a crumb.
Must Try: Try a bundt cake — flavors rotate every two days, like the S’mores bundt or Almond Red Apricot bundt.
Open since 1972, Golden Crown Panaderia is an Old Town Albuquerque legend with serious street cred — including a spot on Food & Wine’s Top 100 Bakeries list and an appearance on Food Network’s Diners, Drive-Ins and Dives show. Tucked off the plaza, this cozy panaderia feels like your abuela’s kitchen, serving up olfactory happiness the New Mexican way — where the air is rich with the aromas of green chile, anise, and fresh-baked bread. At the heart of it all is 87-year-old baker and co-owner Pratt Morales, still going strong and charming regulars daily. The place is also known for its playful twist on tradition like biscochitos in flavors like cappuccino and chocolate, bread sculptures (look for turkeys during the holidays!), and fruit-filled empanadas and flautas.
Must Try: Green chile bread — spicy, cheesy, and pure New Mexico magic. The bread is available 24/7 from New Mexico’s only bread ATM (no joke), along with the state’s official cookie and empanadas, because late-night carb cravings are sacred.
Ready for a flavor adventure? The Le Bakery, opened in April, isn’t afraid to push boundaries. The menu features French pastries and Vietnamese sandwiches, for a menu that’s as creative as it is crave-worthy. Think ube-coconut frangipane brioche, signature tiramisu coffee, and bánh mì with a twist.
Must Try: Almost too beautiful to eat, the spiral-shaped Strawberry Matcha Croissant is filled with earthy matcha cream and housemade strawberry jam then topped with fresh strawberries and matcha chocolate ganache.
Opened just days before the world shut down due to the pandemic, Ihatov is the quintessential American dream — built on determination, a successful Kickstarter campaign, a robust take-out business and, of course — ridiculously good sourdough bread and pastries. In Nob Hill, this charming café from Nobutoshi “Nobu” Mizushima and Yuko Kawashiwo has earned national buzz, including an “Outstanding Bakery” James Beard semi-finalist nod. “Our carefully crafted croissants and the buttermilk croissant featured in the New York Times are especially popular,” says Kawashiwo. With its calming coffee shop vibe and bold bakes, Ihatov — named after Japanese author Kenji Miyazawa’s imagined “dreamland” — is proof that artful passion and pastry make a beautiful pair.
Must Try: The Nigella Sativa baguette, slow-cooked in the oven with freshly ground spices, caramelized onions and topped with black onion seeds, is a flavor-packed standout. But don’t skip the newest addition: the Fruit Croissando, a made-to-order fruit and fresh cream filled croissant.
Where else can you score a grapefruit cruffin, artichoke danish, strawberry shortcake croissant toast, cocoa crispy cookie and more — all from a tiny walk-up window that draws lines before 8 a.m.? Burque Bakehouse has earned not one but two James Beard nominations for “Outstanding Bakery,” cementing its status as Albuquerque’s cult pastry destination and magnet for visiting food lovers. Co-owner and head baker Sarah Ciccotello crafts over 20 artisanal bakes weekly, some featuring seasonal produce, such as rhubarb, kumquats and asparagus. Come early and be ready to swap pastry recs with fellow devotees in line.
Must Try: The green chile croissant — a flaky masterpiece filled with roasted local chile, Tucumcari Jack cheese, house-made green chile jam, shallots, chile flakes, and dusted with tomato powder.
Story by Lanee Lee Styling by Julia Platt Leonard Photography by Tira Howard
This chile-rubbed beef and beans recipe is a true celebration of slow cooking, where time and gentle heat transform humble short ribs into deeply flavorful, fall-apart tender meat. The bold spice rub infuses every bite with smoky warmth, balanced by the earthy creaminess of pinto beans. Add your favorite garnishes—from crisp radishes to creamy avocado—and you’ve got a dish that feels equally at home on a festive table or a cozy night in.
Tender, spice-rubbed short ribs slow-cooked with pinto beans make a hearty, flavor-packed dish perfect for piling into warm tortillas with your favorite garnishes.
Ingredients
Scale
For the spice rub marinade:
1 tbsp ancho chile powder
¾ tsp cayenne (chile de arbol) powder
½ tsp ground coriander
½ tbsp ground cumin
½ tsp oregano
½ tbsp garlic powder
½ tbsp sugar
1 tsp salt
For the beef and beans:
2–2.5 lb bone-in beef short ribs, cut into 5–6 pieces
1 ½ tbsp olive oil
2 cups cooked pinto beans (see “master recipe”)
½ cup bean cooking liquid
For garnish:
Chopped radishes
Chopped avocado
Diced tomatoes
Crumbled cotija cheese
Sour cream
Chopped cilantro
Warm corn tortillas
Instructions
In a small bowl mix together the ancho chile, cayenne, coriander, cumin, oregano, garlic powder, sugar, and salt.
Rub the marinade into the ribs, covering all the sides thoroughly. Place in a container or resealable bag and refrigerate overnight.
The next day, take the ribs out of the refrigerator and allow to come to room temperature. Heat a frying pan over medium-high heat, add the olive oil and sear the ribs on all sides being careful not to let the spice mix burn.
Place the seared ribs in a slow cooker, add a cup of water, and cook until the meat is tender and falling off the bone, about 4 or more hours.
Take the meat out of the slow cooker, remove the bones and fat, shred the meat, and set aside. Pour the cooking juices into a glass measuring cup and refrigerate to allow the fat to solidify on the top. Discard the fat and place the remaining juices back in the slow cooker along with the shredded meat, the beans, and bean cooking liquid.
Heat until warm and season with salt as needed. Serve with your choice of garnishes.
Story and Recipe by Julia Platt Leonard Photography by Dave Bryce
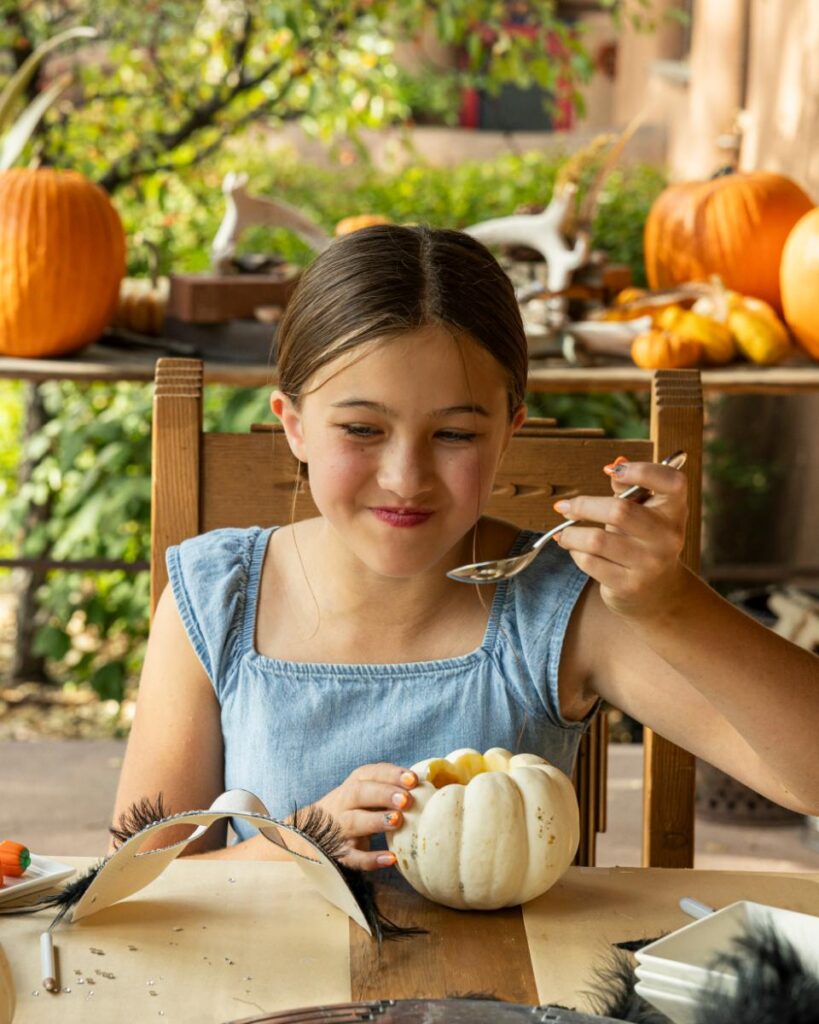
It was not lost on me that I had half a century on the tweens I hosted at my home for a pumpkin carving party. To them, I must have seemed somewhere in age between the pyramids at Giza and the signing of the Magna Carta. But surely things haven’t changed that much since I spent Halloween racing around like an Olympian to score as many treats as possible?
How to Plan a Pumpkin Picking and Carving Party in New Mexico
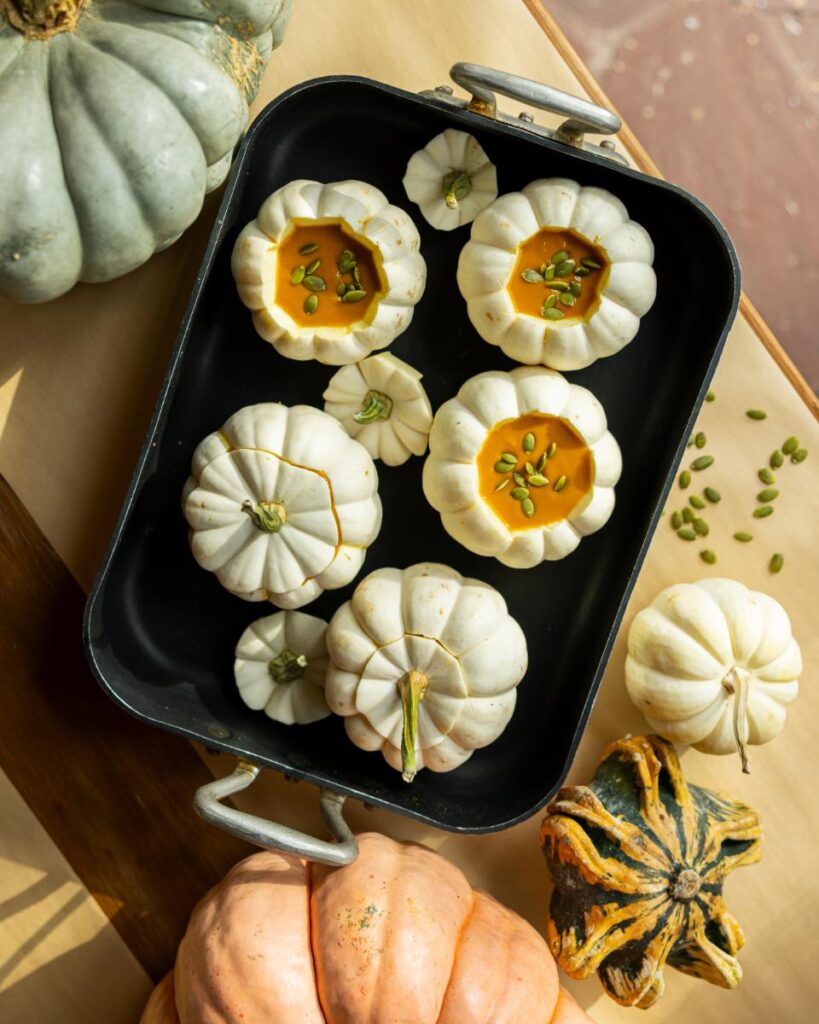
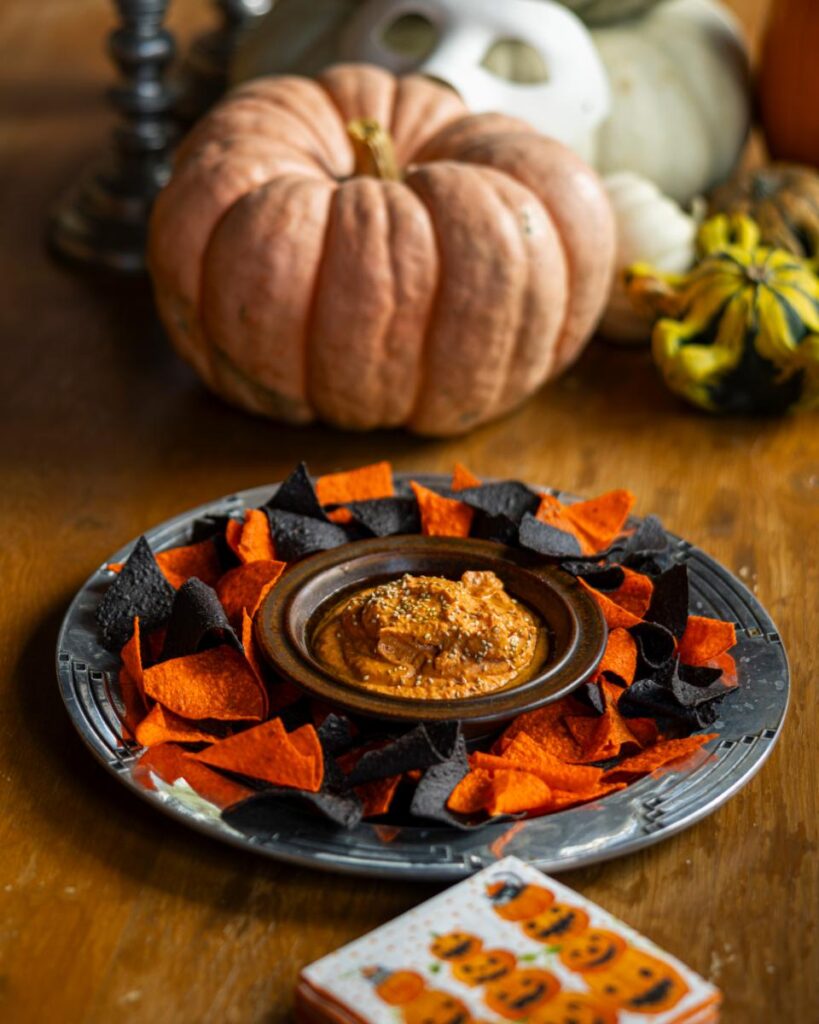
And excess, it turns out, is still the key to an autumnal celebration for not-quite teens. Bowls of candy dotted around the table ensured a suitable sugar spike. Yes, they sniffed out a red pepper-hued hummus as far too healthy, but copious amounts of orange and black tortilla chips softened the blow. Mini pumpkins – scooped out, then baked, and filled with a pumpkin bisque – even had a few converts.
The trick to keeping a group of tweens happy is lots – and I mean lots – of activities. Err on the side of too many and you’ll probably find they whip through them all without batting an eye. And be prepared for some activities to capture their imagination more than others. (The make-your-own mask with loads of ‘diamonds’ and rhinestones and topped off with fake eyelashes was far and away the favorite.)
Then there is the pumpkin carving itself. Don’t worry about scoring ‘perfect’ curcurbita, as the wonky ones are most prized. If there is a slightly disturbing trend to leave a knife embedded in the pumpkin like a B-slasher movie, pretend you don’t notice. It’s just “how they do it” nowadays.
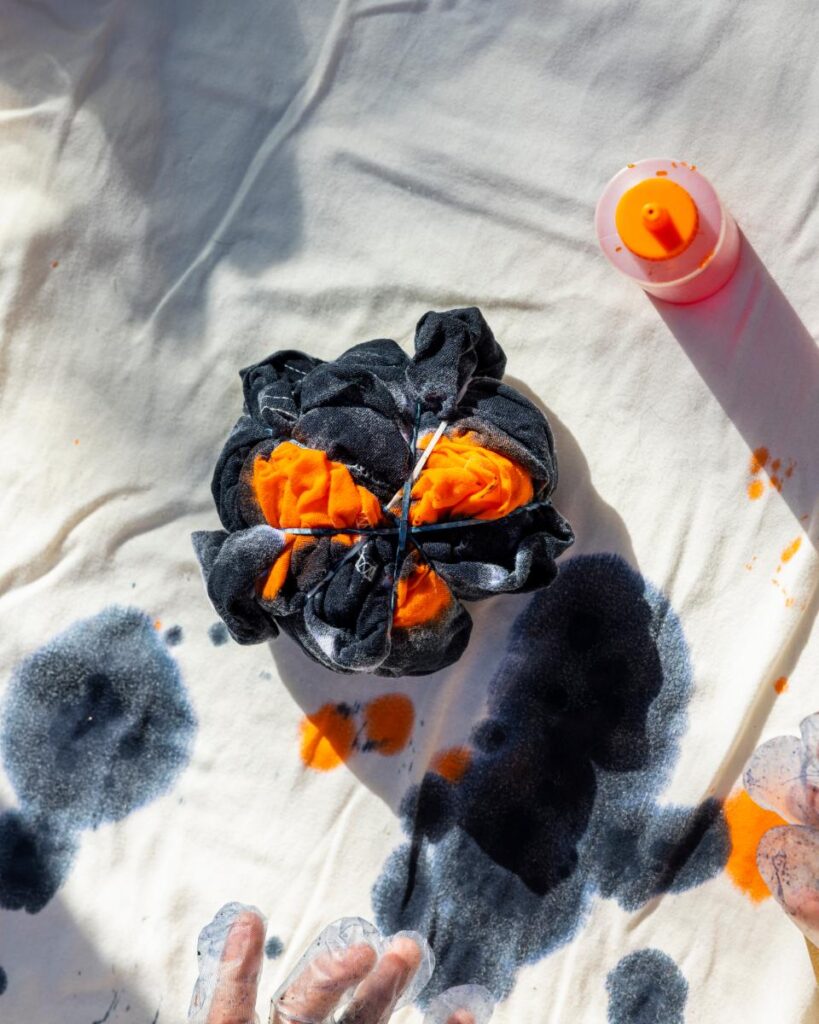
Decorating store-bought cookies with store-bought icing was a winner and an easy one to pull off without even having to pre-heat the oven. Tie-dying t-shirts in orange and black was perhaps overkill, but it meant I could dye one for myself, which was the goal all along.
Keep the candy coming and don’t eavesdrop on whispered conversations and you’ve got a winner. And if you play your cards right, a new tie-dye t-shirt to boot.
Special thanks to photographer Tira Howard, as well as her daughter Pippa and friends for taking part.
Where to Pick Pumpkins in New Mexico
Yes, you can snap up pumpkins at the supermarket but a visit to a pick-your-own farm is a lot more fun. Here are some spots where you can nab the perfect pumpkin, ideal for the spookiest of jack-o-lanterns.
Seasonal flowers, local provisions, farm produce, and of course pumpkins, abound. On weekends there are local musicians on hand, with beer and food trucks to keep you fed and watered. (Treat yourself by saying Texico, New Mexico out loud a few times!)
New Mexico’s thriving gallery scene moves from strength to strength with various artist shows through fall of 2025, and beyond. TABLE contributor Natassja Santistevan suggests some key shows to put on your list.
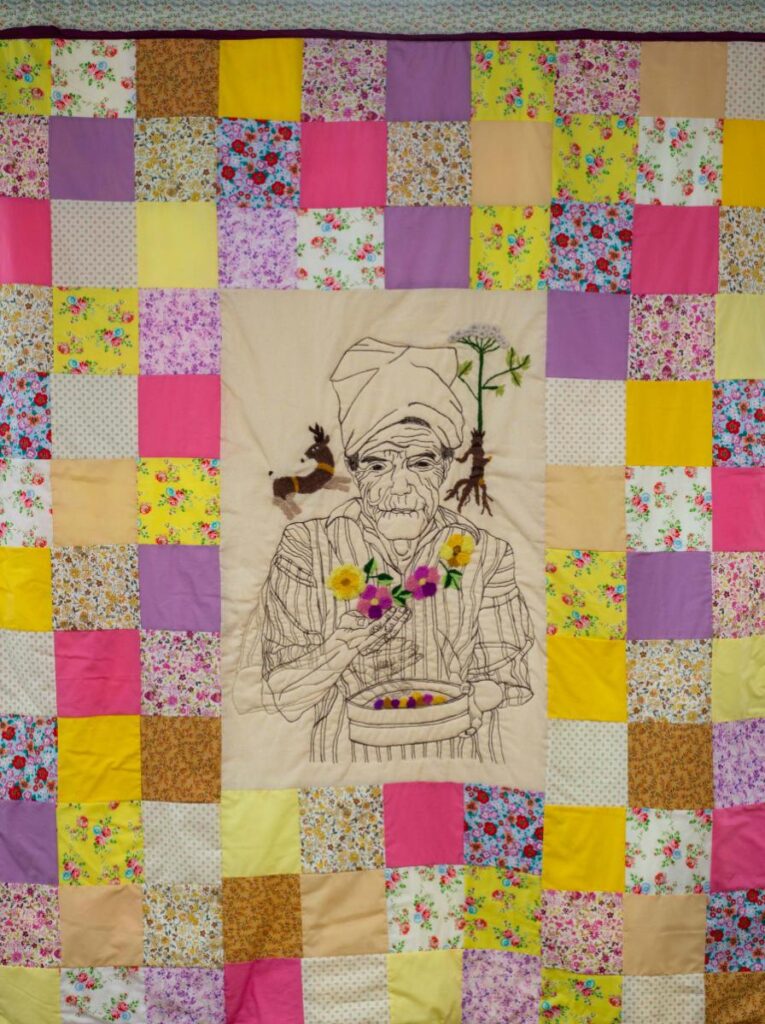
Jocelyn Salaz: Encountering Masculinity September 25 – November 1, 2025 Reception and Artist Talk: Saturday, October 18, 4:30 – 6:30 pm
Salaz’s intricate quilts and embroidered works open a dialogue on masculinity through the lens of gender as performance. Each textile piece becomes a vivid stage for storytelling, where layered fabric and thread convey complexity, vulnerability, and identity. With detailed handwork and bold imagery, Salaz transforms traditional craft into a powerful medium for exploring the fluid nature of gender roles. The result is both visually striking and deeply introspective.
Jackie Beckman: Shape of Things to Come Opens August 22, 2025 Artist reception: August 22, 5-8 pm
Beckman’s Shape of Things to Come invites viewers into a world of kiln-cast, cold-worked glass transformed by abstract urban imagery. Her shapes jumble together snapshots of buildings, bridges, and cityscapes into a vivid, emotional blur— capturing the beauty and chaos of metropolitan life. Experience the vibrant pulse of a city reimagined through glass.
Mud, Bone, Blood, Ice August 30, 2025 – November 30, 2025 Opening Reception: Saturday, August 30, 4:00 – 8:00 pm
A dynamic and immersive exploration of human life and the environmental relationships that come with it, this multi-disciplinary experience features four renowned artists: Johanna Case-Hofmeister, Perri Lynch Howard, Erin Ggaadimits Ivalu Gingrich (Koyukon Dené and Iñupiaq), and Robert King (Chahta Okla and Choctaw Nation of Oklahoma). Mud, Bone, Blood, and Ice uses an array of materials such as installation, sculpture, sound, and photography to embrace indigenous knowledge and challenging beliefs, allowing the viewer to reflect and observe the transformations of life.
Judy Tuwaletstiwa: Fracti.Totum August 30 – Oct. 4, 2025 Opening Reception, Saturday, August 30, 4-6 pm
Renowned artist Judy Tuwaletstiwa returns with Fracti.Totum, a powerful new collection featuring kiln-fired glass on canvas, mixed media, and works on paper. These pieces serve as quiet meditations on the human condition, where material and meaning are inseparable. Through layered surfaces and abstract forms, Tuwaletstiwa invites viewers into an ongoing conversation about memory, presence, and transformation. The work resonates as both artifact and witness — holding space for what words cannot fully express.
Dietmar Busse: The Forest Has 1000 Eyes September 20 – October 25, 2025 Artist Reception: September 20, 5-8 pm
Busse’s work delves into themes of family, identity, and transformation through vivid self-portraits, camera-less chemical paintings, and expressive bird imagery. An extension of his previous series, his work blends the personal with the symbolic in scenes that teeter between tenderness and turmoil. Layered with emotion and visual intensity, Busse’s portraits — both human and avian — convey vulnerability, performance, and the desire to be seen.
George Rodriguez crafts richly adorned ceramic figures that merge intricate detail with cultural storytelling. His vibrant sculptures often engage with sociopolitical themes, grounding personal expression in broader communal narratives. With bold color and symbolic ornamentation, Rodriguez breathes life into clay, transforming each piece into a compelling reflection of identity, tradition, and social dialogue.
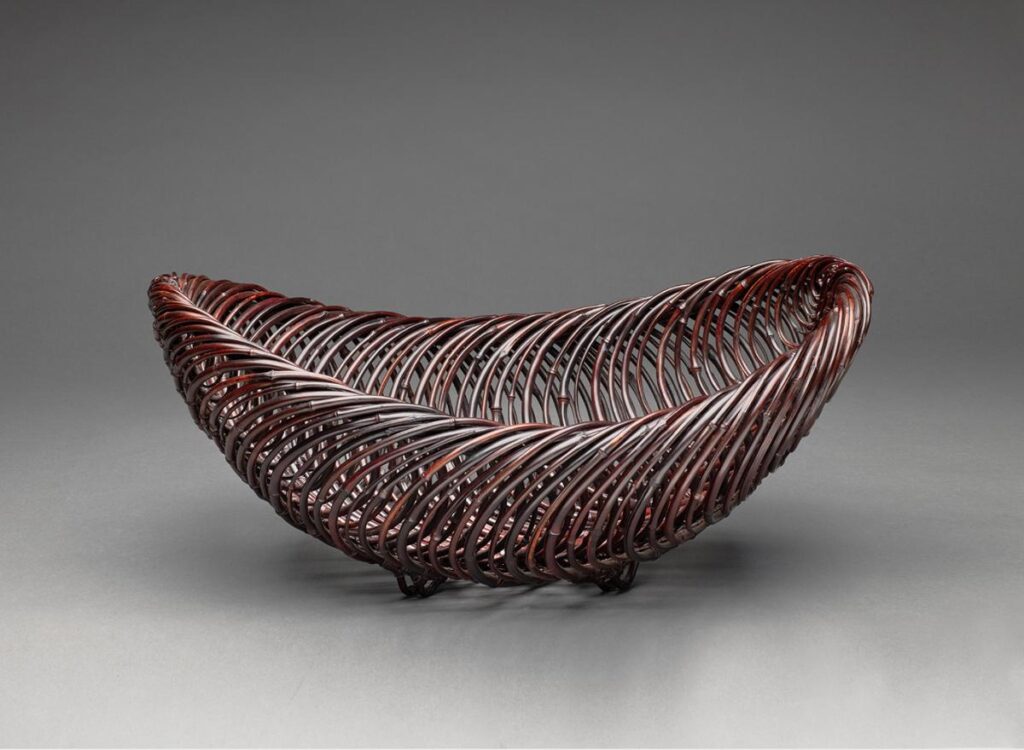
Suemura Shobun: A Retrospective August 29 – October 2, 2025
TAI Modern closes its season with a retrospective honoring Japanese bamboo master Suemura Shobun (1917–2000). Known for his signature seashell-inspired forms, Shobun skillfully incorporated black bamboo from Kyushu, creating works that reflect both innovation and tradition. Rooted in his Osaka heritage, this exhibition celebrates the legacy of a visionary artist whose elegant craftsmanship continues to resonate.
Story by Natassja Santistevan Photos of the Galleries
The idea is simple: food that is expertly cooked, doesn’t cost a fortune, and comes with a welcome that feels genuine, because it is. Heather Sellers – half of the husband and wife team at Horno – puts it simply, “fine food, not fine dining.” That’s a motto that she and Chef David Sellers live by.
Horno in Santa Fe Focuses on Delicious Food and Prime Hospitality
Horno opened in 2021. The owners saw an opportunity for an upscale, moderately priced restaurant in downtown Santa Fe. A place that would welcome visitors and locals alike. Somewhere you could find, as Chef David Sellers sees it, “the best food for not a crazy expensive price” with a wine list that matches that value. “And I think there is,” Sellers says, “because it worked.”
Sellers hails from the Northeast but his family comes from North Carolina, and he recognizes the influence of Southern cooking and hospitality on what he does at Horno. “I learned a lot, you know, from the Southern ways.” Growing up, he had a job as a dishwasher while in high school and then worked as a baker to help pay for college in New Hampshire.
He moved to California to become a professional musician but instead fell in love with cooking. Alice Waters and the innovative farm-to-table approach at Chez Panisse changed the way he thought about food. “Her stuff just really grabbed me,” he says. Eventually he made his way to Santa Fe where he landed a job at SantaCafe and worked his way up the ranks. It’s also where he met his wife Heather, who worked front of house.
It’s not surprising that the food and hospitality at Horno are so generous. Both Heather and David spent years working in non-profits and their commitment to giving back to their community is clear and powerful. They bring an unfussiness to Horno and an intimacy to dining that feels familial, whether you’re eating solo at the bar or with friends at a table inside or out.
Equal Parts Experience and Hard Work
While those indoor tables are reserved for online bookings, outdoors are available for walk-ins. It means that during warm weather a petite restaurant can increase capacity by thirty percent. “It’s a complete game changer for this restaurant, it’s huge,” Sellers says. It’s a smart move but then everything at Horno feels well-considered. The kitchen is minute so every inch is maximized and the flow of cooking – what’s cooked and how – is paramount. “Just as much thought goes into how you’re going to execute the dish as actually creating the dish,” he says. Located just off the bar, there is a calmness to the kitchen which is reflected in a calmness in the dining room. It feels effortless but like everything at Horno it is the result of equal parts experience and hard work.
When I asked Sellers who influenced his cooking career, he cited Alice Waters and Jeremiah Tower, who got his start at Chez Panisse. But he lights up most when he mentions Marc Vetri, chef and founder of Philadelphia’s critically acclaimed Vetri Cucina. “He’s just constantly refining. He never stops,” Sellers says. He adds, “He’s still completely authentic. He’s never sold out in anyway whatsoever. You know, it’s just awesome. I just love people like that.”
Listening to Sellers talk about Vetri, it strikes me that the same thing could be said about him, his approach, and the mission of Horno. It’s the idea that exceptional dining shouldn’t be reserved for only the very wealthy. Food, not flash. It’s as Heather puts it, “Food for the people.” And Sellers delivers that. One dish, one plate, one memorable meal at a time.
What’s on the Menu at Horno?
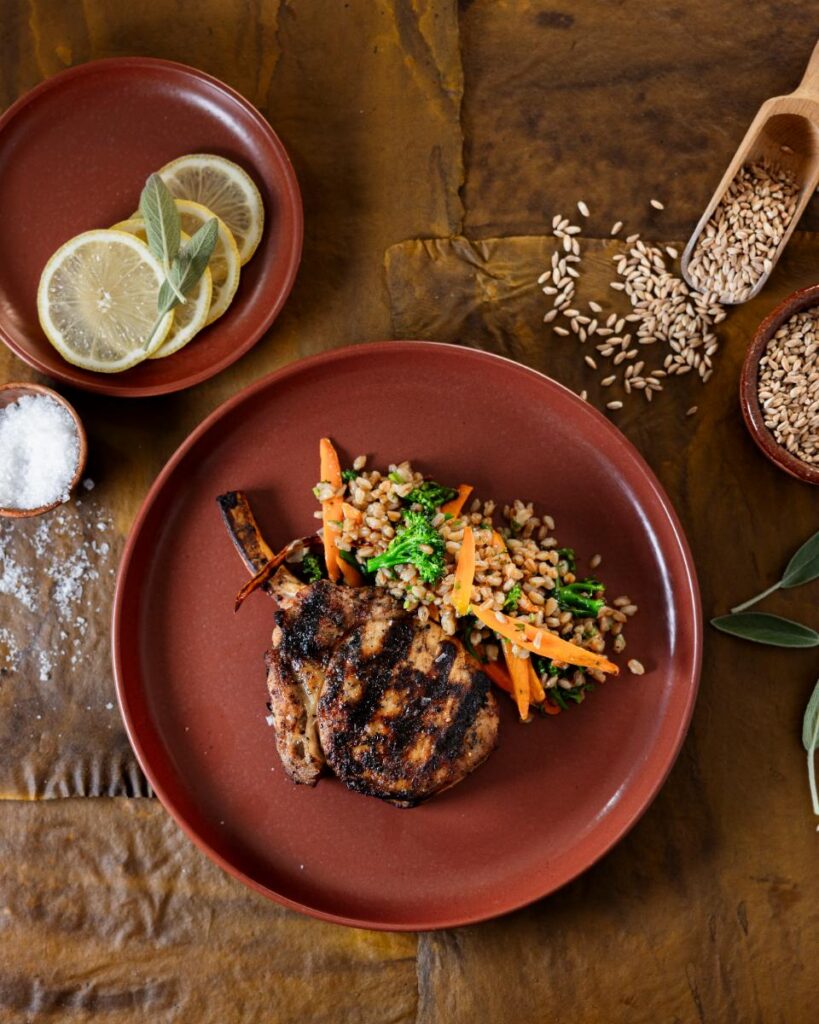
Grilled Duroc Saltimbocca Pork Chop
A twist on the classic Italian saltimbocca but instead of the traditional pork scallopine, Sellers opts for a much juicer, bone-in heritage breed Duroc pork chop. A mix of farro, broccoli, and baby carrots adds crunch, while a perfectly balanced caper, sage, and preserved lemon sauce adds not only creaminess from the butter but also zing from the lemon, taking this saltimbocca to exalted heights.
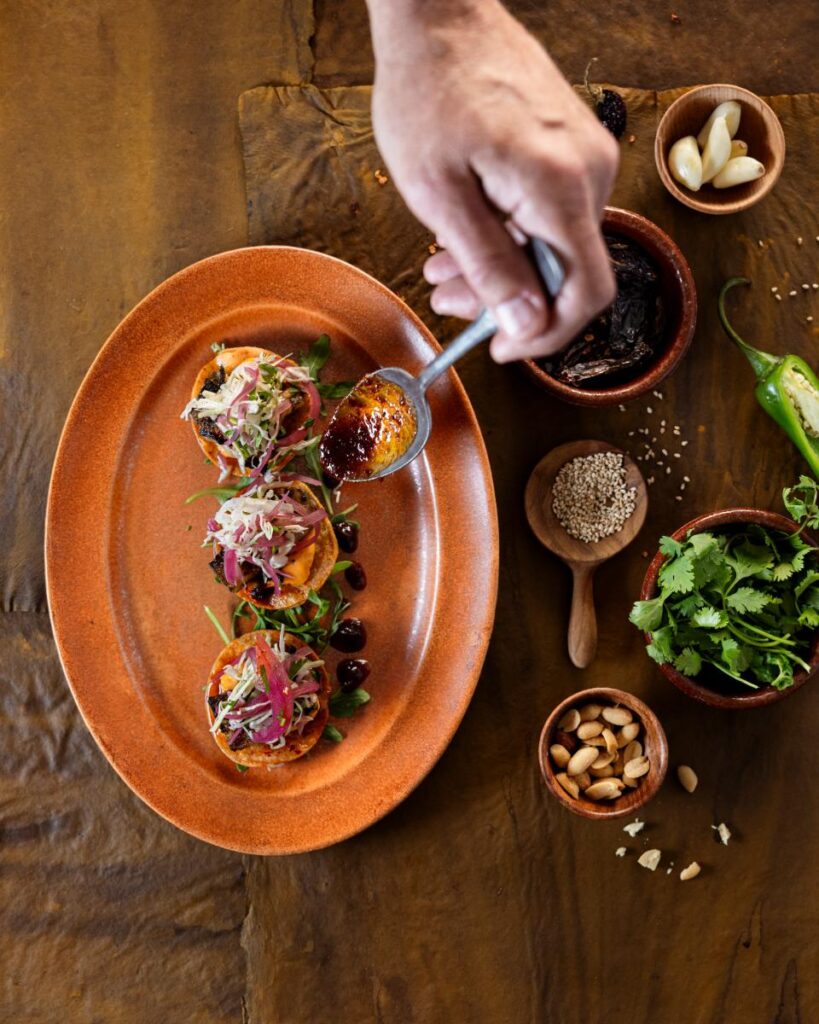
Grilled Pork Belly Tostadas with Sriracha Aioli and Salsa Macha
This dish is a close relative to one that won Horno the taco wars in Santa Fe. Like all dishes at Horno, it’s perfectly balanced and features one of Sellers’ favorites – salsa macha that he makes with toasted Morita chiles. “It’s a very complex, delicious sauce,” he says. The pork is braised first, then grilled so it has a crispy exterior and melting interior. A pickled onion salad breaks through the fat and adds a welcome bite of acidity.
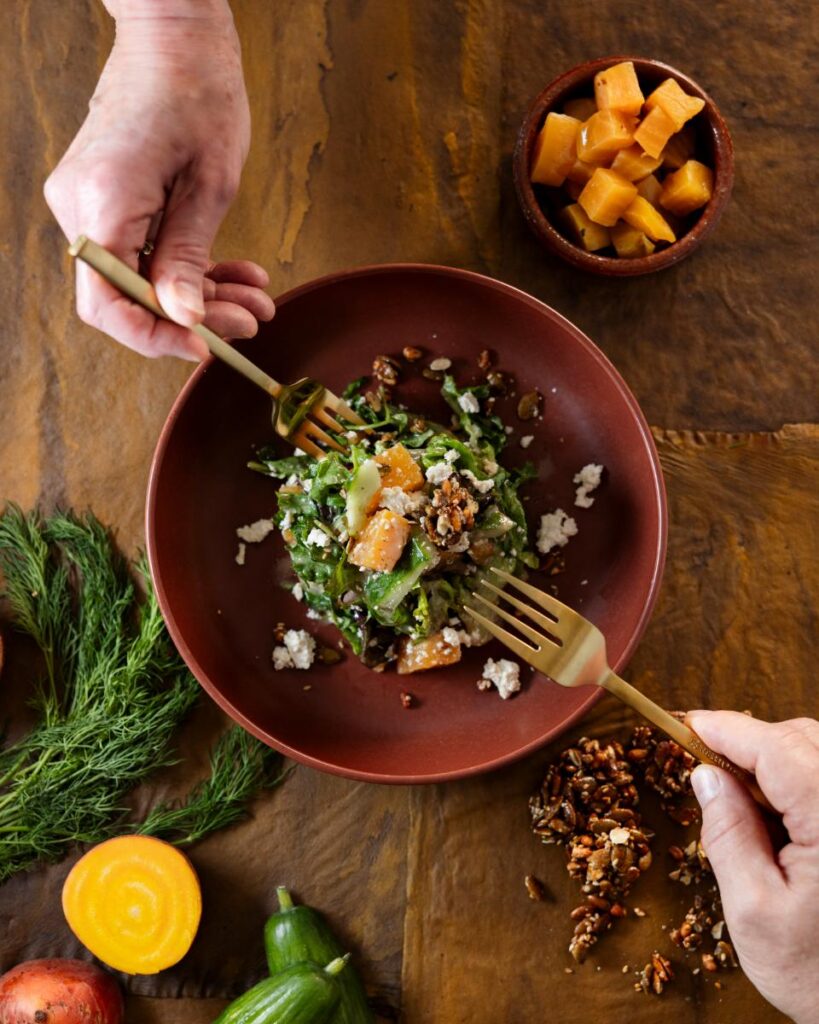
Roasted Beet with Pumpkin Seed-Piñon Granola and Tofu Feta
This vegan dish is a firm favorite of diners whether they’re vegan or not. Roasted yellow Chioggia beets are paired with hearty greens, cucumber, and then an addictive pumpkin seed and piñon granola that adds welcome crunch to the dish. Tofu ‘feta cheese’ (try it – you will be a convert) and a dill vinaigrette bring the whole dish together. It’s been on the menu since the day Horno opened and thankfully shows no sign of going anywhere soon.
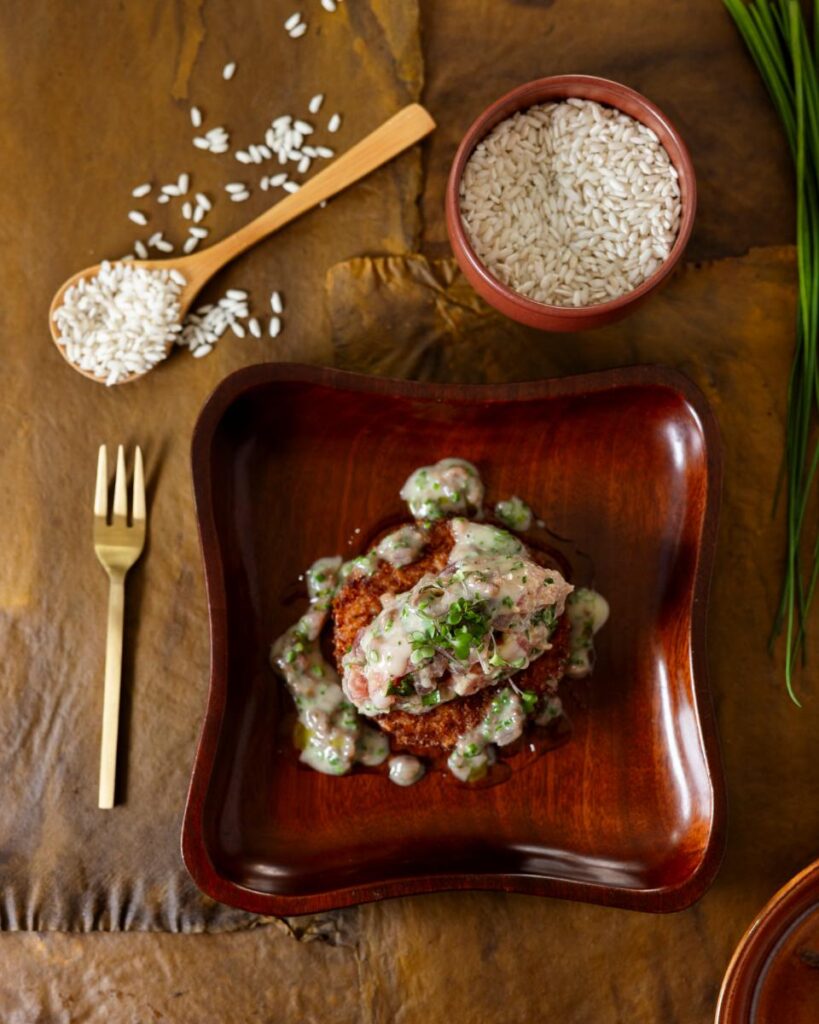
Tuna Tartare on a Crispy Risotto Cake with Warm Anchovy Butter
Start with the finest, sushi grade tuna, dice it, and then introduce it to ingredients normally seen in beef tartare: Dijon mustard, lemon juice, fresh herbs and olive oil. Serve it on top of a warm, crispy risotto cake and then anoint it liberally with an anchovy butter sauce. The result is a delightful play between hot and cold, “And it always kind of takes people back – they’re shocked at first – and then love it.”
Chocolate Tahini Torte with Almond Caramel
It’s rich, it’s elegant, and it’s vegan. Sellers creates culinary magic with his take on a chocolate torte that he makes with coconut oil and tahini – a paste made from ground sesame seeds – and a lush almond caramel. A strawberry coulis adds drama and a light counterpoint to the depth of the chocolate. It’s finished with vegan meringues for a dessert that is a fitting end to a sublime meal.
Words by Julia Platt Leonard Photography by Tira Howard
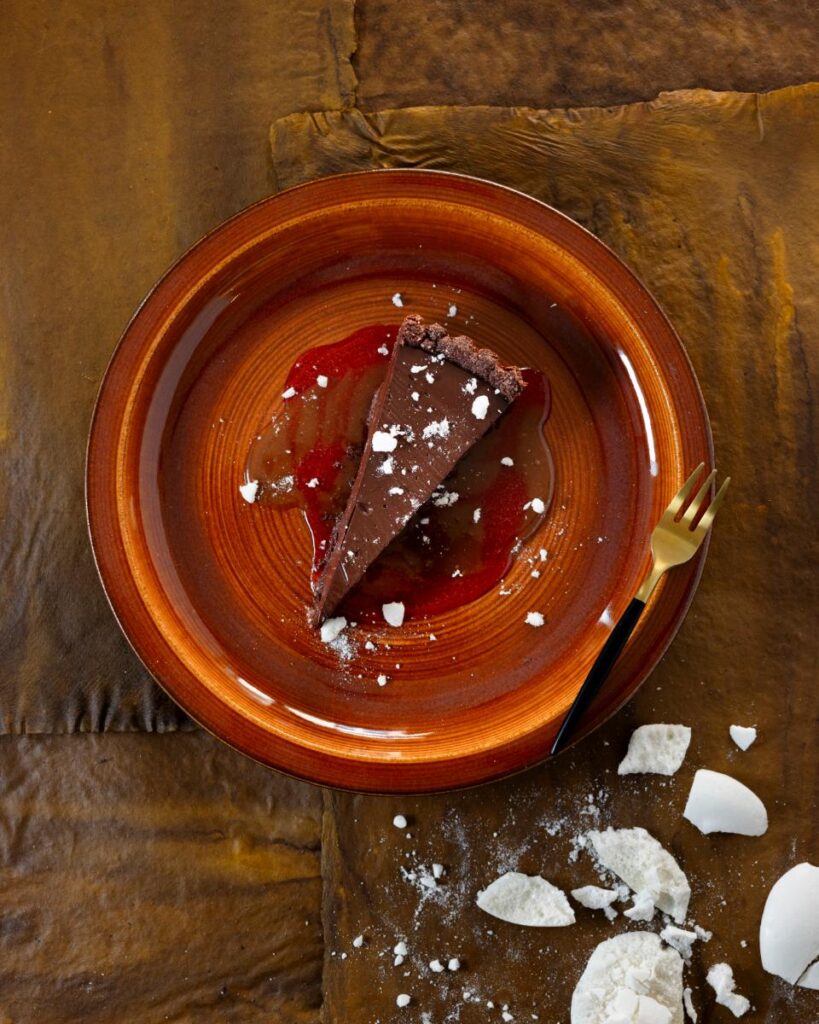
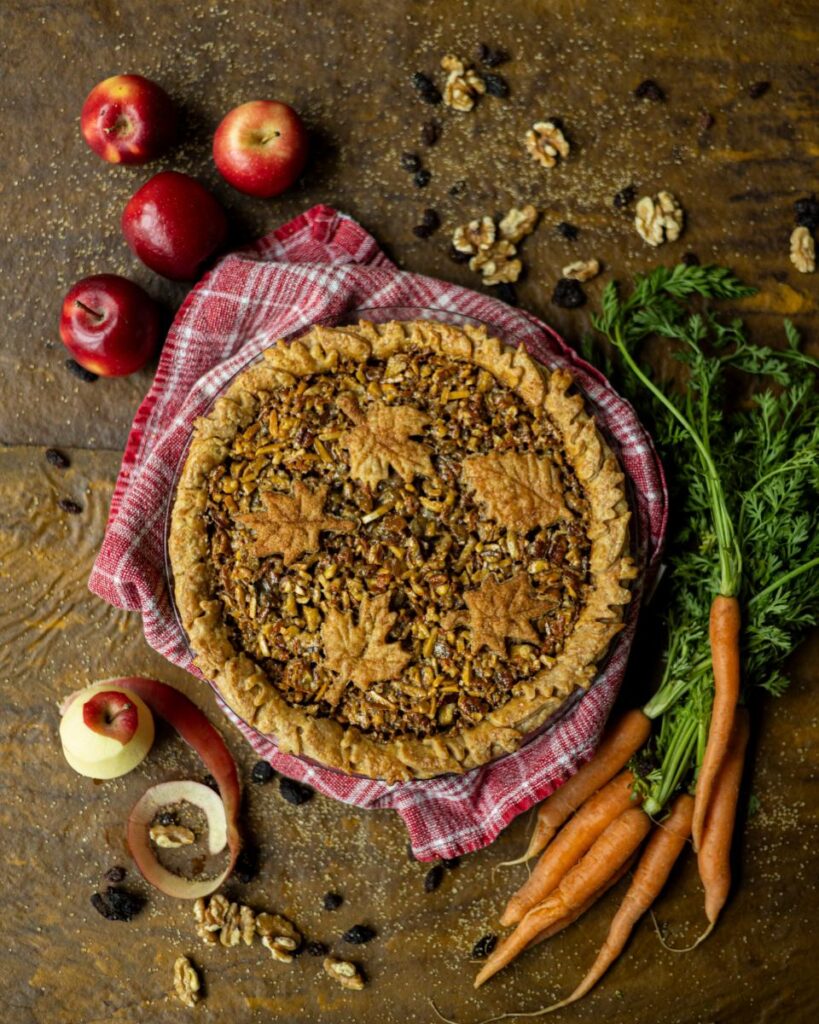
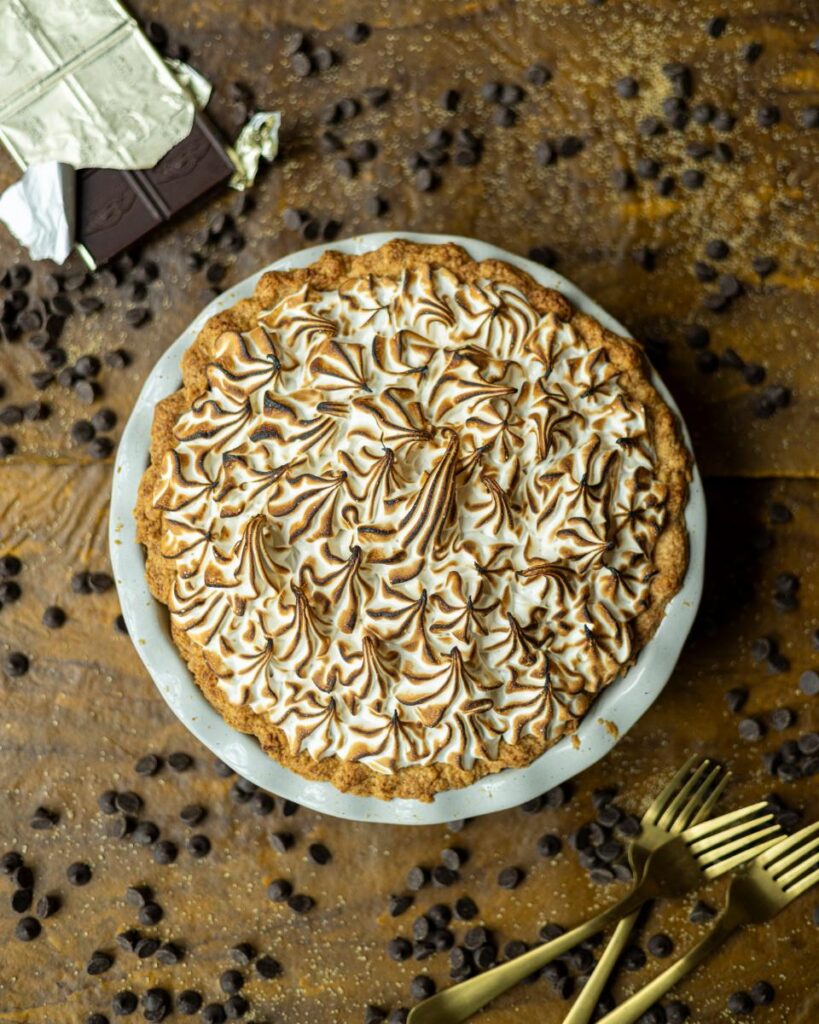
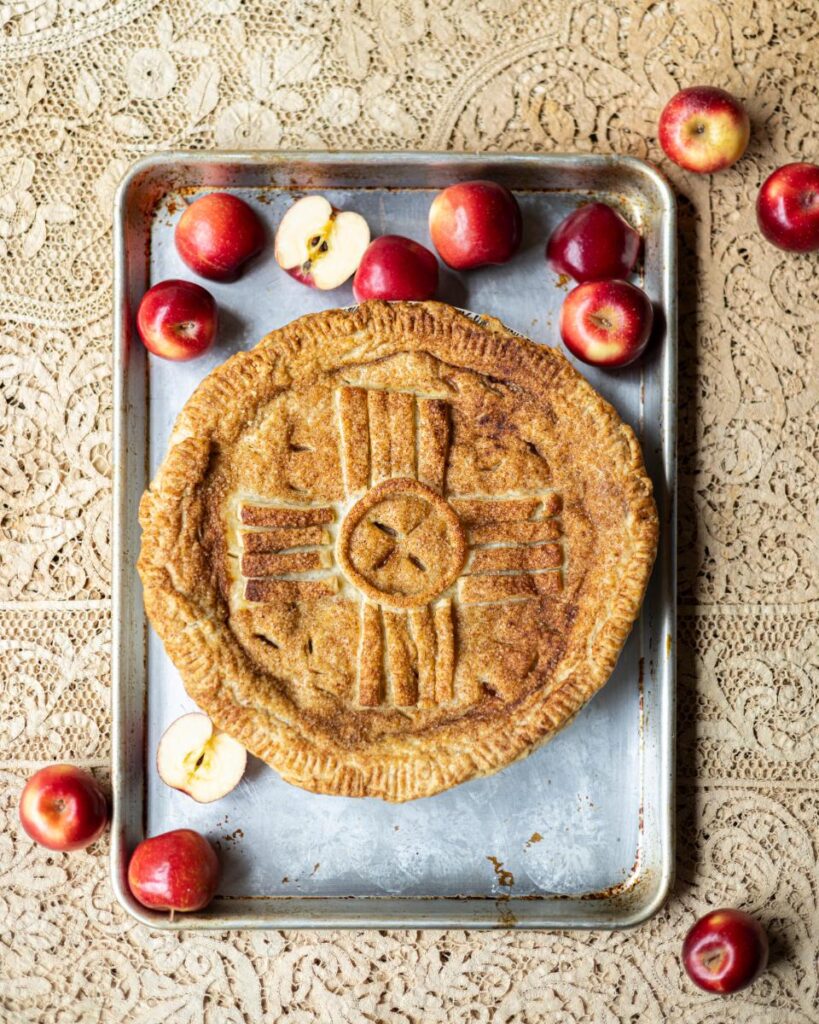
As American as apple pie, or huckleberry or blueberry, or key lime piled high with whipped cream, or perhaps pumpkin glazed with glossy caramel? How about dark chocolate pudding enveloped in whipped meringue? Or pecan with the subtle warmth of New Mexican red chile, or nuts with bourbon, apples, carrots and a touch of maple syrup?
Pie-Eyed and Happy About It!
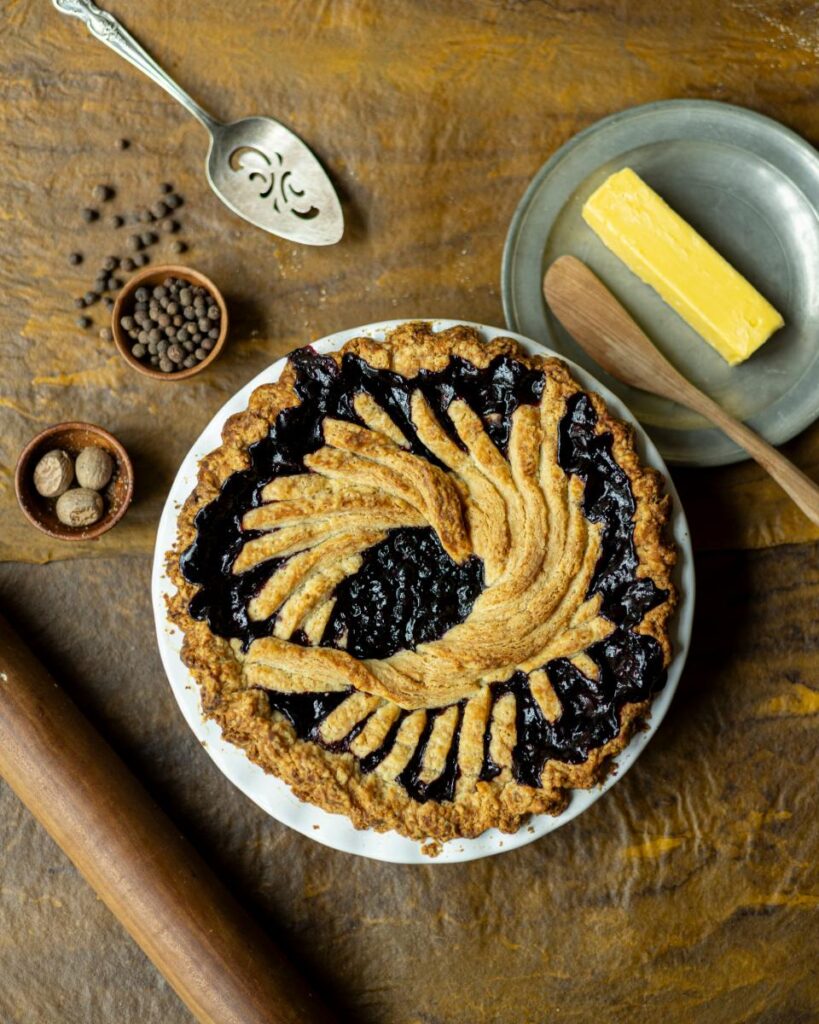
We brought together 10 passionate pie people at the Nuevo Mexicano Heritage Arts Museum for our TABLE Magazine pie bake-off. Half of our 10 were pros and half were home bakers. They came from all backgrounds and walks of life, united in pastry. Gil Garduño, founder of New Mexico Gastronome blog and website, and one of our state’s most astute eaters, joined me to judge this jewel-like collection of pastries to award the Pros’ Choice Awards. A small group of the public were able to select People’s Choice winners at this pie-palooza, too. Enjoy the photos, or make your own life a little sweeter by re-creating one of their recipes.
TABLE Magazine’s Pie Bake-Off Contestants and Recipes
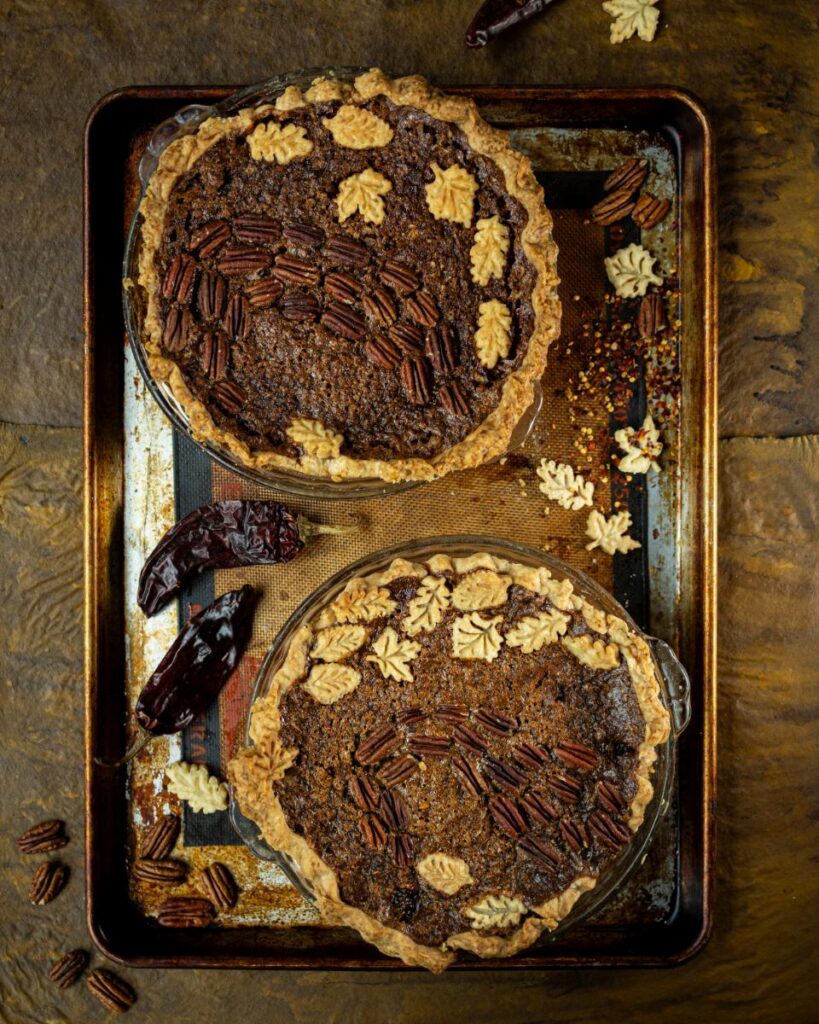
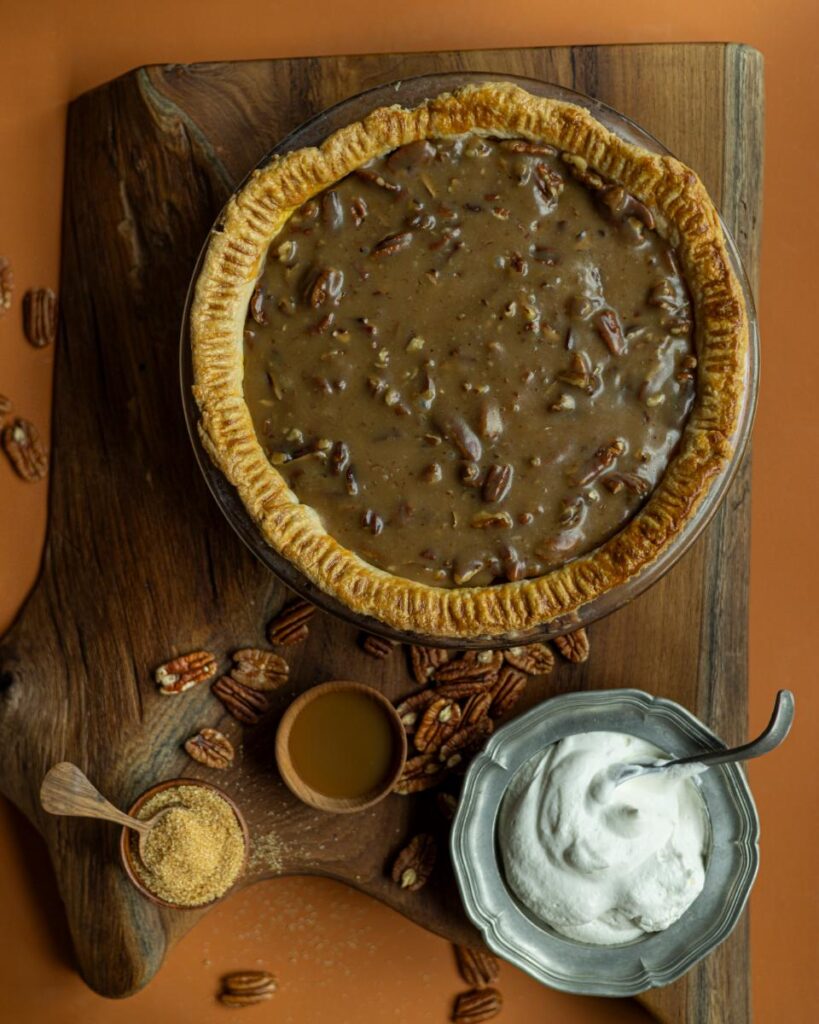
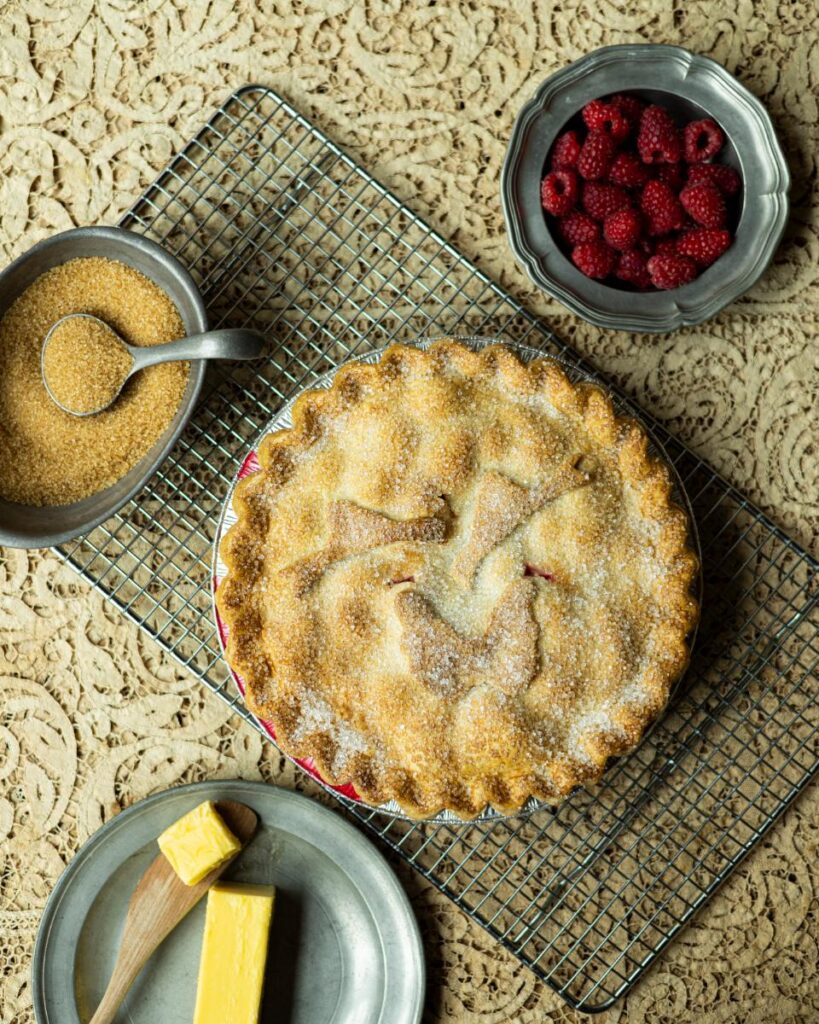
Sara Breckenridge-Sproat’s winning pie was pecan! She scented it with red chile in a buttery crust enhanced with sweet little pastry autumn leaves. Her husband David loves heat with sweet. By adding our local hot stuff to her classic holiday pecan pie, and this winning combo was born.
Sara retired to Santa Fe in 2017 after three decades of military service as an Army nurse with the rank of Colonel. She met her husband, an Army family medicine practitioner, in her first post, at Fort Lewis in Washington State. When Sara married, a savvy friend implored her to master pie crusts. Her friend stated that they weren’t as tough to prepare as they were made out to be. And that the results were a heck of a lot more delicious than tasteless frozen grocery store versions. Sara has been baking her own buttery pie shells ever since, along with cookies, and a crusty sourdough too. She doubled down on baking during Covid and says that the couple hasn’t bought commercial bread since 2020.
A Santa Fe friend whose young son Susan Farrington Schepens babysat saw our call for bakers and urged Susan to enter. Susan has been baking since her childhood in Saratoga Springs, NY, where her mom and grandmother were her baker models. In high school, she enrolled in a “trades” curriculum her junior and senior years, and loved the baking coursework. After relocating to Knoxville, TN, she took more pastry classes for the sheer enjoyment of it, later passing that love on to her two daughters, Erika and Kara. Initially, it was Kara who showed the most interest and talent for baking.
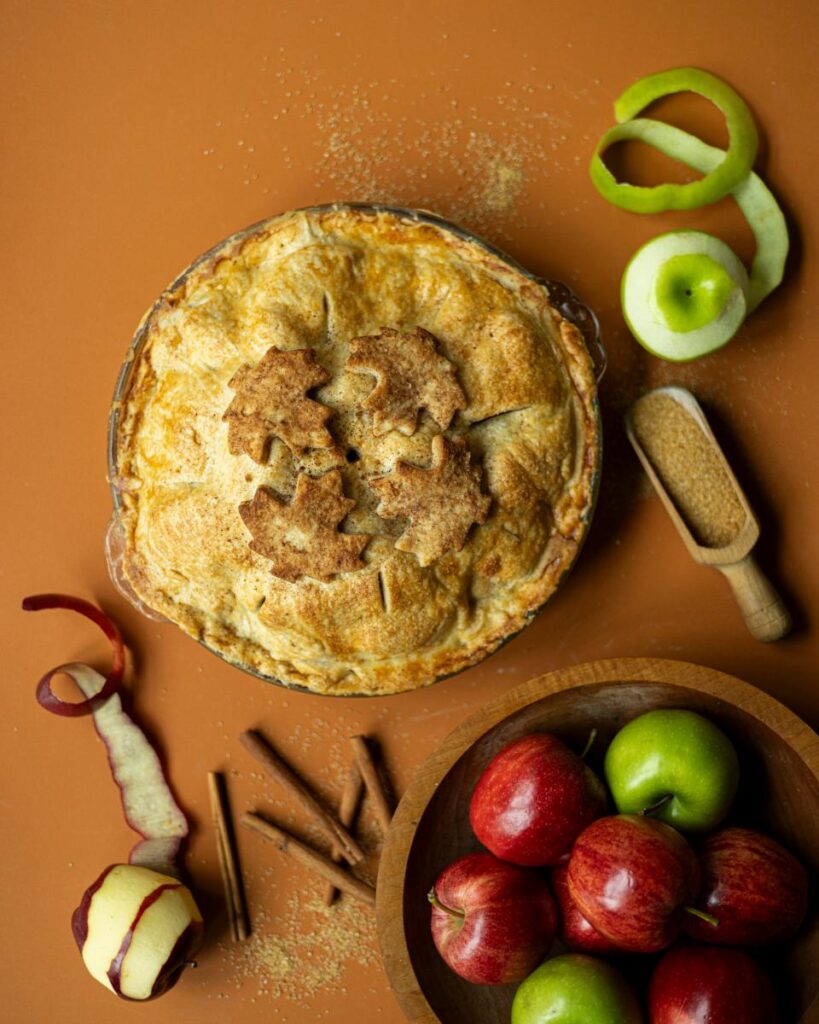
When a horrible accident took Kara’s life, Susan abruptly stopped baking, because the associated memories were simply too painful. After Susan and her husband moved to Santa Fe nine years ago, she had an inkling that a return to baking might help her heal. She took some classes in Santa Fe Community College’s Culinary Arts Program and, indeed, did find making pie crust therapeutic. Her favorite pies are autumnal ones like pecan and the beautifully domed apple pie she made for us. Susan notes that her daughter Erika has now become an avid baker of bread. Susan feels blessed that the family tradition will indeed continue on.
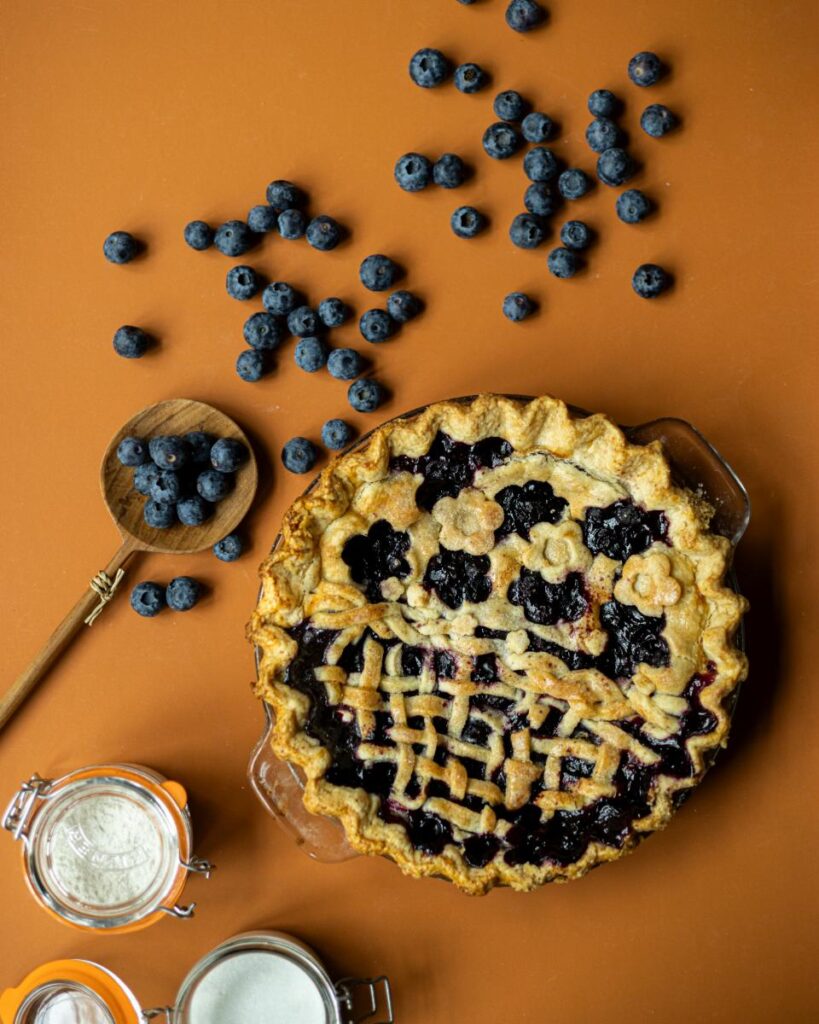
Dr. Ron Bronitsky grew up in Albuquerque helping his mother bake. Some 30 years ago, he entered a blueberry pie in the New Mexico State Fair’s baking competition. He was stunned and delighted when he won a blue ribbon. That hooked him on baking competitions. He was a contestant on the Netflix series, Blue Ribbon Baking Championship. Ron says his goal was to avoid being the first person eliminated. He accomplished that, and then some.
The retired pulmonary critical care specialist mentions that his science background has played a role in his continual experimentation with baking formulas and ingredients and their proportions. He created his “autumn harvest” pie just for this event. It was popular for its creative and delicious mix of nuts, apples, carrots, maple syrup, and more. His flaky crust earned praise, too. Ron is also the reigning grand champion, three years running, of the fall Pie Town Pie Festival.
Brad Furry was an impressionable 11-year-old when a chocolate mousse in Paris opened his mind to the world of cooking and baking. He had been sent by his parents from Durango to live with some French friends for the school year. It was a rough adjustment initially, given his age and the wildly different environments. However, he credits that year with being the best life-altering experience ever. The mother in his French family taught him to make her deeply dark and satisfying mousse. He has used her recipe ever since.
Now a Santa Fe realtor and a rancher with his husband Bradyn, Brad often bakes for his four sons as well as friends who look forward to his Christmas Bundt cakes, in particular. His “rich, decadent, indulgent” chocolate pudding pie with stunning swirled meringue has a charming story behind it. At the time that Bunny Terry was stepping down as longtime chair of the New Mexico Cancer Foundation, Brad heard her reminiscing about the chocolate pie her late mother used to make. He resolved to make a similar pie to thank Bunny for her years of volunteer work. That the pie had its genesis in the mousse of decades ago made it all the sweeter. We were thrilled he recreated it for TABLE.
Missy Auge is employed in the hospitality trade but, not as a baker or food professional. She’s currently the wine director working at Bishops’ Lodge Resort in Tesuque. Credit a father who loved apple pie, and a sister whose Rio Rancho fruit trees are always prolific, for Missy’s version of the all-American favorite. Growing up in Belen, she also had two grandmothers who baked, one of whom was a local home economics instructor.
Missy moved to New York after college but found her way back to New Mexico in her mid-20s. She had a several-year run as owner of modern Italian eatery, Tanti Luce, in downtown Santa Fe. Her chef at the time was very “into” wine, which became her passion as well. In her professional life today, she’s certified through the Court of Masters as Wine Director/Sommelier for Bishop’s Lodge. Tasters praised her pie’s balance of sweet and tart fruit flavors, along with its flaky crust. Her apple pie was described as a “classic autumn comfort — simple, elegant, rustic.”
Unlike most of our bakers, Myra Dalland was not drawn to baking through family, or even early in life. She was in her 20s in New York and had taken a restaurant server job. On several occasions, when the chef was working on new dishes, he asked the staff to taste when he thought “something” was missing. She tasted and rather meekly made a few suggestions. The chef thought she was right in each instance and eventually exclaimed that she should become a cooking consultant.
When she moved to Tesuque a decade ago, she started a business making cookies that were gluten-free and low on the glycemic index, but high in flavor and texture. She eventually expanded into individual-size chicken-green chile pies as well as dessert pies. She sold them through Santa Fe area grocery stores until her recent retirement. The judges particularly loved the caramel-pecan topping she added to her pumpkin pie.
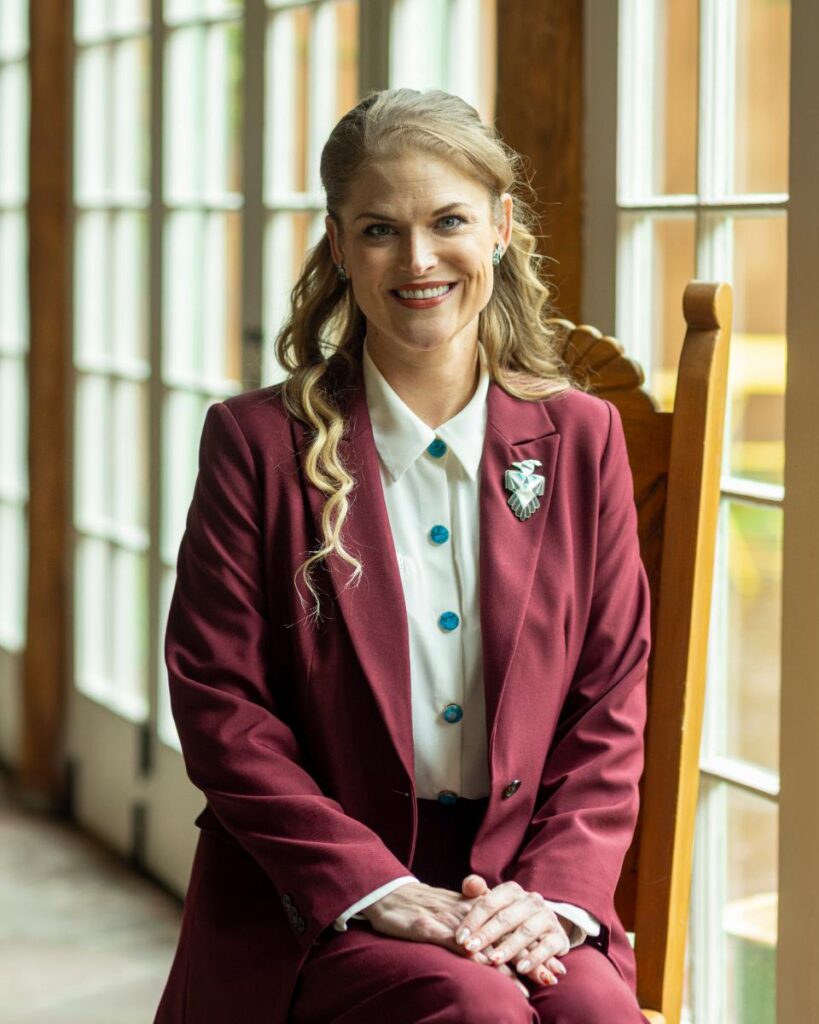
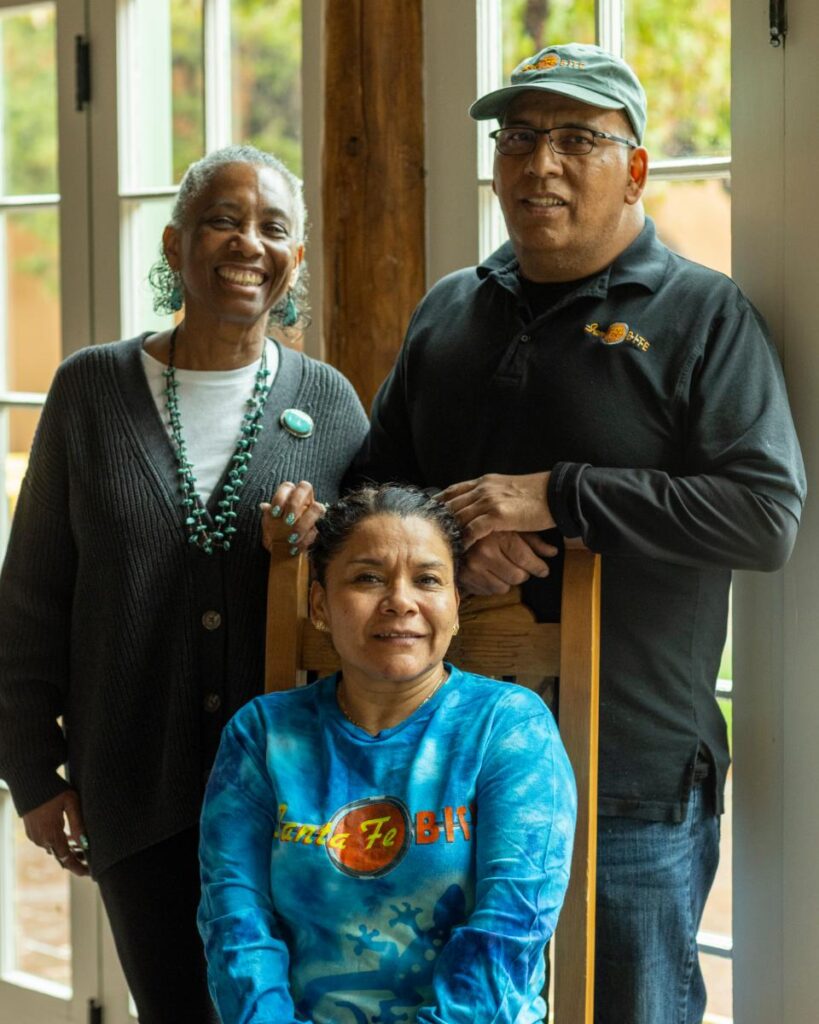
Maribel Ortiz credits her mentor, former Santa Fe Bite owner, Bonnie Eckre, with teaching her all about baking. “Mari” started with the well-known eatery as a busser and food runner but was fascinated with the array of pies and cakes that Bonnie whipped up in the kitchen while husband John cooked the Bite’s famous burgers. By the time the Eckres transferred ownership to current partners, Mari’s husband Armando and Angela Mason, Mari had fully taken over the baking.
Maribel Ortiz pictured with her husband Armando Rives and Angela Mason, co-owners of Santa Fe Bites
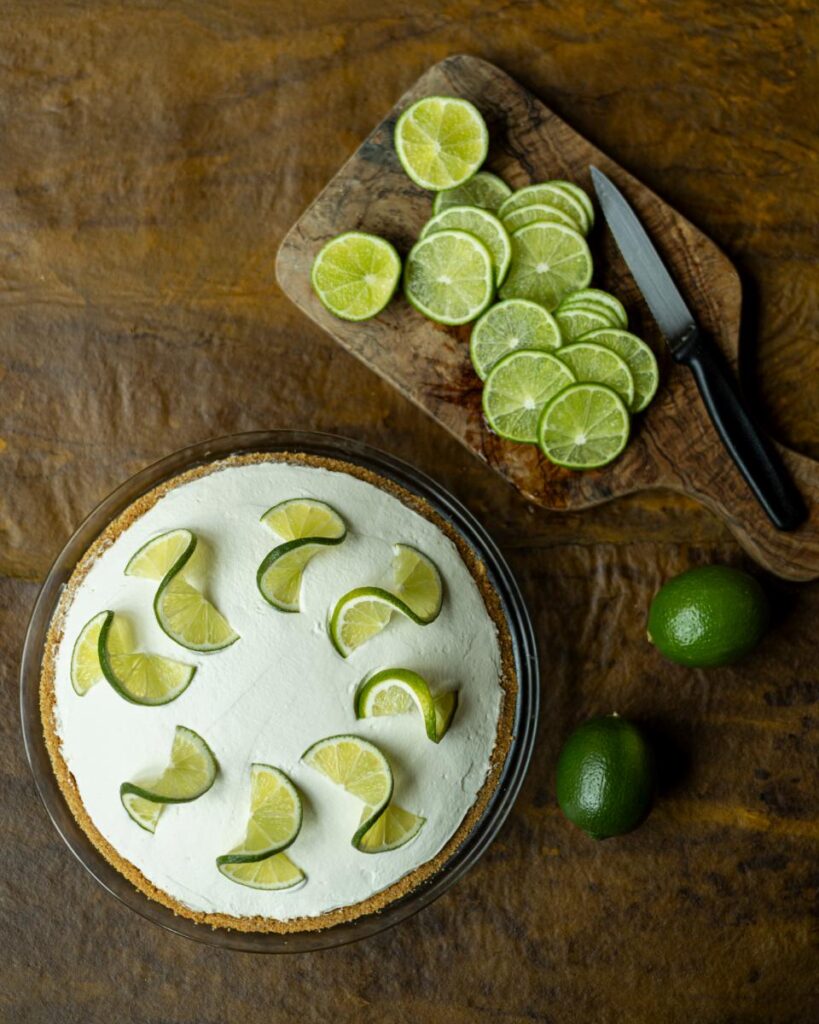
Mari and Armando first met while working at La Fonda on the Plaza. They had both come to Santa Fe from Coahuila, Mexico but she laughs that she was a country girl and he, a city kid. Today, they have a daughter who also works with them at Santa Fe Bite. Mari particularly likes making cream pies, such as the key lime dream she whipped up for our competition. Judges found it “perfection in sight,” and “nicely tart, the essence of key lime pie.”
Growing up in Chicago, Rebecca Freeman first cooked and baked with her Italian grandmother. At an early age, she decided to tackle a bûche de noël as a baking project, and the satisfaction she received from that experience hooked her. She graduated with a Culinary Arts degree from Kendall College in Chicago and staged at restaurants there including Alinea. Rebecca came to Santa Fe in 2012 for what was to be a three-day visit with her sister. While in town, she landed a job at Geronimo and never went back. She also worked as a pastry chef at Compound Restaurant and later at The Club at Las Campanas. In 2023, Rebecca was honored as the American Culinary Federation’s National Pastry Chef of the Year. These days, she’s Executive Pastry Chef for both Coyote Café and Santacafé.
Rebecca loves making pies at home and always bakes a fruit-filled one for her husband’s birthday. She chose to flavor her huckleberry pie with merlot wine for its red fruit-forward notes. Judges especially complimented the pie’s “magnificent” butter crust.
Keegan Crumpacker grew up in the family business. His mom Amy started Crumpacker’s in the mid-1980s, first making pies and pastries to sell at the Santa Fe Farmers’ Market. For a large portion of his childhood, the family kitchen was also the certified commercial kitchen for the business, so he thought it perfectly normal to grow up with a restaurant-style range and walk-in freezer. The buttery pie dough recipe, the crimp of its edge, and the topping of turbinado sugar are all signatures that date back to Keegan’s great-grandmother. The raspberry-rhubarb pie he made for this event was one of the very first pies the family created for market because they had a huge rhubarb patch, and several farmers raised raspberries, which made a beautiful rosy filling together.
Keegan works as a Cooking with Kids educator and coordinator and has run the bakery business now for nearly two decades. He sells the pies — both sweet and chicken with green chile — breads, cookies, preserves, cold-pressed juices and more at the Saturday Santa Fe Farmers’ Market, and during the summer months, at the Thursday Los Alamos Farmers’ Market and Albuquerque’s Sunday Railyard Market. Amy still helps out baking pies by hand a couple of days each week, and now Keegan’s teenage daughter is getting into baking, too.
As a small child growing up in Santa Fe, Karina Lira watched her mother make elaborate cakes for quinceañeras and weddings. She was often enlisted as the dishwasher for those projects. As Karina grew up, she got to help with the preparations, which led her to enroll in the Santa Fe Culinary Arts Program, where she recently graduated. In the interim, she has worked as a pastry chef at Four Seasons Rancho Encantado, and now at Harry’s Roadhouse, where she makes scads of layer cakes and pies, like the luscious blueberry she prepared for us. When she’s not baking, she loves hiking around her Rio Rancho neighborhood with her husband and their dog, Deebo.
Special thanks to the Nuevo Mexicano Heritage Arts Museum for hosting us as they celebrate the 100th anniversary of the Spanish Colonial Arts Museum.
Story by Cheryl Alters Jamison Photos by Tira Howard Food Styling by Julia Platt Leonard Shot on location at the Nuevo Mexicano Heritage Arts Museum
There is a welcome bite in the air. We gladly turn our thoughts to cozy fires and leisurely dinners with our nearest and dearest. We also turn our thoughts to local shops in New Mexico! Where else would we find eye-catching finery to wear as well as the season’s must-haves to make home and hearth a welcome retreat.
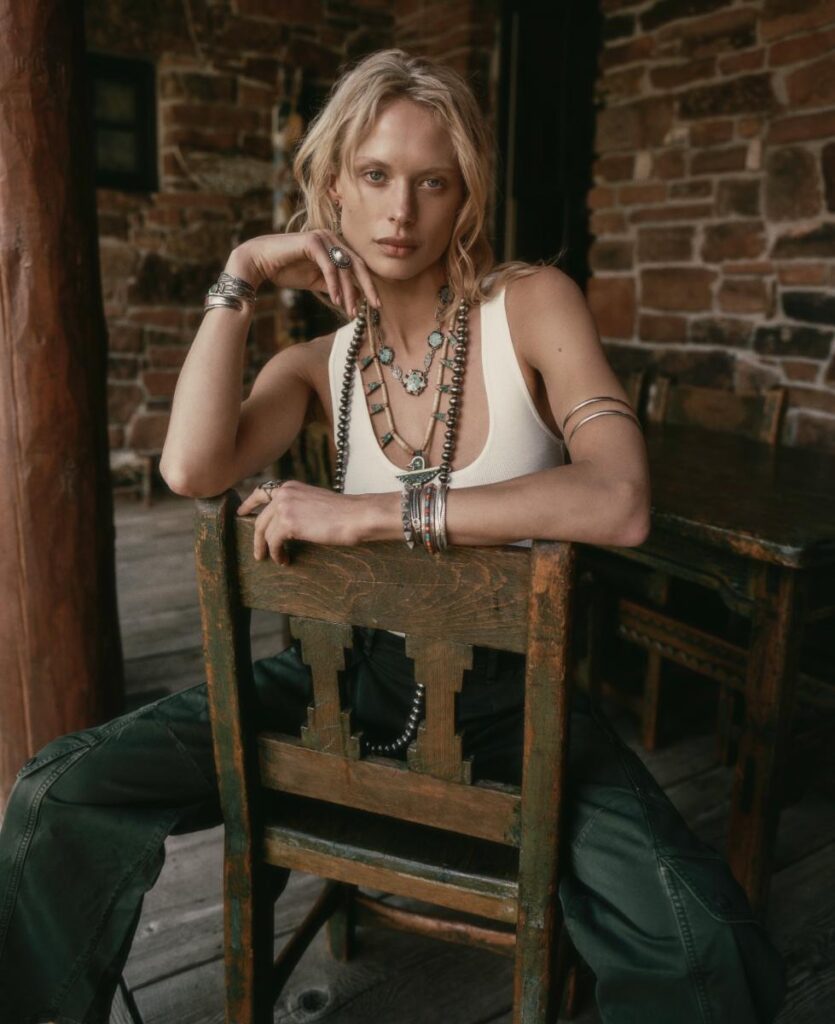
For over 50 years, Peyote Bird has been the source for outstanding vintage and contemporary jewelry. Their mission is to celebrate the work of the finest artisans of the Southwest. Layered groupings of necklaces and cuffs create a timeless look that honors craftsmanship and timeless design.
Channel the spirit of the Southwest with this classic denim shirt with intricate golden embroidery. This rugged and refined design goes easily from the rodeo to a night out on the town.
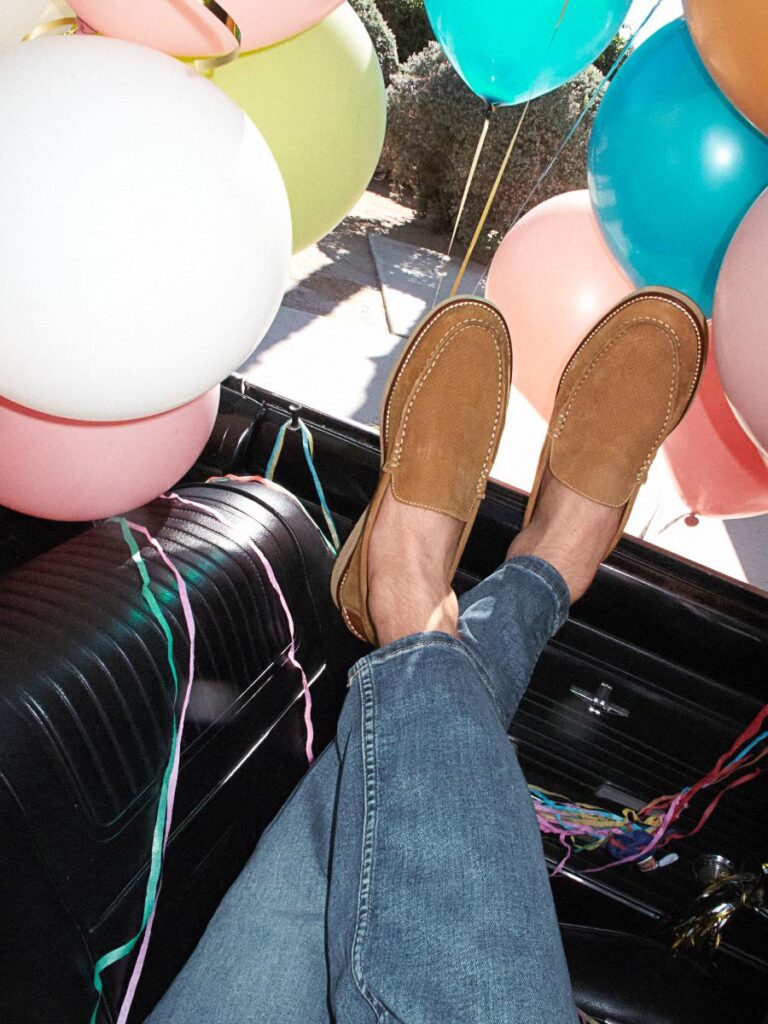
For 40 years, Goler Fine Imported Shoes has been the go-to Santa Fe boutique for shoes. They also offer clothing and accessories for both men and women. Go funky or keep it classic, like these suede loafers.
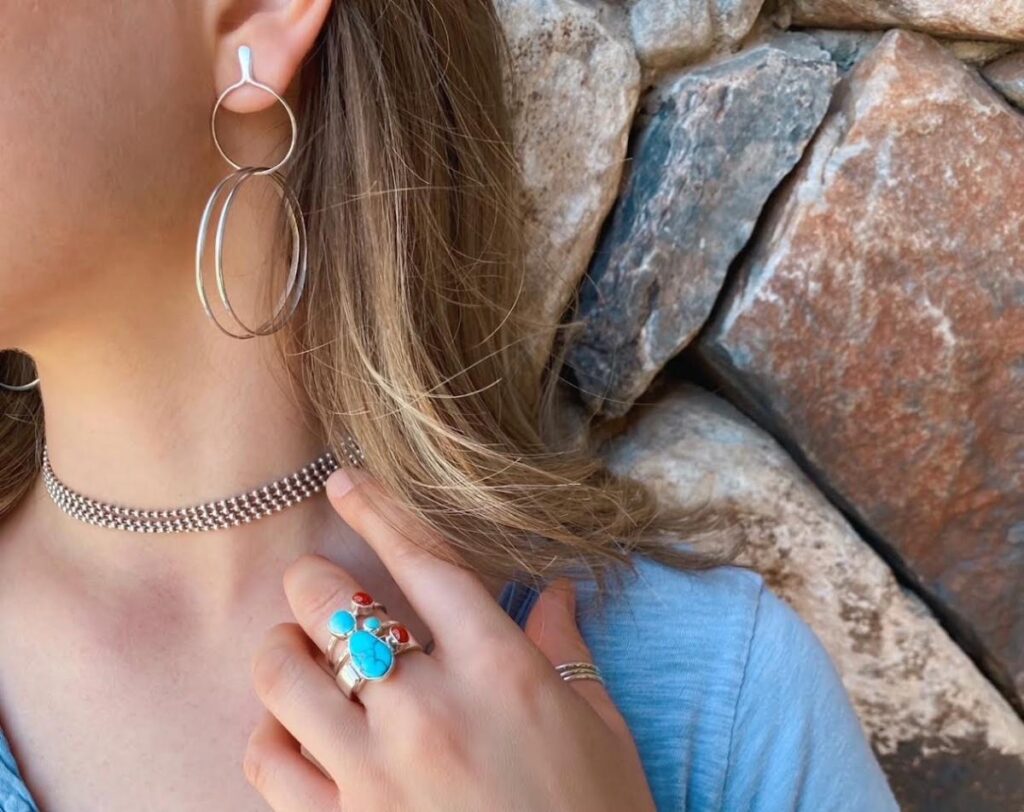
A must-have double hoop design in .925 sterling silver. Perfect to wear with something dressy or for a low-key weekend trip to the farmers’ market. Pair them with a sterling silver ring set with turquoise and coral.
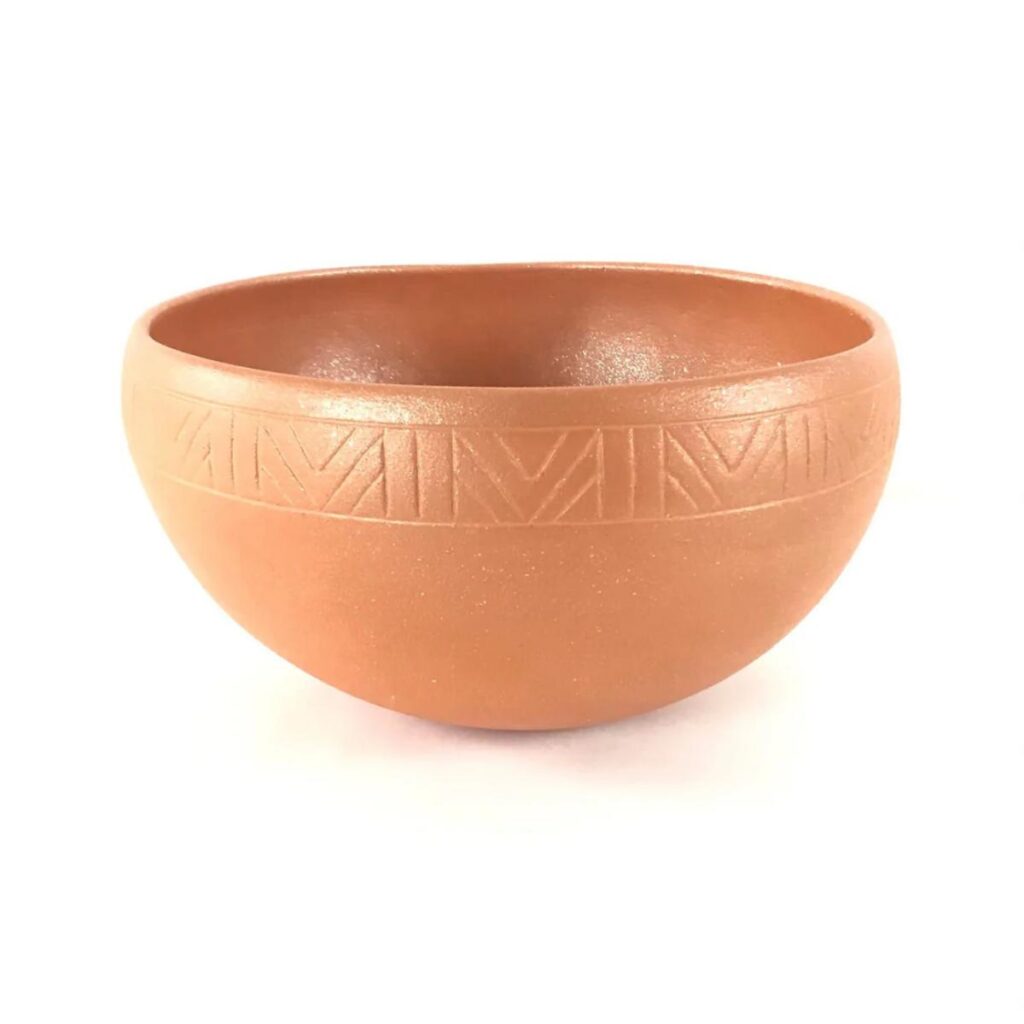
Ohkay Owingeh artist Clarence Cruz uses traditional methods and micaceous clay to create a dough bowl that is both functional and elegant. Linear etchings line the rim of the bowl. This piece can work happily in your kitchen or elsewhere a work of art.
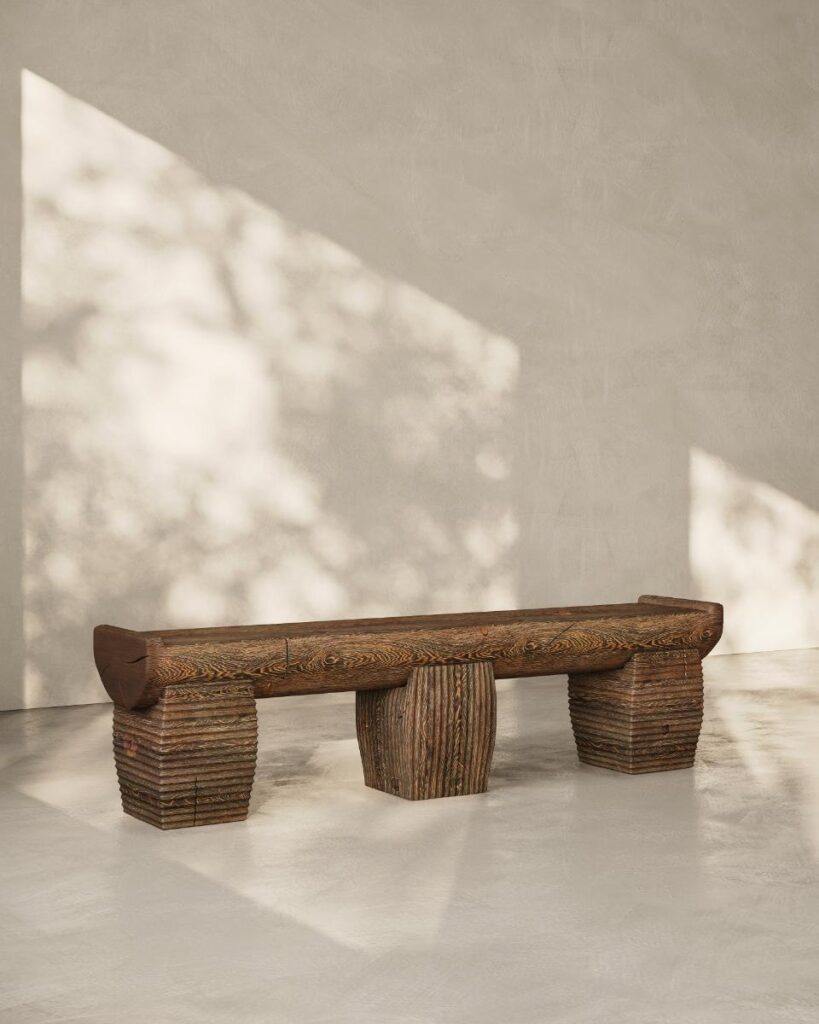
Skilled artisans use sustainably sourced wood from the Jemez Mountains and the Santa Fe National Forest. They craft clean lines and details into this Alamosa bench, and finish it to meet your design specifications. Each piece is unique and part of Pfeifer’s commitment to environmentally responsible furniture design.
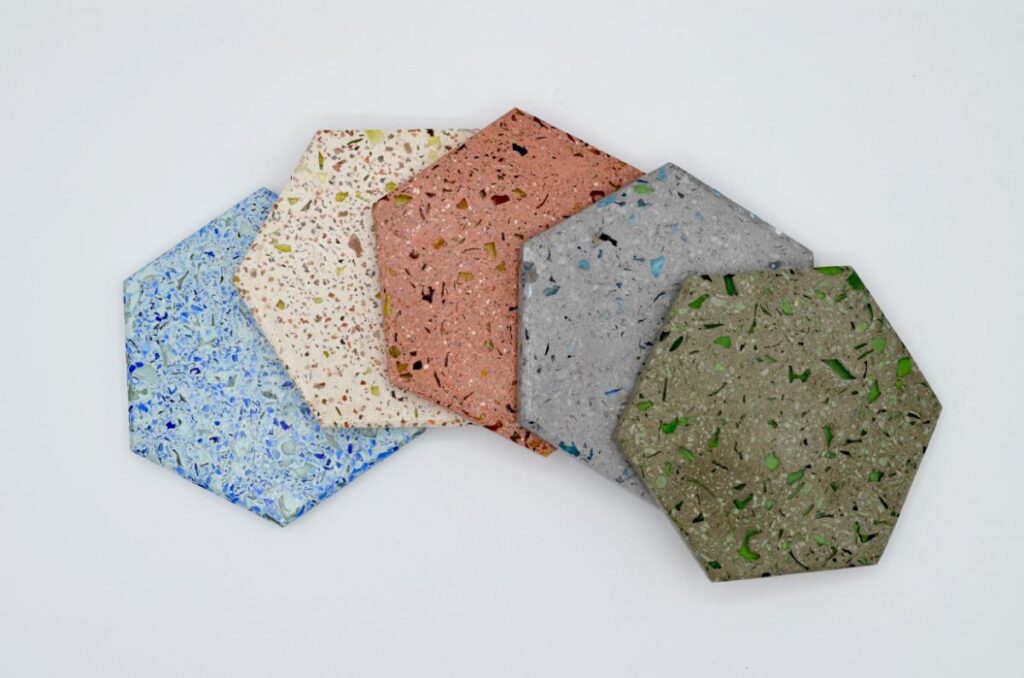
Donated glass bottles get the upcycle treatment that results in these charming – and practical – terrazzo-style coasters that come in a set of four. Their sustainable origins mean you can shop guilt-free at BAGR’s new Santa Fe shop on Delgado: you’re helping to keep glass out of the landfill.
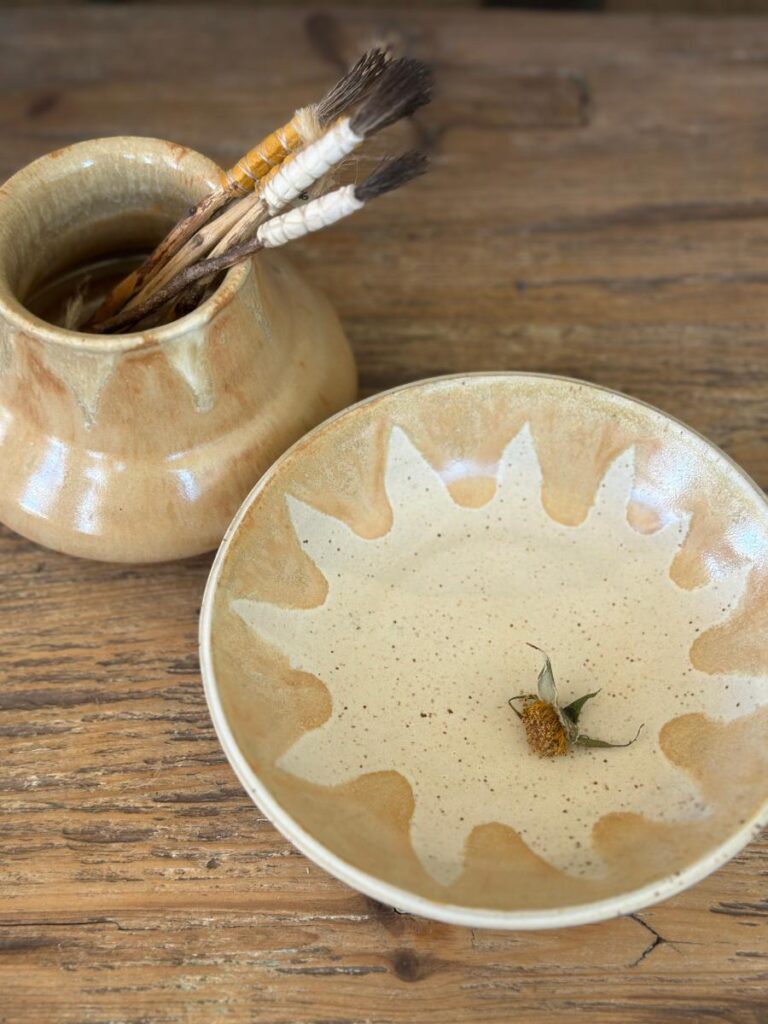
Julie Newberg uses clay from Albuquerque to create organic tableware that feels like a slice of the desert landscape. Limited edition paint brushes from Beam Paints in M’chigeeng First Nation deploy traditionally harvested deer bristles, hand-carved handles of wild verdant white cedar wood, and details of real buckskin.
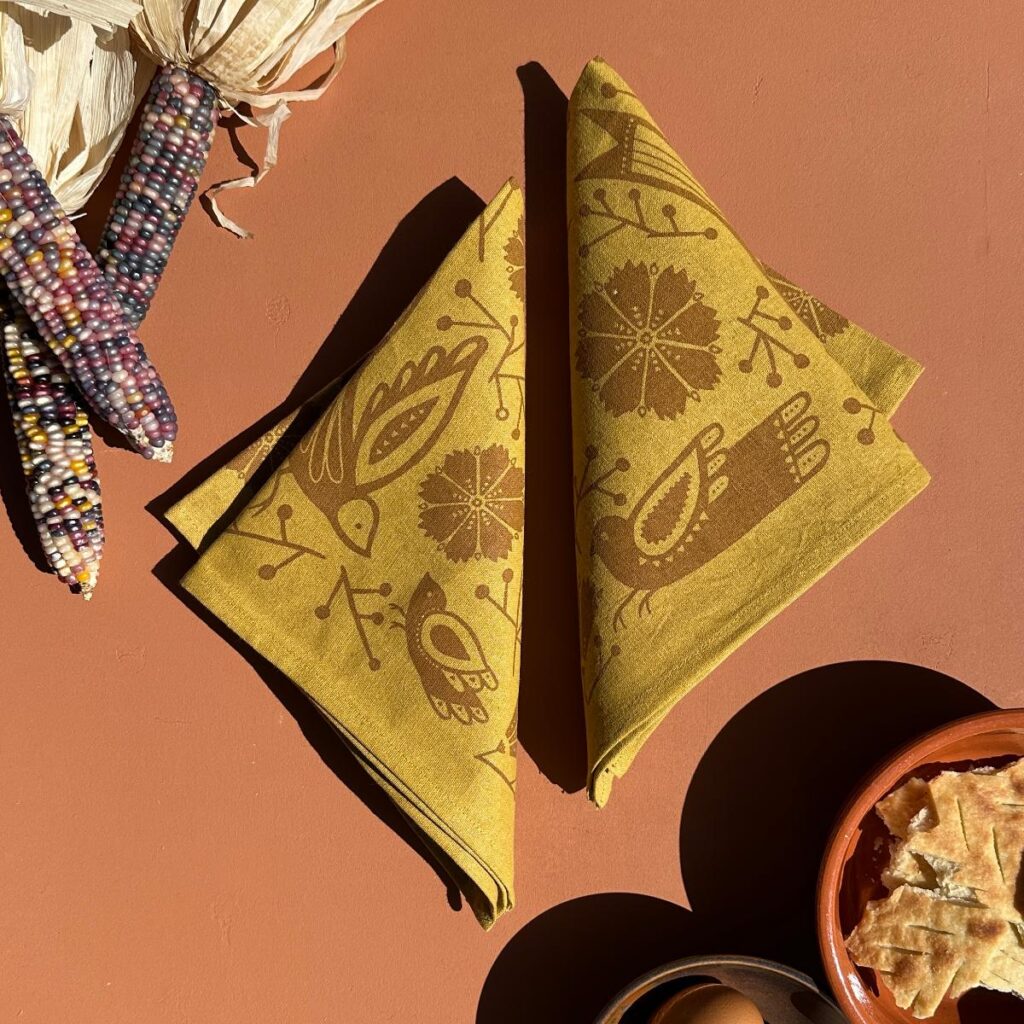
Los Påjaros Napkins are based on original designs by Jessie Baca in Santa Fe, New Mexico. Each napkin is hand-printed on 100% organic Indian cotton and hand-finished with a folded flat hem. Napkins are available in three colors: Cerrillos Turquoise, Dusty Rose, and Chamisa Yellow.
Santa Maria Provisions
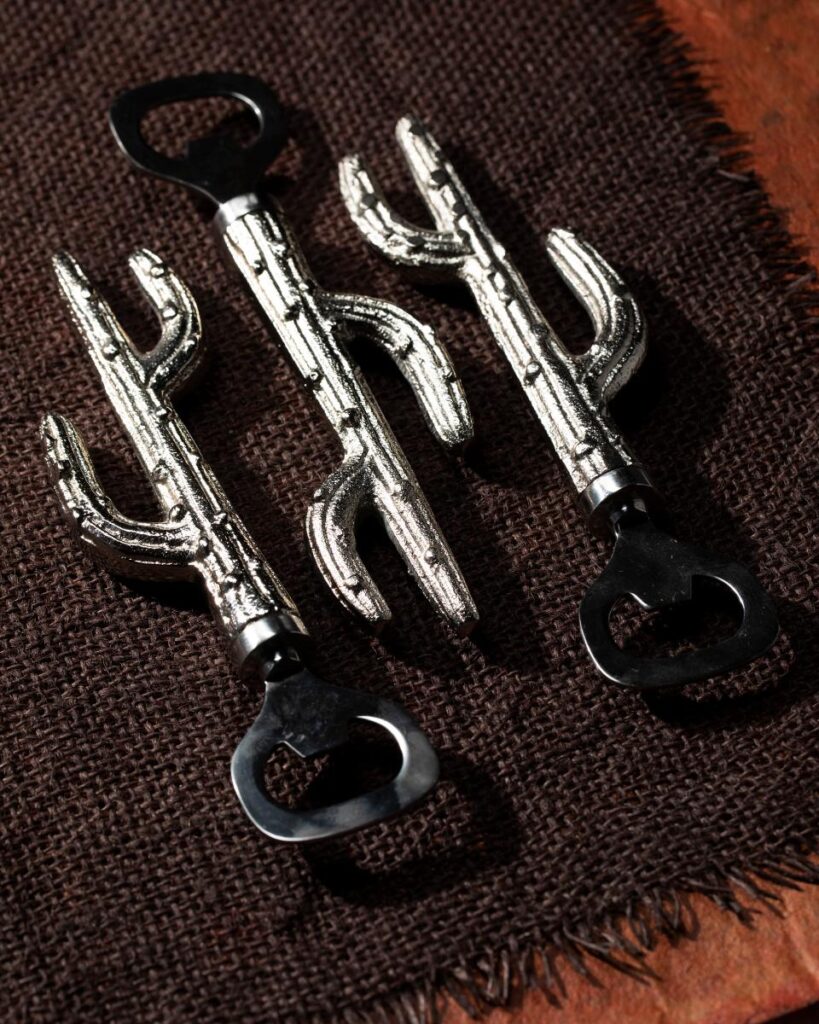
Add a bit of the desert to your next drinks bash with these cactus-shaped bottle openers. They’re made of durable, sturdy metal.
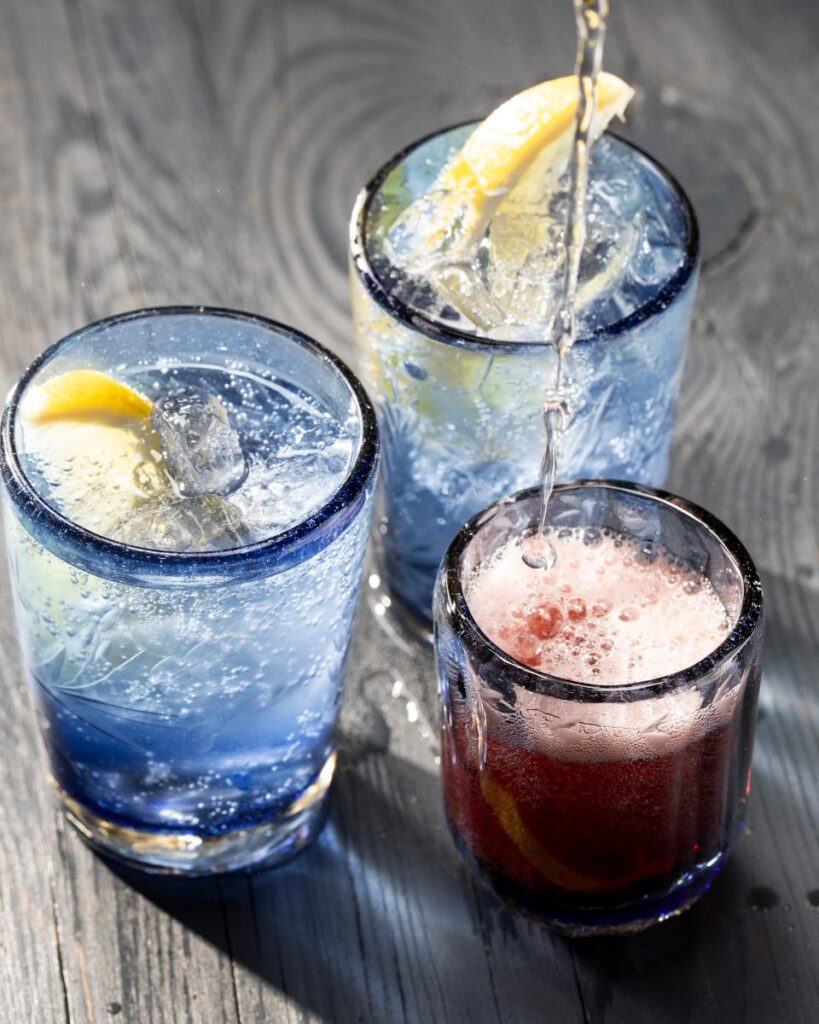
Color your table in a sea of azure with mouth-blown glassware from Detours. Choose from drinks glasses that are the perfect size for everything from water to wine to a cocktail or daintier ones with charming fluted detailing.
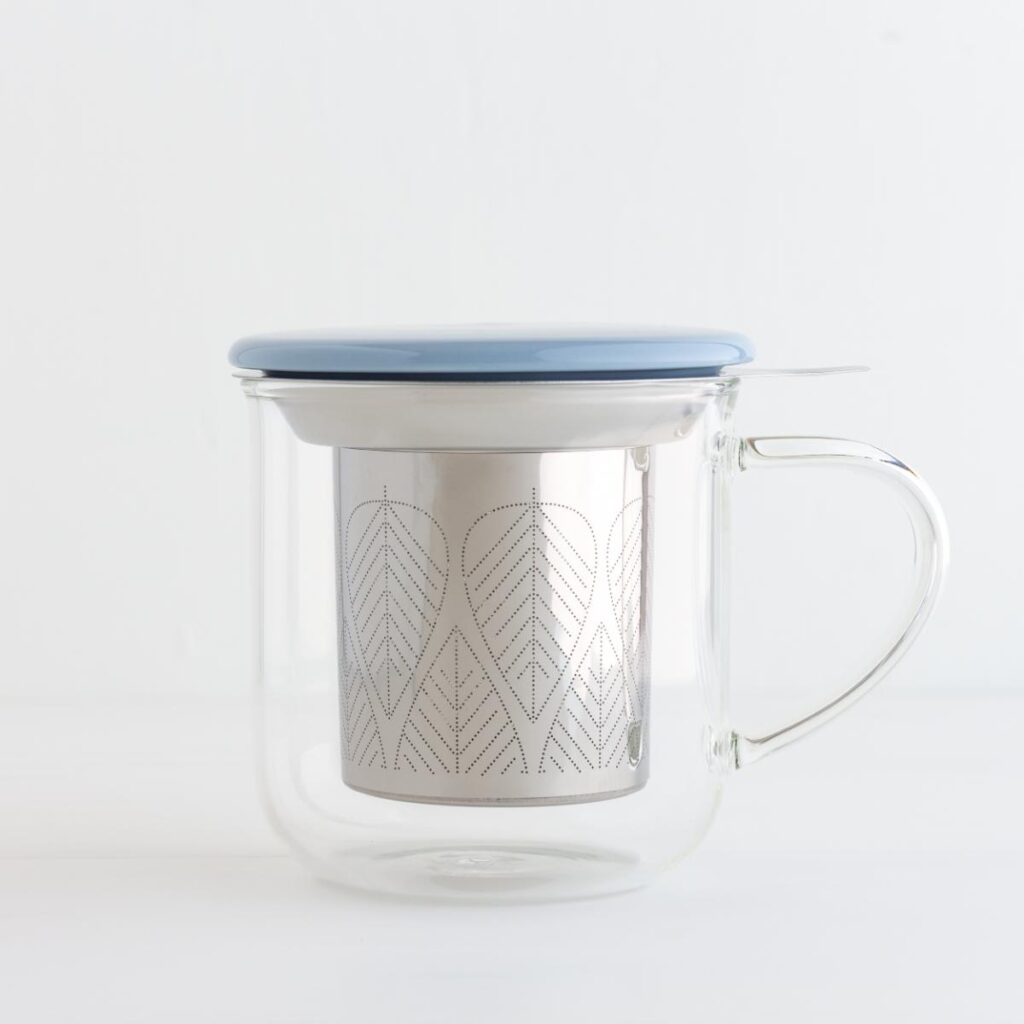
A glass mug replete with a fine mesh infuser, and a ceramic lid so you have everything you need to brew the perfect cup of tea. The lid even does double duty as a drip tray for the infuser. The cup holds 14 ounces of your favorite loose leaf tea and comes with lids in a choice of colors.
In ‘Mountain River’, a work by artist John Axton, a yellow line meanders, leading your eye through a field of blue to a yellow-green horizon. There is a meditative quality to the work of Axton – an artist who has been with Ventana Fine Art Gallery since it opened over 40 years ago.
Slip into the season with this blue-on-blue cable knit sweater vest from Robert Young of The Cloth, the luxury fashion house based in the Caribbean. The oversized indigo vest is paired with block printed cotton blouse – also from The Cloth – for a casual yet ultra-sophisticated look.
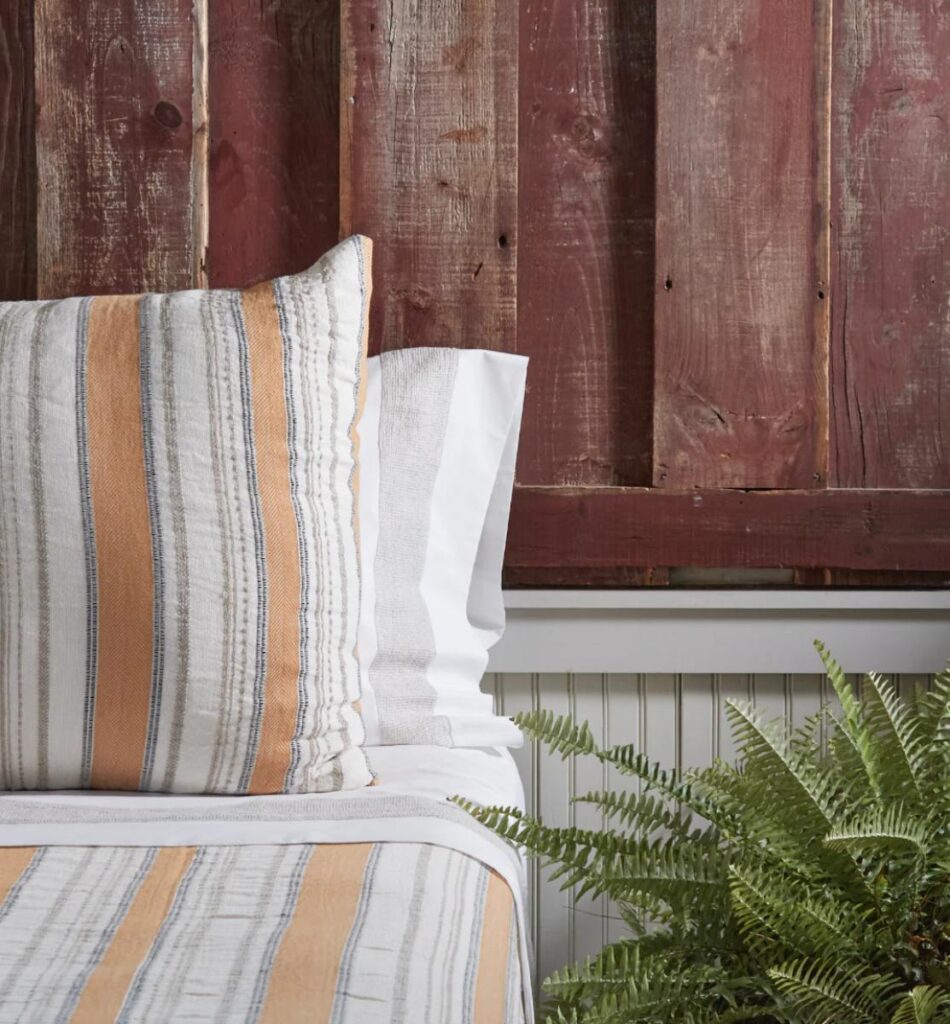
For over 50 years, TL at Home has been a women-owned and operated firm creating luxurious bed linen like this stone-washed Toni Spice coverlet. Made in Portugal from a blend of cotton and linen, it’s machine washable and will retain its size and color for many years of fuss-free pleasure.
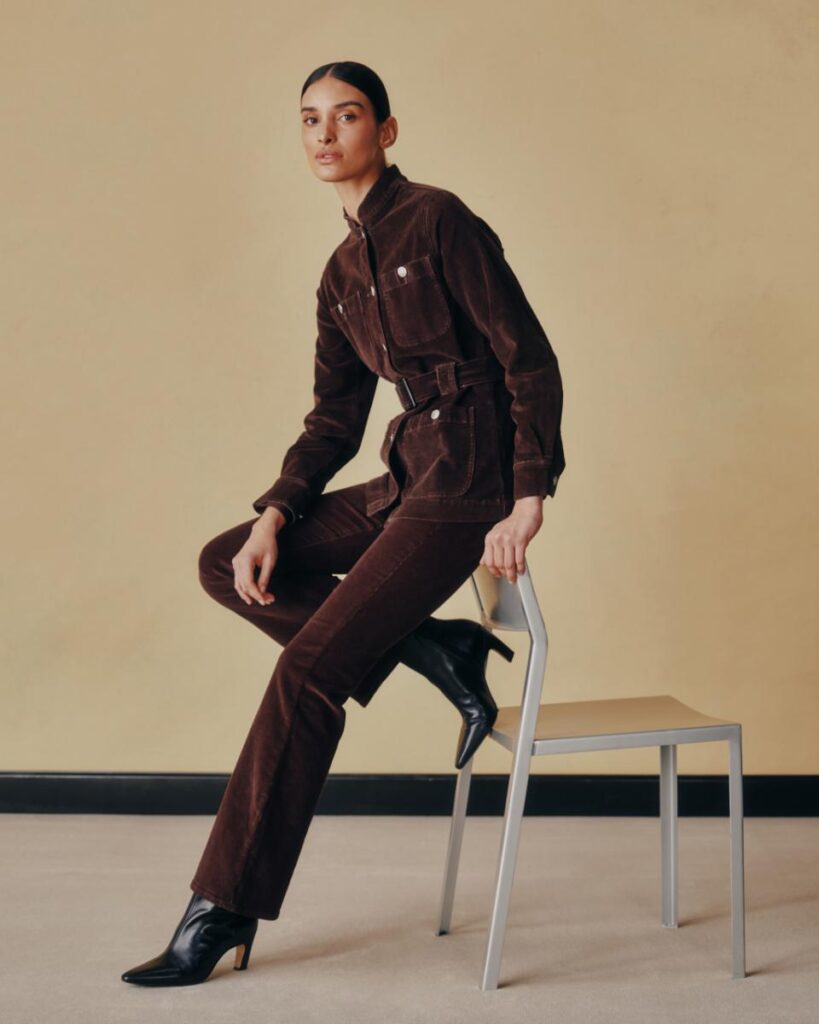
Add a touch of style and relaxed comfort to your autumnal wardrobe with this corduroy utility jacket paired with slim boot cut pants. Both are from DL 1961, a design group that puts sustainability at the forefront whether it’s using responsibly sourced fabrics or ensuring the most water efficient production processes.
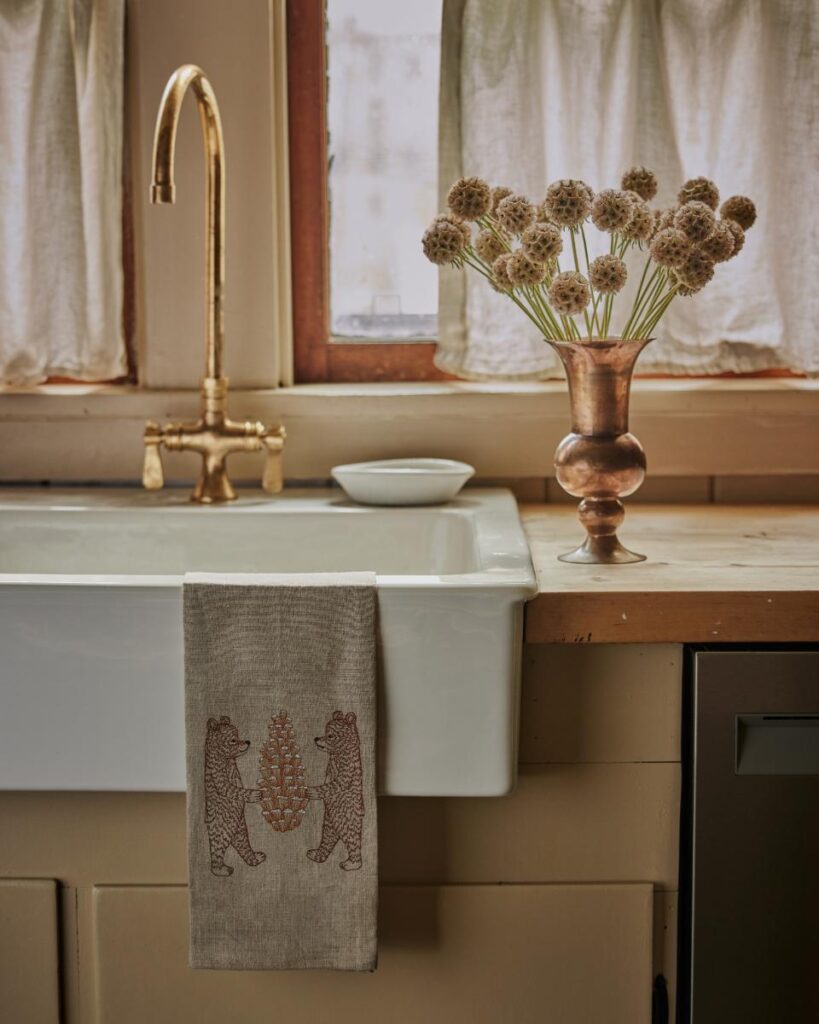
Founded in 2007 by designer Stephanie Housley, Coral & Tusk embroidered textiles bring a bit of whimsy to your home. Each design starts life – whether it’s fanciful squirrels, feathers, or charming bears holding a pine cone – as an original pencil drawing by Housley that is then translated to cloth.
Trace the line of bright light that ripples through the amber layers of this breathtaking cat’s eye tourmaline ring. It is a majestic 13.4 cts with a 22 kt gold bezel and a lightly peened shank. Truly a thing of beauty to treasure.
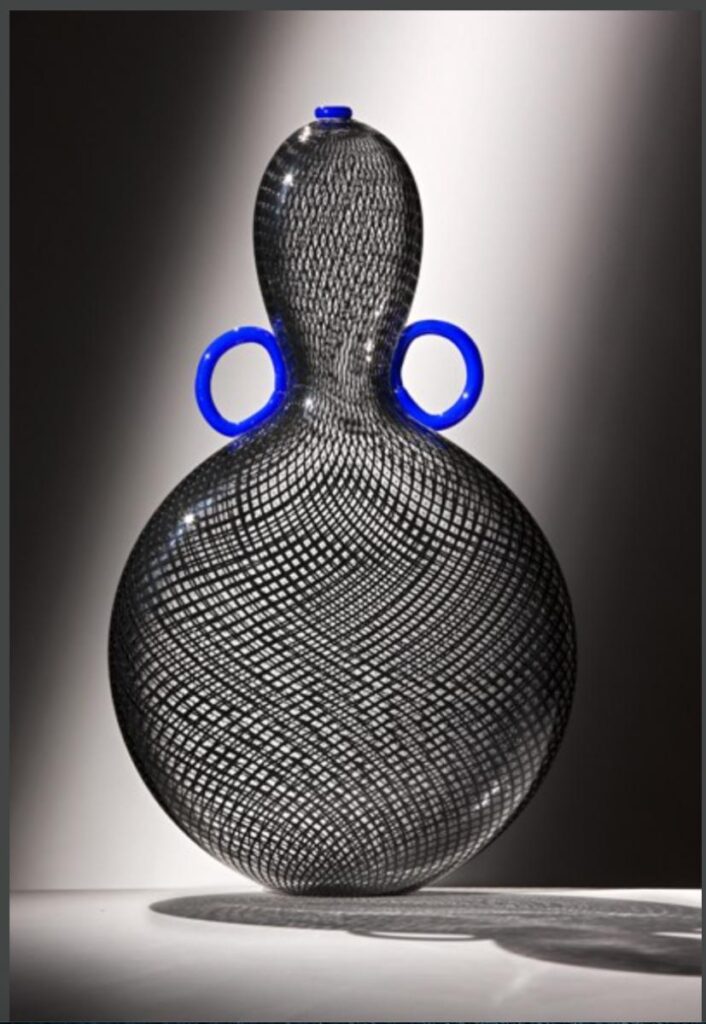
Reticello – meaning small net in Italian – is a highly complex technique that was refined by Venetian glass workers as far back as the 16th century. Dante Marioni is a master of this challenging art form. His piece Black Reticello Gourd has sensuous curves and arresting splashes of blue at both the lip and handles, making this a one-of-a-kind work of art.
As the days grow shorter and the nights longer, a cozy fire is in order. The Firebird stocks Pilgrim Hearth Tools, a company that has been in business for over 75 years. The sets are extremely sturdy – ready for heavy-duty use – while adding an elegant touch to your fireplace. The Firebird stocks a wide range of tool sets from Pilgrim and also does custom orders.
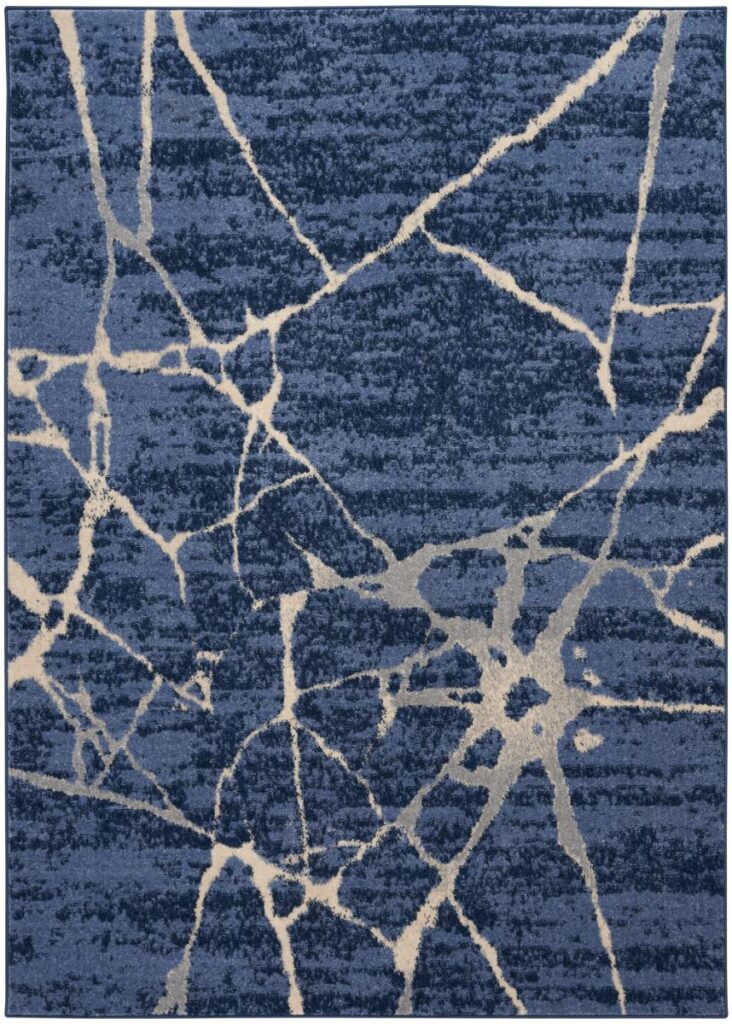
The River Flow rug is inspired by nature with a cracked-stone pattern so you can transform any room into a tranquil oasis. While stylish, it’s durable and perfect for high-traffic areas throughout your home.
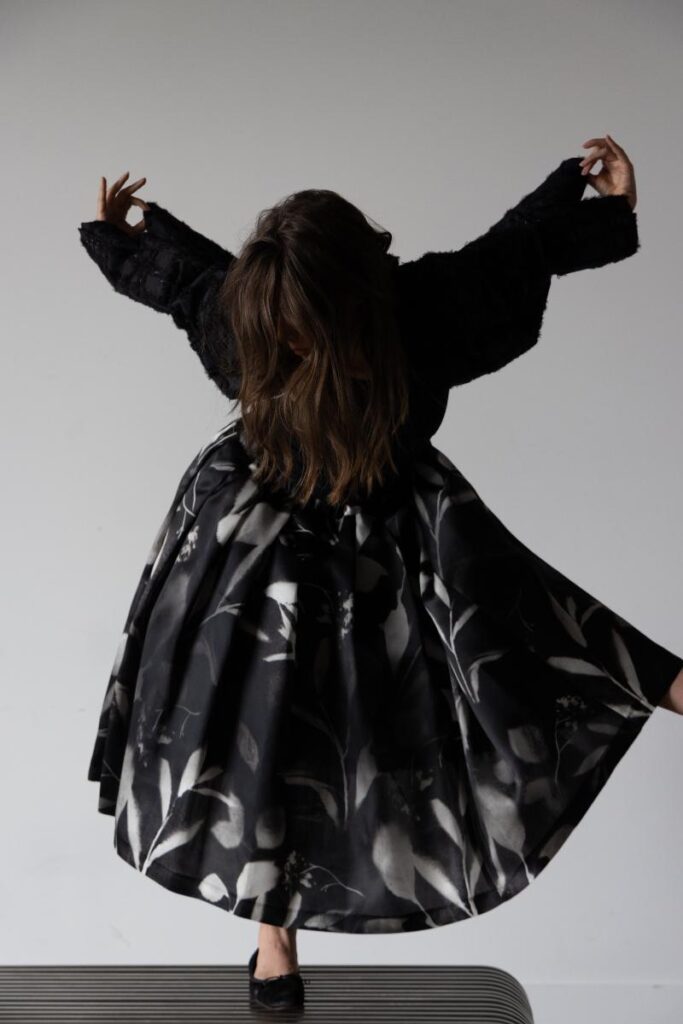
Your wardrobe is set with these two standout pieces from Comme Des Garçons. The skirt is black and silver silk with abstract print and a tulle petticoat. It’s paired perfectly with a textural rear-zip cotton jacket.